
With the Spring School Holidays 2022 upon us, and a few rain days forecast over the next fortnight, we thought a few ideas on how to make some toys to have fun with may appeal. As firm devotees of making 'stuff' with leftover cardboard boxes, ice-cream sticks and even matchboxes when they were around, we can assure you there's nothing better than getting some 'bits of wood' together to build something brilliant with. There are also a LOT more ideas on how to do this than there were when we were youngsters, as well as heaps of resources to find plans and older ideas when you do an online search. We like the Adventure in a Box website, which is loaded with great handmade toy ideas as well as other craft activities for youngsters.
The National Museum of Australia features some wonderful early Australian toys, some of which were handmade. For instance, this this toy tractor made from old banana boxes, scrap metal and a piece of string shows the childhood ingenuity of a young boy living in Australia during the Second World War.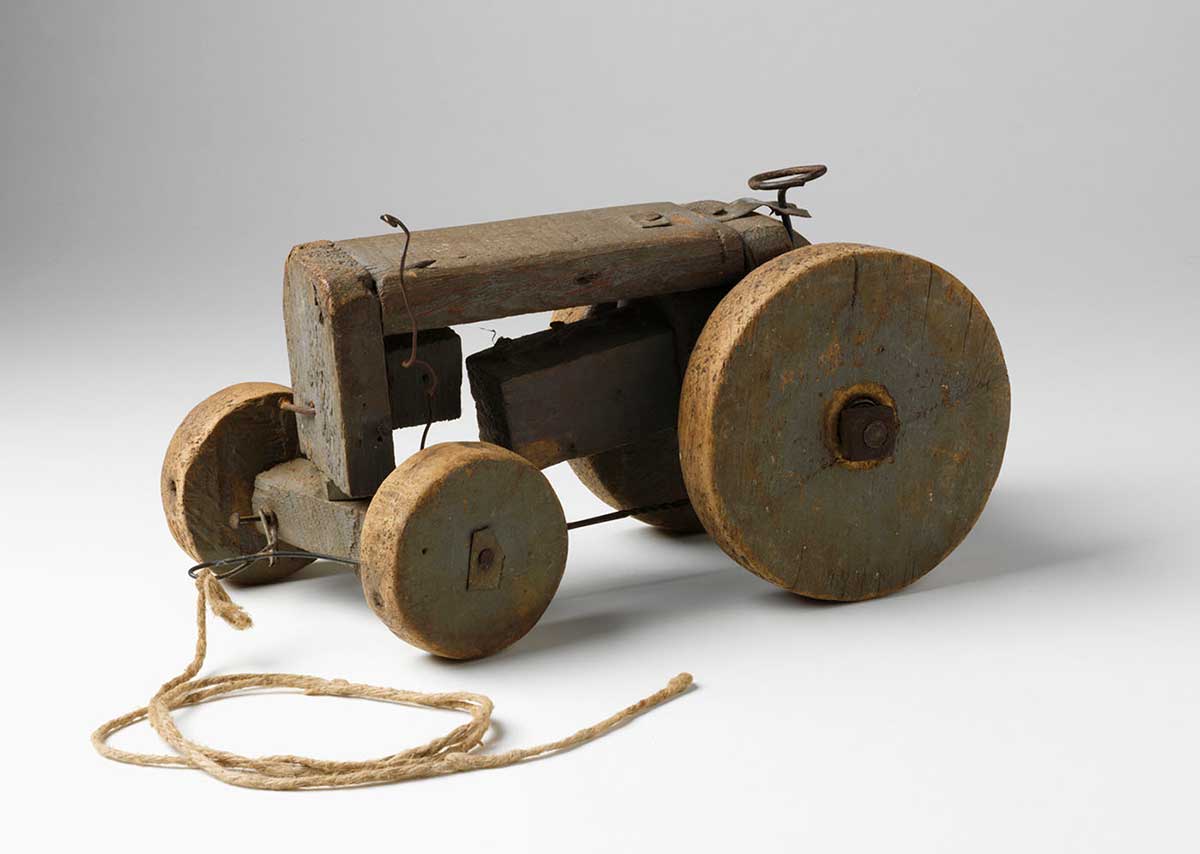
The NMA states;
'Ten-year-old Brian Burns made the tractor when he was living on a farm in northern New South Wales in 1943. The tractor is an example of a ‘make-do’ response to supply shortages and wartime rationing.
Brian Burns made this tractor in miniature after cajoling his father, Mick, for a Ford Ferguson 9N tractor. The Fergie was quicker, quieter and easier to operate than other tractors on the market. Mick suggested that if Brian wanted the tractor so badly, he should make one himself.
Brian used timber salvaged from banana boxes and made a steering mechanism from bits of steel, wire and string he found in the back shed. He painted the tractor grey, just like the Ford Ferguson he was seeking to replicate.
Commercial toy making was deemed a non-essential industry during war. Factories which had produced toys were required to help with the war effort. Toys grew scarce and Brian’s tractor is an excellent example of the notion of ‘making do’. Brian valued the tractor highly and it moved with him from house to house for most of his adult life. The National Museum acquired the tractor from Brian’s cousin, John McNally. Little of its original grey paint remains, but the spirit of childhood ingenuity continues.'
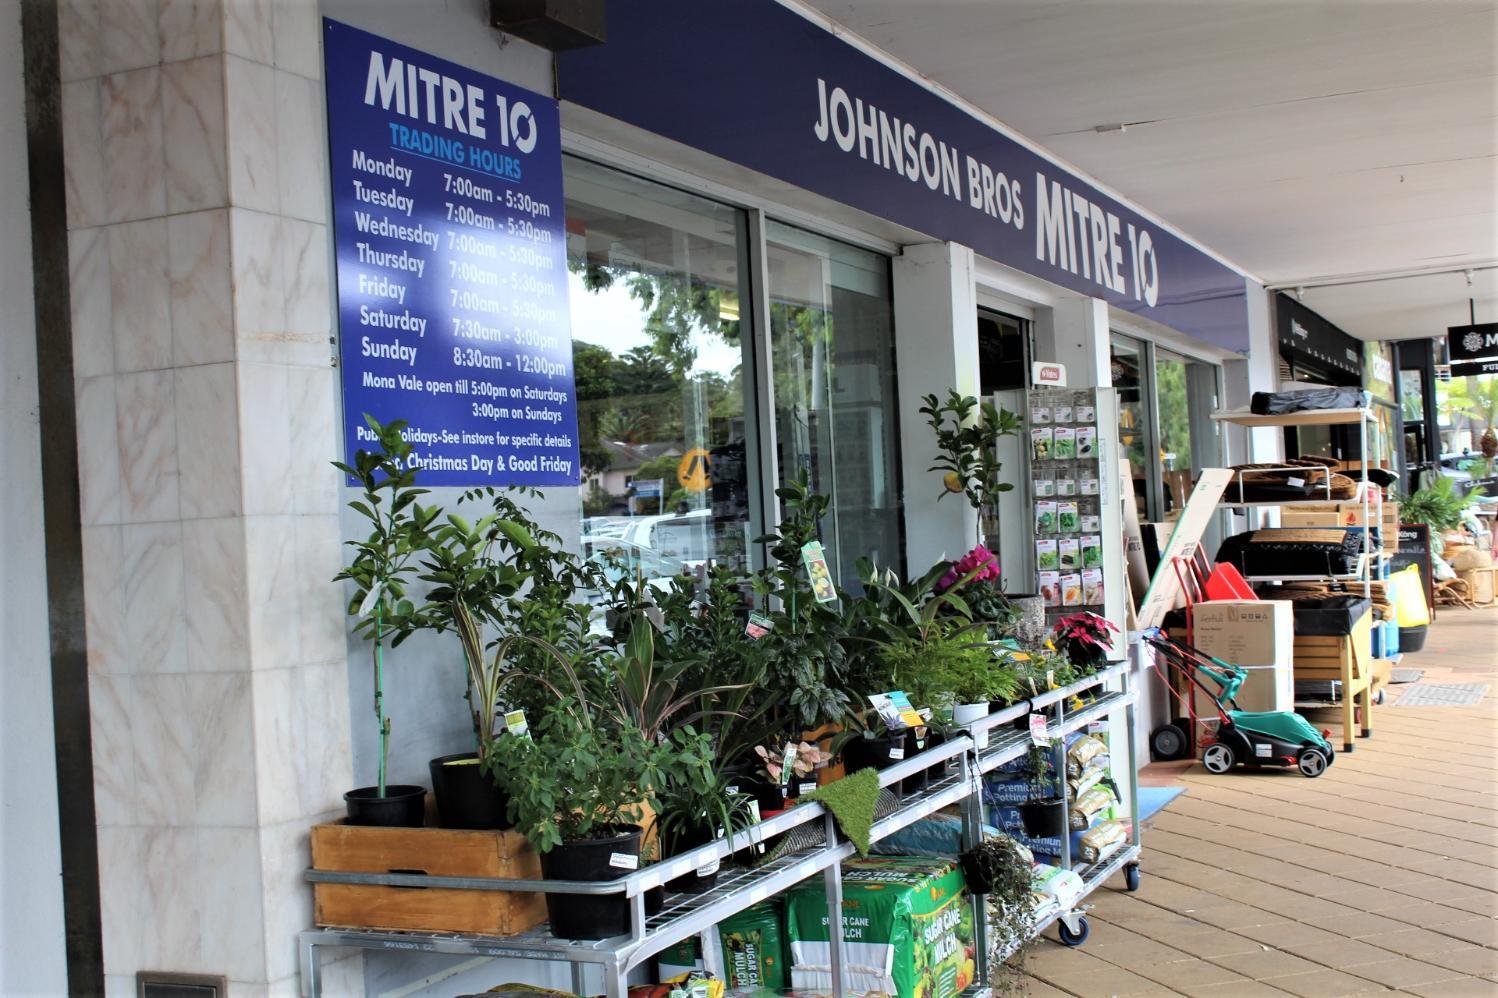
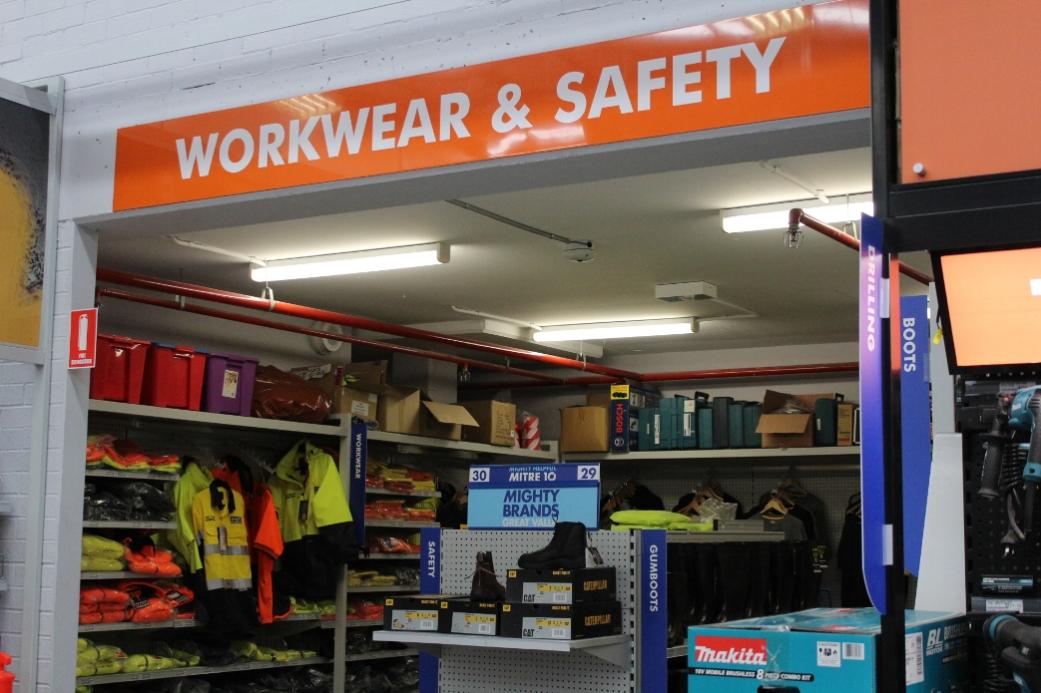
Here are a few we've collected over the years for you to try out on rainy school holi-days. Johnson Brothers Mitre 10 at Mona Vale stocks a great range of wood and all the other products you will need for these projects, as well as many other items that will keep those young bright minds occupied on something constructive during the Spring break.
Simple Wooden Toy Car
Tools and Materials
- 20.32 centimetres of 1X4 (19mm x 90mm) pine board – or timber of your choice – hardwoods will last longer and look nicer of you’re going to do a simple sand/stain or varnish finish
- 15.24 centimetres of 3/16 dowel rod
- Saw
- 1.2500 drill bit
- 0.875 flat wood bit
- 1.5000 hole saw with .47625 cm guide bit
- Drill
- Clamp
- Non- Toxic Paints (art)
- Varnish – optional
- Wear Protective gear when cutting out wood – goggles and mask
 Cut out the pattern and trace it onto one corner of the pine board. Be sure to also mark the holes for the axles and the window. Then, clamping the wood firmly in place, cut along the traced edge with the coping saw.
Drill the two holes for the axles using the drill bit, and then drill out the window using the flat wood bit.
Using the remainder of the 1X4 board, cut out the wheels using the 1.5 hole saw. Then cut the dowel rod in half, so that you have two 7.62 axle pieces.
Sand all the rough edges. Then, insert the dowel rods into the wheels and tamp lightly with a hammer until they slightly protrude from the other side. After that, you can put the axles on the car and tap on the remaining wheels from the other side. Varnish or help your youngster to paint on some numbers and colour prior to varnishing.
Car stencil courtesy of Instructables - click on and 'save as' on your PC.
Toy Wooden Cars – Free Plans, courtesy Woodworking Downunder
1930’s Roadster: www.woodworkingdownunder.com/wooden_toy_car_plans.html
1920’s Racer: www.woodworkingdownunder.com/toy_car_plans.html
Batmobile: www.woodworkingdownunder.com/batmobile-toy-car.html - All are PDF’s at 25 kb per plan
There is no guarantee that this will stop toys appearing all over the floor but if those who it is made for are encouraged to do a little craft painting and add some designs to wood that can then be varnished and sealed, they may want to put all those toys away once they have finished playing with them.
You can also make this Toy Box a little longer, turning it into a chest, and with a padded cushion added to the top, it become a bench for a youngsters or teenagers room.
Materials:
For a 800mm x 400mm x 400mm box:
- 4x Long rectangle pieces of your choice of material (we used 18mm MDF 800mm length x 400mm height) + lengths of sides, base and top.
- 2x Square Pieces (18mm MDF 364mm length x 400mm height)= 2 x ends
- 2 x Hinges – for back of Box
- 2x 95° Concealed Hinges with Stays (for Inside Box)
- 4x Heavy Duty Castors (for feet)
- 18x 4mm X 30mm Chipboard Screws
- 2 x Large Handles – for ends
- 1 x Large Handle for Lid
- Sandpaper: 220 and 320 grit for sanding between coats of polyurethane
- Clear polyurethane: Timber finish
- Wood Glue
- Paints for decorating if doing so – for those creatives!
- Tape Measure
- Pencil
- Screw driver (to match screws head)
- Drill
- 2.5mm drill piece
- 5mm drill piece
- 35mm hinge hole cutter drill piece
- Level measurer
- Safety Glasses (when using drill)
- Hearing Protection (when using drill)
1. Cut your wood to the size that you require using a circular saw. Lay out all the pieces in front of you to start.
2. Attach the three long rectangular pieces that will make up the bottom and the 2 sides by placing one of the long rectangular pieces flat on the as this will be the base of the box. Then place another piece on top of the base facing the same way, and put it right up to the edge fitting flush to the end.
3.You now make some pilot holes for the screws: measure in from one end on the side piece where you would like your pilot holes to be and mark with a pencil. For this size box, and for it to last, use 5 screws, if your length is 800mm, place one at 200mm, 400mm, and 600mm to fix the middle, and then 2 further fixing screws at 25mm in from each end – as both the sides and bottom are the same length you can measure the pilot holes the same for all 3 pieces.
4. Next measure the same distances on the bottom piece and mark pilot holes. Drill your pilot holes on the bottom piece all the way through and only drill a small entry pilot hole on the side piece.
5. Add your wood glue along the inside of one side piece. Get an extra pair of hands to help when you carefully push the side up against the bottom. Wipe away any excess glue.
6. Whilst holding the glued pieces in place, use the pilot holes pre-drilled for the screws.
7. Now repeat this process on the other side of your toy box you have the 2 largest sides and the bottom piece all in place and secure.
8. Time to add the Ends (remember these fit inside and on top of the base): measure where you want the pilot holes for the end pieces and also the bottom piece – measure 100mm, 200mm and 300mm on the sides of the side pieces and 2 fixing holes of 25mm from both ends. Do the same for the end side pieces that they are going to attach to. For these pilot holes, you want to go all the way through on the side pieces, but only start a small hole for the end pieces.
9. Before pushing it into place, add a thin layer of wood glue to the side that will attach to the bottom and gently push it into place – wipe any excess glue away, and again ask for some assistance to hold it in place whilst you use the screws to secure it all into place – remember to attach the bottom and each side!
10. Add your Lid: The hinges that we recommend for this type of lid are 95° Concealed Hinges, and more specifically the ‘Screw On, Full Overlay’ variety. This means they will open the lid 95° to get into the toy box, whilst also fitting the lid flush when closed as the hinge is hidden inside the unit. To back these up, and to make your box more decorative, adding two exterior hinges at the back of the box is also recommended. If little fingers are likely to get caught in these, placing them inside the box may be preferred.
11. To fit the exterior hinges, measure in 100mm and once again, mark your drill holes prior to drilling. To fit the interior hinges you need to bore a hole using a hinge hole cutter drill piece, a 35mm version is the standard for this. These enables the top of the hinge fit into the lid and then close flush when it’s flat. Once again position the hinges 100mm from each end to allow room for the lid stays. Measure in from each end and mark the position. From here measure 21.5mm from the edge to mark where the centre of the hole is going to be. Once you have the centre, take the drill piece and drill a shallow hole, deep enough to fit the circular head of the hinge into so it is flush with the lid.
Now make a couple of pilot holes for the hinge unit to attach to the toy box side, place the hinge top in the hole just drilled, line up the side to the top and measure 37mm from the edge, and mark one of the holes from the mounting plate. To achieve the correct closure speed you can turn the screw head on the side of the stay so it is safe.
12. Adding your Lid and End Handles: this is a fairly easy step but once again, measure to ensure you get a centre for the ends and the centre for the larger handle you are going to install on the lid. This will keep your Toy Treasure Box looking nice and make pulling it or moving it easier. Once you have marked the centres, set the handle where you want it to be and using your drill, drill the holes through.
13. Attach castors to the base of the toy box using your drill and screws.
14. If the special person this Toy Box/Storage Chest has been designed for wishes to add some colourful decoration, this is the best time to do it. if you are going to stain or seal the wood, give it a good sanding to bring out the grain and smooth the surface so the stain or varnish takes.
 Materials:
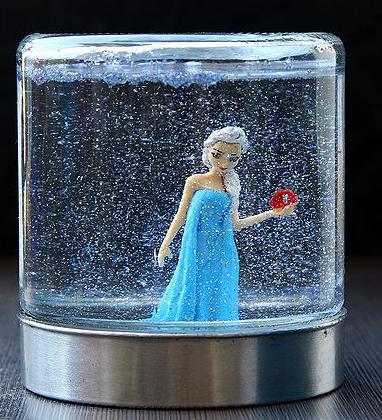
- Nice jars with lids; round shapes or straight sides
- Waterproof glue
- Strong epoxy
- Glycerine
- Glitter – silver or a mix of colours - around 2 x tablespoons per 600ml jar
- Minature figures – make sure these are ‘rust-proof’
- Optional – food colouring for water
You could make bigger versions of these – there are many larger jars used in atrium that can now be bought with lids to match, although you don’t want it so big that you cannot shake it up and make a snowstorm!
1. Decide on a theme – do you want a landscape, a zoo, a farm or an underwater version?
2. Once you have assembled all you will need to make your own snowglobe decide how you will arrange you figure or figures on the lid. Glue in place in inside of lid and allow to dry (using a strong epoxy glue or a superglue is best for this).
3. Almost fill the jar with glycerine so your figures, or ‘scene’ are covered. Add your glitter and some food colouring if you like.
4. Screw in the lid and apply a rim of waterproof glue or a sealant around the join to seal. Make sure you leave this to dry well before giving it a shake to see your very own just created snow globe!
If you have coloured the water, place your snow globe on a windowsill to catch sunlight and add a nice glow to any room it’s in.
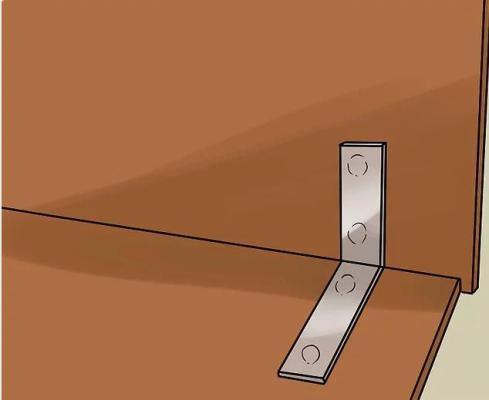
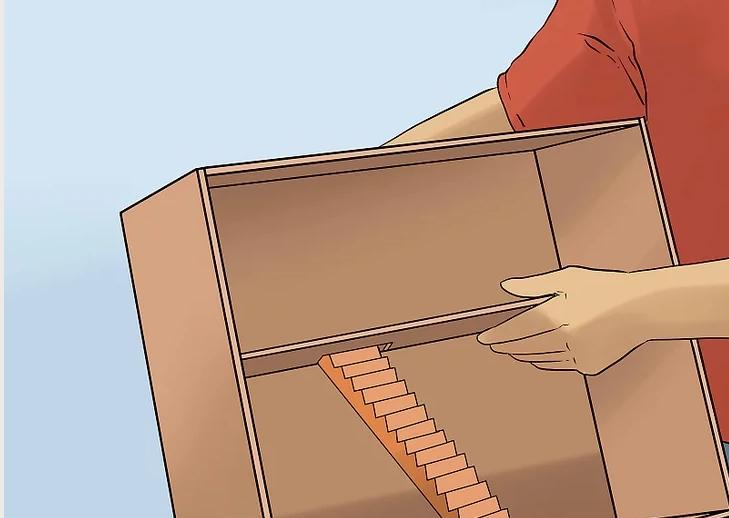
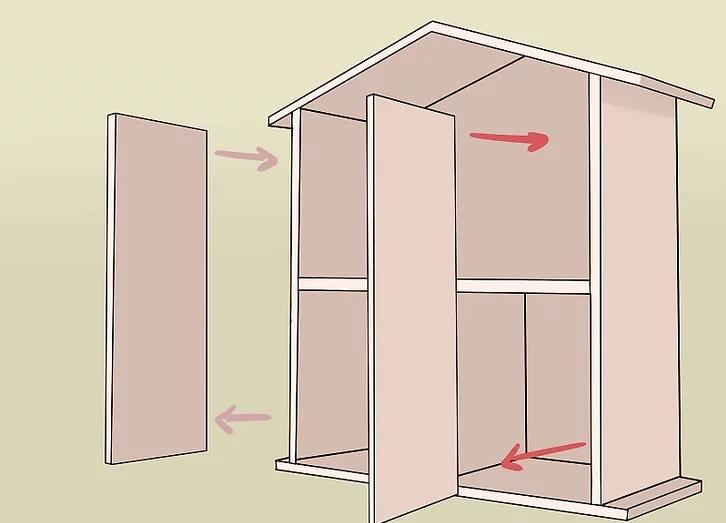
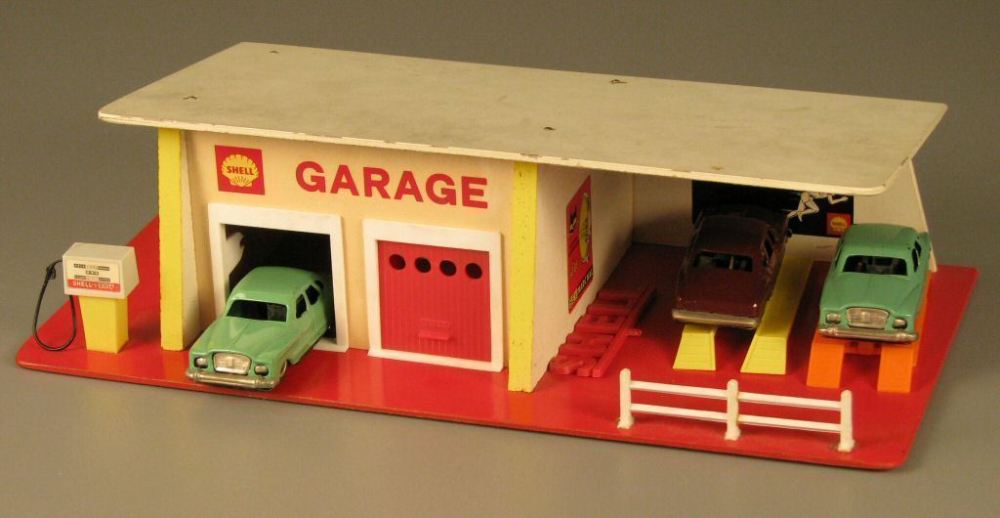
DIY Dolls House Or Garage Or Boatshed
- jigsaw
- drill
- rasp
- paint brushes
- screwdriver
- caulking compound gun / glue gun
- chisel
- mallet
- sharp knife (Stanley knife) and extra blades
- drill and drill bits
- set square
- wood clamps
- Wood
- Sandpaper
- Wood glue
- Hinges - L Brackets
- Dowel
- Paint
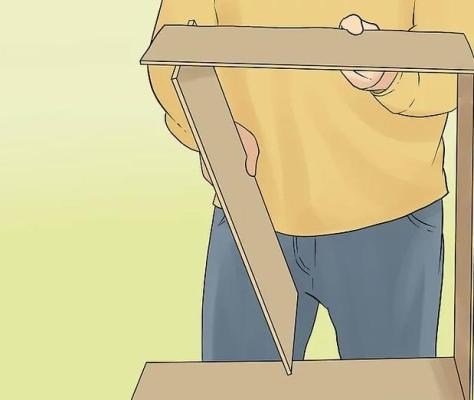
- 4 pieces of 19mm x 190mm lumber (at least 60cm long each)
- 4 pieces of 30.48cm x 30.48 cm medium weight chipboard or similar material
- A drill with a 2.54 bit
- A hand, table, or jigsaw to make basic cuts in the wood
- 2.54 dowels (either a single stick or 8 single pieces)
- Sandpaper
- Wood glue
- Paint and other materials to create the finished look
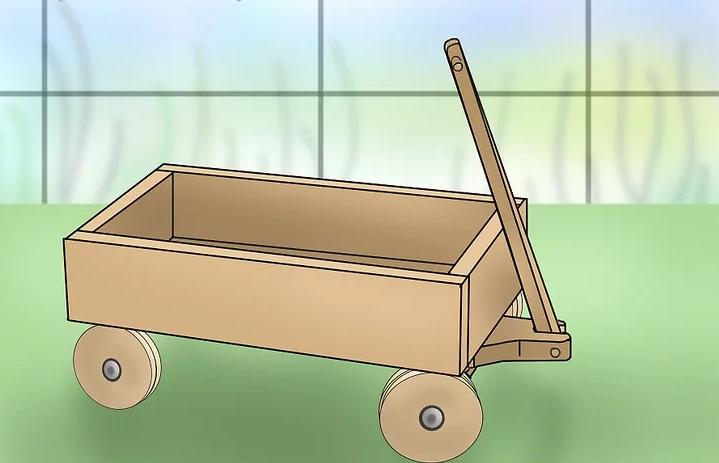
Childs Waggon
- 2 x 1.905cm x 11.43x 60.96 Side A
- 2x 1.905cm x 11.43x 36.83 End B
- 1 x 1.27 x 40.64 x 60.96 Plywood bottom
- 2 x 1.905cmx 8.89x 30.48 Side rail
- 1x 1.905cm x 11.43x 36.83 Back rail
- 6x 1.27 x 4.1275 x 23.495 Batten
- 8x 1.27x 6.985 x 11.43 Wheel truck
- 4x 1.905cm x 1.905 x 6.985 Truck separator block
- 2 x 1.905cm x 4.445x 9.525 Wheel mounting block
- 1 x 1.905cm x 15.24 x 30.48 Steering yoke
- 1 x 1.905cm diameter x 60.96 Dowel (handle shaft)
- 1 x 3.175diameter x 12.7 Dowel (handle grip)
- 4 wheels – rubber ones will last longest
- Sandpaper
- 4 x 0.9525-diameter x 6.35 hex-head-bolt axle
- (Note: Cut off excess; finished bolt is 6.35cm.)
- 8 x 1.905 cm diameter washers
- 4 x 0.9525 cap nuts
- 100-piece pkg 1.905 No. 6 Phillips-head wood screws
- 100-piece pkg 2.54 No. 6 Phillips-head wood screws
- 1 pack bright finish nails
- 2 x hex nuts
- 1 x 2.54 cm diameter screw eye
- 1 x 1.5875 cm diameter screw eye
- 16 x Finish washers
- 600mls polyurethane, 600ml acrylic latex primer, 600mls semigloss dark red acrylic latex, wood filler, wood glue
- Drill
- Circular saw
- Basic hand tools
- Dust mask
Tools And Products From Johnson Brothers Mitre 10 To Help You Get These Toys Made
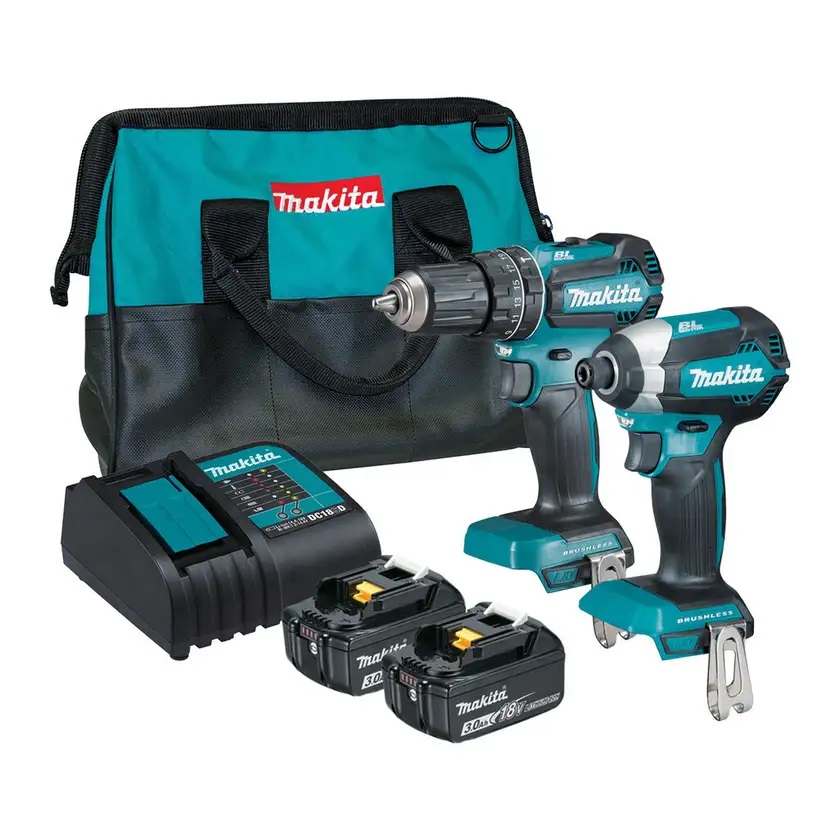
Makita 18V Brushless Combo Kit - 2 Piece: $379.00
Includes: DHP485Z - 18V Brushless Hammer Driver Drill. DTD153Z - 18V Brushless Impact Driver. 2 x BL1830B - 18V 3.0Ah Batteries with Fuel Gauge. DC18SD - Single Port Optimum Charger. Tool Bag.
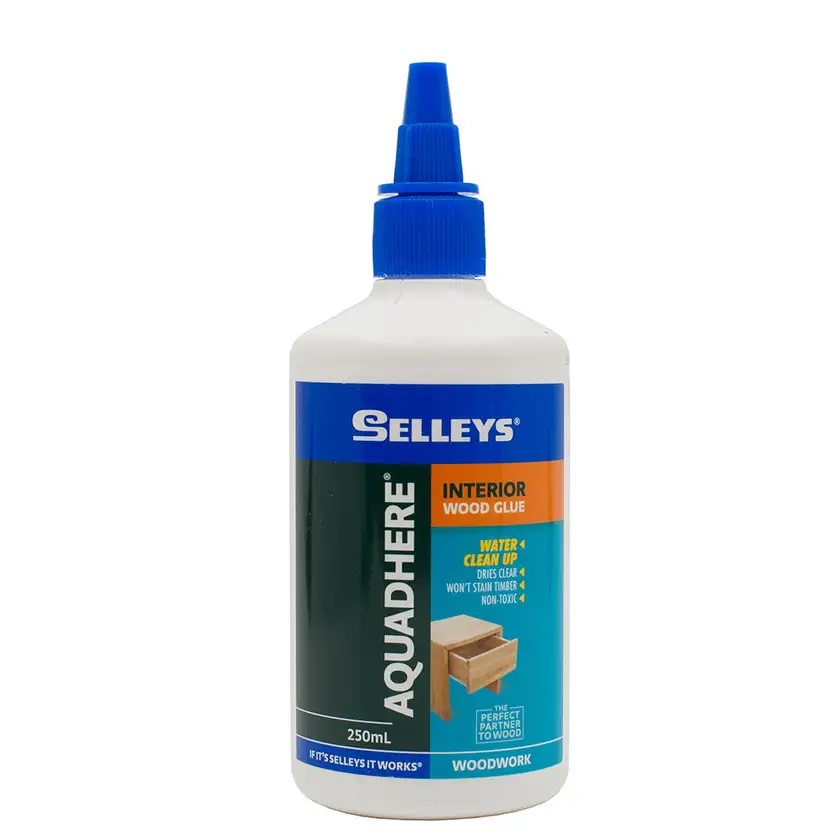
Selleys Aquadhere PVA Wood Glue Interior Adhesive 250ml: $8.45
High-quality interior PVA wood glue suitable for all types of wood. Suitable for end grain glueing. White in colour, but dries clear so won’t stain the timber. To fill small gaps, mix with sawdust. Suitable for use on interior wood, cardboard, cloth, paper, mosaics, leather, craft materials.
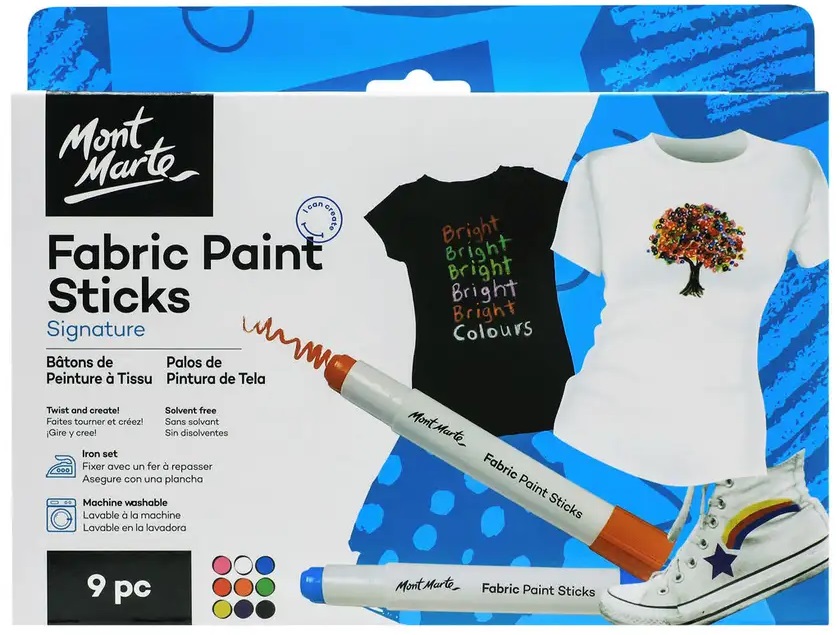
Mont Marte Fabric Paint Sticks - 9 Piece: $16.95
Nine vibrant coloured sticks. Suitable for t-shirts, cushions, bags, fabric shoes and more. The Colour is cured with a hot iron. Machine washable once ironed.
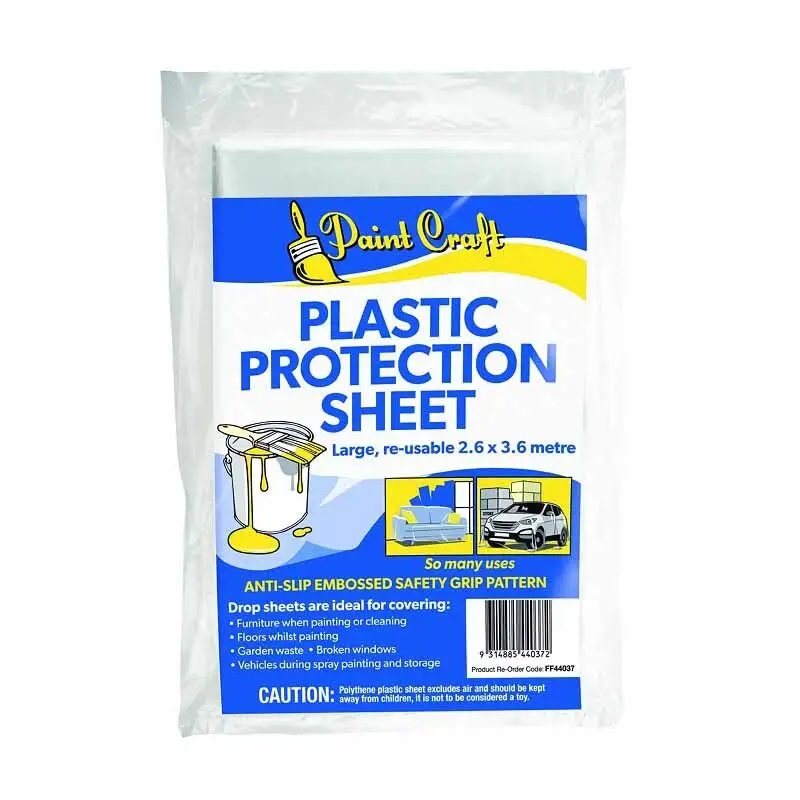
Paint Craft Plastic Protection Sheet Large 2.6 x 3.6m: $2.65
Large 2.6m x 3.6m plastic sheet. Anti-slip embossed safety grip pattern. Ideal for covering the floor while painting.
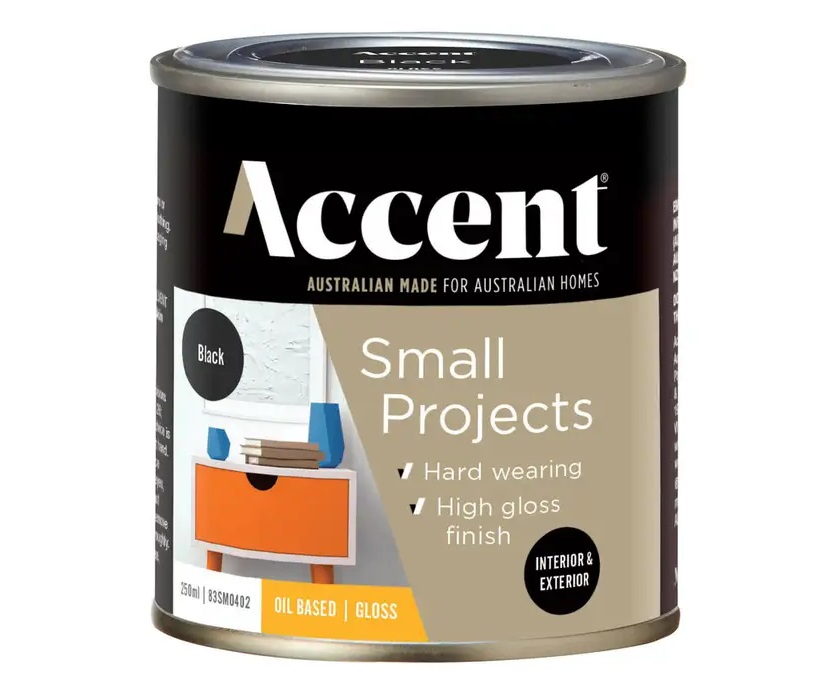
Accent Small Projects Oil Based Gloss 250 mL: From $17.50
Accent Small Projects, perfect for craft projects and home accessories. Suitable for interior and exterior projects. Hard wearing, high gloss finish. Mineral Turpentine clean up. Australian made for Australian homes.
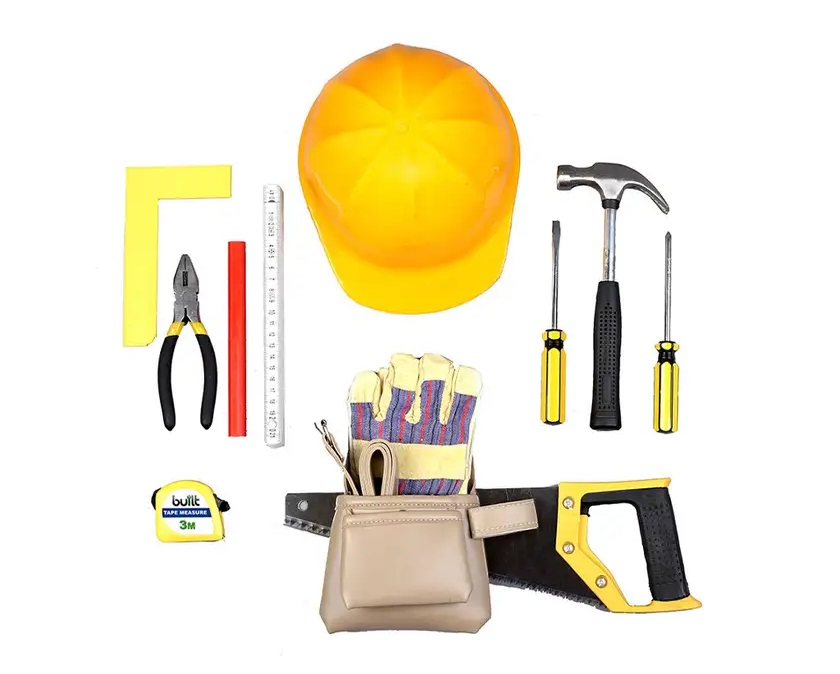
Built Big Kids Tool Kit - 12 Piece: $49.00
1 x Hammer, 2 x Screwdriver, 1 x Cap, 1 x Carpenters Pencil, 1 x Hand Saw, 1 x Tool Bag, 1 x Square, 1 x Pliers, 1 x Level, 1 x Tape Measure, Gloves.
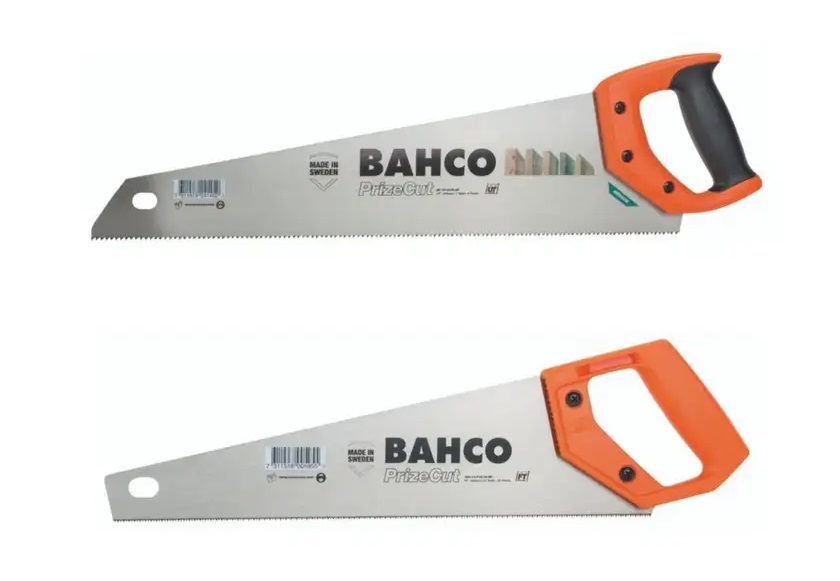
Bahco General purpose 475mm and Fine tooth Toolbox saw 350mm – 2 pack: $30.80
NP-19-U7/8-HP: PrizeCut™ Universal Handsaw for cutting all types of wood 7/8 TPI 19". 300-14-F15/16-HP: Fine tooth Toolbox Saw for Plastics/Laminates/Wood/Soft Metals 15/16 TPI 14".
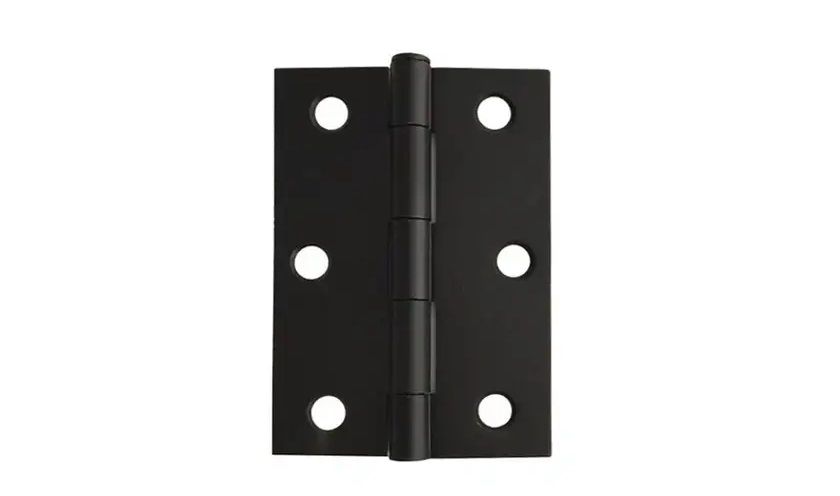
Trio Butt Hinge Light & Narrow Black 85 x 60 x 1.6mm: $3.80 - 85 x 60 x 1.6mm, Light & Narrow, Black (BL), Fixed Pin (FP).

The Spring Outdoors Catalogue runs until December 31st, 2022: filled with great ideas to enjoy your Spring and Summer outdoors

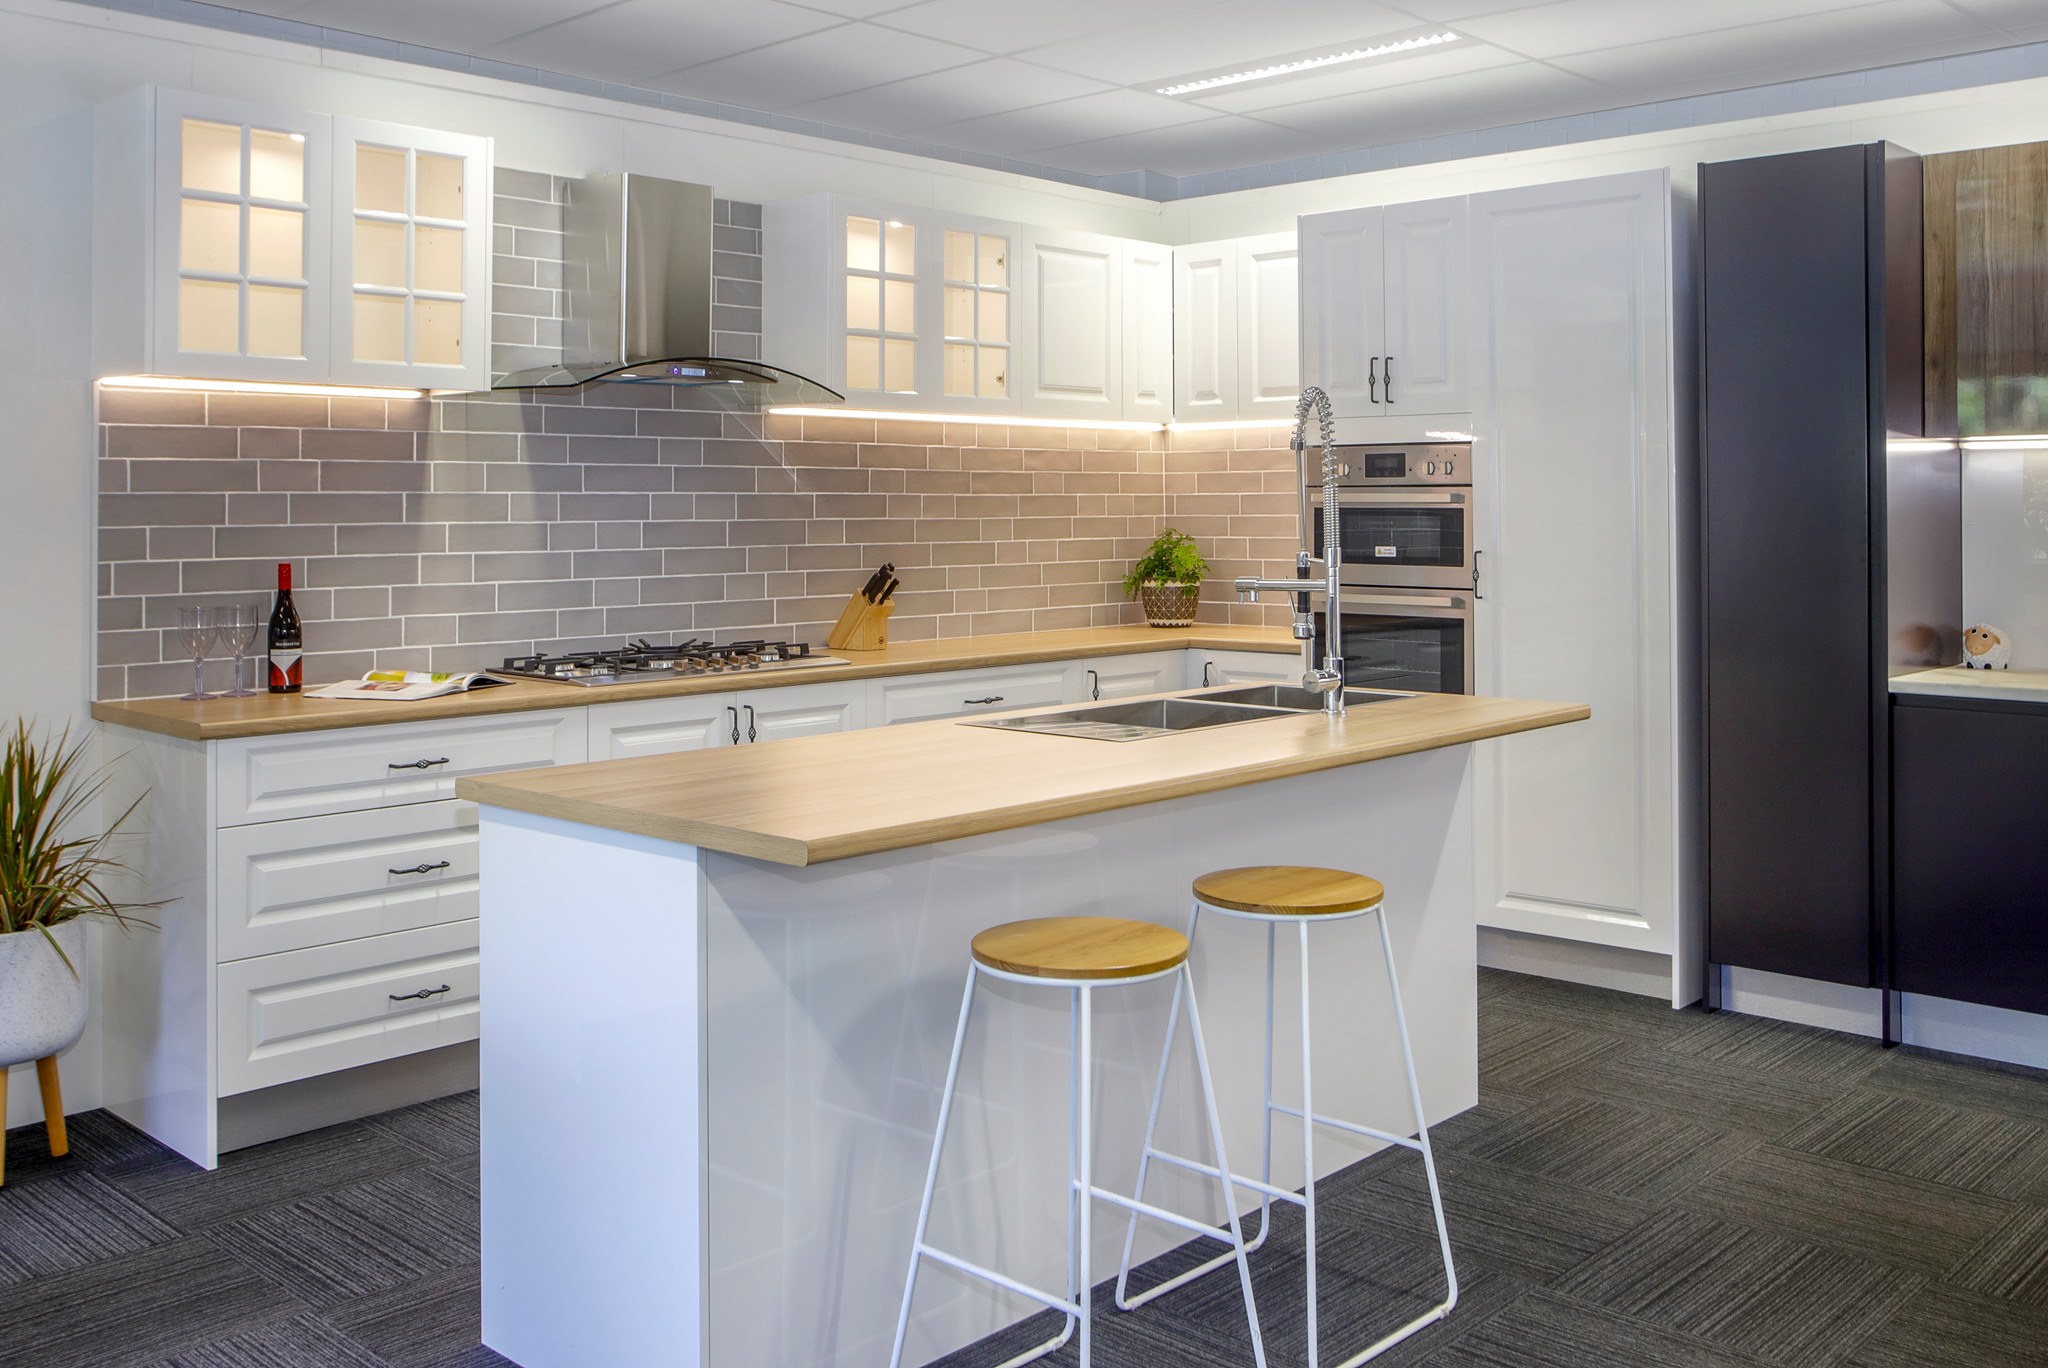
JBH Design Centre
JBH Design Centre is a tool for builders and DIY'ers to assist in the fit out of houses. It has displays of kitchens, Bathrooms, Doors and Storage as well as knowledgeable staff to assist in making house fit out painless.
Visit: http://jbhdc.com.au/
On Facebook: https://www.facebook.com/design.centre.jbh/


Click on logo to visit Johnson Brothers Mitre 10 website
Johnson Bros Mitre 10 - Avalon (02) 9918 3315
Johnson Bros Mitre 10 - Mona Vale (02) 9999 3340
JBH Timber & Building Supplies (02) 9999 0333
JBH Fencing & Landscape Supplies (02) 9970 6333
www.johnsonbros.com.au Online store: jbhmv.com.au

Previous DIY Pages:
Decking Timbers Caring For Your Deck Decking Finishes Privacy Screens I Privacy Screens II Privacy Screening Hardwoods Autumn Paths and Lawns Insulation Batts Plasterboard Ventilation - Edmond's Ecofan Blackboards for Children and Home Spring Lawn Care Shade Sails & Watering Basic DIY Tools DIY Tools - Power Drills Recycle Your Trampoline into An Air Bed How to Build Your Own Backyard Cricket Pitch Christmas Lights Displays around House and Garden Summer Mildew - Refresh, Renew How to Fix Things That Drip and Bump in the Night Time To Plant Winter Vegetables in a Raised Garden Beds Layout Organsing Your Tool Shed Make Your Own Weathervane Installing A Garden Watering System Decking Oils How To Make Garden Compost How To Winter proof Your Lawn How to create Shabby Chic effect on Timber Furniture How to Build Your Own Raised Garden Bed Growing Your Own Winter Vegies Winter Heating Guide Prepare Your Yard For Winter Eradicating Noxious Weeds From Your Yard How to Fix Furniture Finishes Part I How to Repair Scratches, Dings, and Dents of Furniture Surfaces - Part II Winter Draughts Fix Classic Wooden Tool Carrier Spring Garden Checklist Part I Install Your Own Skylight Retaining Walls for Saving Soil and New Spring Garden Beds Summer Salad Garden Native Plant Garden for A Fairy Arbour Renewing Short Flight of Exterior Stairs Deck Maintenance DIY Summer Tasks You Can Do In Time to Get to the Beach Garden Ponds for Attracting Birdlife, Dragonflies and for the Soothing Sounds of Water Salt Air: Maintenance and Protection Creating an Outdoor Dining Arbour, Gazebo or Patio - Part I Creating an Outdor Dining Arbour, Gazebo or Patio Part II Autumn Garden Tasks Autumn DIY Jobs: Waterproof Your Home Checklist Dealing With Dampness Inside the Home Fixing Your Fence Repairing and Replacing Damaged Decking boards DIY Toy Box and Snow Globes: School Holidays Fun - Winter 2015 DIY Wooden Toy Cars and Perfect Painted Flowerpots: School Holiday Fun - Winter 2015 Shoring Up an Under House Earth Bank – Installing a Basic Retaining Wall DIY One Shelf Sideboard Early Spring 2015 Garden Care Salad Garden For Children Keeping Your Garden and Home Cool in Hot Weather Classic Beach Garden and Camping Chairs 3 Portable Versions Anyone Can Make DIY Outdoor Furniture Mark I: Park Benches for Your Garden Make Your Own Scooter or Skateboard: Summer 2016 Fun How to Install a Solid Core Door and Door Furniture Summer Garden Jobs: Pruning A Hedge How to Make A Swing Chair - With A Frame for Garden Setting Garden Jobs for March to Make A Beautiful and Healthy Spring Keeping Outdoor Nooks Warm During Cooler Months Children’s Step Stool with Storage Stop Winter Rain Lawn Loss and Soil Erosion on Slopes DIY Garden Shed: Part 1 of 4 - Base DIY Garden Shed: Part 2 - Framing Walls DIY Garden Shed: Part 2b - Gable Roof Framing Garden Shed Part 3: Roof Installation DIY Garden Shed: Weather- boards - Door And Window Installation And Paint Finish DIY Coffee Table With Chessboard Inlay Spring Gardening: Feeding Your Soil And Plants - What Works For Each Plant DIY Sandstone Flagging Parking Area - Platform DIY Pre-Summer Checklist For A Safe Home Summer Spruce Up: Interior Paint Tips and Three easy steps to rejuvenate your timber deck The Perfect BBQ Garden Setting DIY Water Wise Garden DIY Side Gates DIY Storm Preparation And Home Protection One To Two Day DIY Weekend Spruce Ups Vegepods For Autumn Planting + Easy To Make Lego Table Or Student Desk That Can Be Dismantled + Johnson Brothers Mitre 10 Online Store Johnson Brothers Mitre 10 Great New Mona Vale Store: Still In Bassett Street - number 73 Johnson Brothers Mitre 10 New Mona Vale Store: The Greenlife Garden Centre Go Outside And Play: Creating Garden Spaces To Connect Children With Nature DIY Plasterboard Repair DIY Dolls House Or Garage Or Boatshed DIY Child's Waggon - or use as a large planter mover DIY Bathroom Refresh: Zing For Spring Tips for Growing a Native Garden FireCrunch, Australian Developed Fire-proof, Sustainable, Durable and Reliable Building Board Now Available at Johnson Bros. at Mona Vale and Narrabeen School Holidays DIY Ideas for Children: Little Vegetables Garden, Swing, Windchimes Bushfire Season Preparation 2017: Home and Outdoor Areas Johnson Brothers Mitre 10 Trade Centre at Mona Vale + Issue No 1 of Mitre 10’s inSITE Magazine for Tradies and Handymen Preparing Al Fresco Areas for Christmas Get-Togethers and Summer Visitors Summer De-bug; Mosquitoes, flies, cockroaches and ants - how to keep the outdoors insects where they belong DIY Summer Projects: Install A Fountain Or Water Feature Late Summer and Early Autumn Projects: A Shed For All Storage Solutions + Garden Tasks + Keeping Our Waterways Clean Autumn Plantings for Winter Harvests 2018 Paintback Collection Event: Johnson Bros Mitre 10 Mona Vale Saturday, April 7 Reducing Ticks in Your Garden: Garden care, Plants that Repel, What to Wear Outdoors Attracting Insectivore Birds to Your Garden: DIY Natural Tick Control Mother's Day 2018: DIY Rose Garden Winter Mould & Mildew Inside Your home: How to Keep Air and Surfaces Healthier DIY Traditional Rocking Horse Johnson Brothers Trade Day 2018 DIY Mushrooms and Vege Kits: School Holidays Fun Winter 2018 for Curious Kids Woodworking Projects for Beginners: School Holidays Fun Winter 2018 - Simple Storage Box + Wood Tool Box Spring Garden Prep: Soil Care Spring into Spring + JBH August 2018 Trifecta DIY Backyard Doggie Paradise Garden Care for Heavy Rain Days + Non-Toxic Snail and Slug Debug Ideas Garden Design and Plant Management to Minimise Tick Attacks and Infestations - insights from an essay by Bill Conroy BSc. (Agr) (Syd) + a Tribute to Wilfred Lawrence Conroy CBE by Keith Jackson, PNG and others Make Your Own BBQ Kitchen Garden: Gifts That Grow Past That Giving Day Christmas Lights 2018: Light Up the Night How to Keep Your House Cool During a Heatwave Without Using an Air-Conditioner Mid-Summer Garden Care 2018 Winners Of National Hardware Store Of The Year - Johnson Bros Mitre 10 Mona Vale! + End Of Summer Garden To Do List DIY Fruits of Your Garden: Growing Figs Fruits Of Your Garden: Growing Passionfruit - Autumn Is Also The Time To Plant Strawberries For Spring How To Water Your Plants When Away On Holidays + Some April 2019 School Holidays Fun For Outdoors; A Skateboard Swing Or Indoors; Grow Or Make Pot Plant People Dealing With Autumn Dampness Inside The Home + Mums Day Gifts For 2019 Winter Heating Guide + Get Ready For Winter Specials Keeping Your Garden Dewful During Times Of Water Restrictions and Drought Installing Leaf Stopper Gutter Guard + Trade Day 2019 JBH Mitre 10 Trade Day Guests 2019 An Artfull Garden - for Winter School Holidays 2019 DIY Deck Refurbishment: Turning Wood Into Open Tiled Spaces - Groundworks Father's Day Wish List 2019 + How to Re-stain your Deck timbers and posts for Summer Installing Posts For Decks and Verandahs With Heavier Loads + Installing Membranes For Tiled Decks National Garden Week's 2019 Focus Is On Children(Oct 13-19): Spring School Holiday 2019 Garden Ideas (to get started on) Replacing Balustrades Handrails DIY Tiling Your Verandah: and Choosing Your Simple Or Complex Tile Pattern Reduce Bushfire Risk To Older Homes + Preparing Your Yard For Bushfires Time to Put Up those Christmas Lights and Deck your Gum Trees with rows of Jolly! NSW RFS Bushfire Survival Plan 2020 + Reduce Bushfire Risk To Homes + Johnson Brothers Mitre 10 Great Water Saving Ideas during Level 2 water restrictions + some 'Don't Sweat Summer' Specials The Inaugural Sydney Edible Garden Trail - Learn how to help your garden survive the heat, drought, and water restrictions DIY Flyscreens DIY Privacy Screen In 2 Hours Family Hardware Store Wins Best In Australia Autumn DIY Jobs: Exterior Jobs to Keep Everything Dry and Cosy Inside the Home Autumn Vegepod Garden: Plant Now to Stay Healthy: JBH Response to COVID-19 Restrictions - We're Adapting! Autumn Holidays Projects: Let's Go Fly A Kite + Some handy Painting Tips for Interiors and Sprucing up that Outside Deck - Easter Hours 2020 Pittwater's Noxious Weeds: A Great Time To Get Outdoors and Pull Them Out and Replace With Native Plants Blooming Lovely: Late Autumn Planting For Gardens Full Of Colour, Cheer + Great Food For The Table Dealing With Dampness Inside The Home - June 2020 DIY A Job For Life: Apprentice Carpenter + Commencement Tool List Winter School Holidays 2020: Easy To Do Garden Mosaic Pavers Little Hands Can Create + Home DIYer: Simple Concrete Slab DIY - A Job For Life: Landscape Gardener Apprenticeship DIY Fathers' Day ideas for 2020 + August Garden Jobs DIY Job for Life: Plumber's Apprenticeship Early Spring Garden Care Spring 2020 + Salad Garden For Children A Job For Life: Certificate III In Electrotechnology - From Apprentice To A Business Owner; Jay Turns Up The Voltage On His Career + Spring Garden Specials - seedlings time! Spring is here and wattles are out in bloom: a love letter to our iconic flowers Perfect Tomatoes, Capsicums and Spring Onions - Summer Salad Staples + what to plant now BBQ Season: some tips to keep your New or Old BBQ Clean Christmas Lights Time 2020: Deck Your Home With Rows Of Jolly! Johnson Brothers Avalon Store Renovations & Mona Vale Store: Everything You Need This Summer In Stock How To Keep Your Home Cool During A Heatwave Dealing With Dampness Inside The Home: The Wet Summer Of 2020/2021 +Nothing By Halves, Johnson Bros. Mitre 10, great new video By Community Requests Autumn/February 2021 re-run: Garden Design and Plant Management to Minimise Tick Attacks and Infestations The Bees Knees: what you can plant now to help your garden grow and help the bees Dealing with Storm Events: Flooding inside and around the home - how to Be Prepared Fun Project Ideas for Autumn School Holidays 10 Ways to keep your home warm and save money this Autumn and Winter Mother's Day 2021 Ideas: Grow Her Some Lemons Or Avocadoes Or Get A Pink Step Ladder So She Can Safely Reach The Top Shelf Indoors + JBH Celebrates Upgrade Of Avalon Beach Store These 3 Tips Will Help You Create A Thriving Pollinator-Friendly Garden This Winter 'Generation Restoration' Is The UN's World Environment Day 2021 Theme: How You Can Help Out At Home The Johnson Brothers Trade Day Is Back: Thursday June 17th + How To Build A Nesting Box For Our Local Possums and Birds Winter School Holidays 2021: Fun Projects You Can Do Around The Home - Something For The Young and Even Younger Winter DIY Ideas: Painting A Feature Wall + Outdoor Heating Options For Your Home + Declutter/Organise That Tool Shed Science Week 2021 Food Theme: A Salad Garden For Children Early Spring Chores For Great A Summer Outdoors: Clean and Reseal Your Wooden Deck Area Early Spring Chores For Great A Summer Outdoors: Soil Preparation For Vegetables + Salads + A Few Other Tips To Make Your Garden Ready To Plant Out Spring School Holidays Projects 2021: A Swing Chair and Dolls' House or Toy Garage The Beer Ledge: Done In An Afternoon Projects For The Garden October- November Garden Jobs: Let's Get Busy Planting Out Now + Mow For Your Bros. This Movember Mow For Your Bros. This Movember: Some Lawn Care Tips To Keep Your Grass Greener This Summer - Aerate, Worm Up!, Fertilise, Watering, Mowing Basics Christmas-New Years 2021 Checklists: Preparing The Garden & Home - Entertaining - Gift Ideas For Every Budget DIY Backyard Cricket Pitch DIY Surfboard Rack: Vertical and Horizontal Options Late Summer - Early Autumn Garden Tips: BOM Forecasts Warm Autumn 2022 With Above Average Rainfall Dealing With Dampness Inside The Home March 2022 Maintenance Of Your Home's Outside Areas After Storm Events: Paths, Walls & Windows, Dampness Under The House, Dying Lawns And Plants - The DIY Checklist Fun Project Ideas for Youngsters for Autumn School Holidays: wooden cars, blackboards, bright painted herb pots, grow your own food, make a chessboard Mother's Day 2022: Promise Her An Ever Blooming Native Flowering Plants Garden Retaining Walls Save Your Garden's Soil: DIY Winter Draught Stops To Lessen Your Power Bill Johnson Brothers Trade Day 2022: June 16 At Mona Vale + Winter Garden Jobs For A Flowering Fruitful Spring Winter School Holidays Projects For Youngsters On Rainy Days Dealing With Dampness Inside The Home: Black Mould July 2022 Stop Winter Rain Soil Erosion In Your Garden - Especially On Sloping Blocks Increases In Building Materials Costs Adds Pressure To Fixed Price Contracts - Construction Industry Father's Day 2022 - Some Gift Ideas To Make Dad Feel Special; Some For Those Without A Single Dollar + Some For Those Who Get Pocket Money! Spring 2022: Time To Get In The Garden! What Can Be Done In September - For Youngsters + Oldsters
______________________
John and Bob Johnson - The Johnson Brothers Profile John William Alfred Johnson - The Eulogies for those who could not attend Mass
Australia's Prime Minister Visits Mackellar - Informal Afternoon Tea with Hon. Malcolm Turnbull October 2016
JBH Win Awards August 2018 Trifecta - 2018 Free Trade Day supporters, Mitre 10 Heritage Advert features JBH Mona Vale Store, Hardware Australia’s 2018 NSW Hardware Store of the Year over 2500sqm.
Front Page Issue 294: 2018 Winners Of National Hardware Store Of The Year - Johnson Bros Mitre 10 Mona Vale !!!
National Garden Week's 2019 Focus Is On Children(Oct 13-19): School Holiday Garden Ideas (to get started on) & Congratulations Award Winning Johnson Brothers Mitre10 At Mona Vale - 2019 NSW Store Of the Year, 2019 NSW Trade Centre Of the Year and 2019 Village Garden Centre of the Year
Johnson Bros Mitre 10 were awarded as the best Trade Store in the country: February 2020
Family Hardware Store Wins Best In Australia: Johnson Bros Mitre 10 Mona Vale Crowned ‘National Trade Store Of The Year’ - Celebrating 65th Year in 2020
Anzac Day In Pittwater 2020: Candles, Crosses and Online Commemorative Services: Johnson Brothers Family Donates 20 Thousand Candles to Community Light Up The Dawn Initiative
Front Page Issue 447: ANZAC DAY 2020
Front Page Issue 478: Johnson Brothers Avalon Store Renovations & Mona Vale Store: Everything You Need This Summer In Stock
Front Page Issue 492: JBH Celebrates Upgrade Of Avalon Beach Store