April 6 - 12, 2014: Issue 157
Make Your Own Weather Vane
This may be a bit challenging for some and easy for others. An afternoon project that allows you to choose your own kind of weather vane, or the traditional rooster, arrow or ship decals made from stencils, is sure to please and draw the eye to whichever way the wind is blowing a little more than the versions you can purchase ready to mount.
This is a project young and old may do together too – little hands love painting (check on Council requirements and don’t come up with something too ‘paisley’ or you may have to repaint ) – and older hands are steadier on some of the power tools that may be required.
As a gift, a nice and useful addition to your own home, or a means for adding something quite unique to all those fundraising stalls, this is one that will bring enjoyment and confidence to other DIY undertakings once done. We are running an article on the beginnings of Weather Vanes, and insights into some of the older versions, which crown quite famous buildings, in this week's Collector's Corner as further inspiration.
You can make a weather vane for a potting shed, deck or garden for decoration. These tools have been used for centuries to determine the direction of the wind while our farmers use weather vanes so they can know what kind of weather to expect based on wind direction.
A weather vane is really just a piece of wood or metal on a swivel. The flat piece (or blade) catches the wind and points away and toward the wind, indicating wind direction. Wind direction is always described in terms of where the wind is blowing from, not toward. For instance, a west wind will blow east. The front of the weather vane should always face in the direction the wind is blowing from.
 What You'll Need to Make a Weather Vane
A 91.44 cm x 91.44 cm (or 3x3-foot) piece of wood for the vane blade, 5cm depth (1 inch thickness)
Jig or coping saw
Swivel and mounting hardware (if mounting to a house or structure – e.g.- your tool shed!)
Plastic or metal letters N, W, E, S to indicate wind direction
Wood or metal dowel or rod (6.35 cm or ¼-inch diameter)
Sandpaper
Drill and 6mm drill bits
A 10.16cm x 2.54cm or 4 inches x inch wood ball or post base
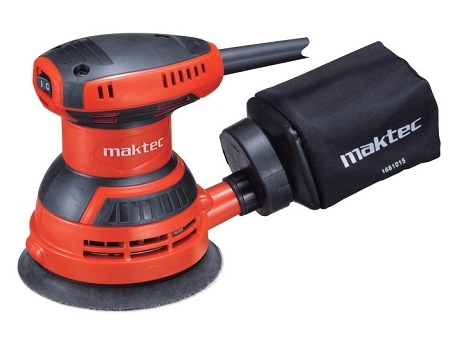
Right: MAKTEC Random orbital sander $65.00 JBH Mitre 10 April 2014 Specials
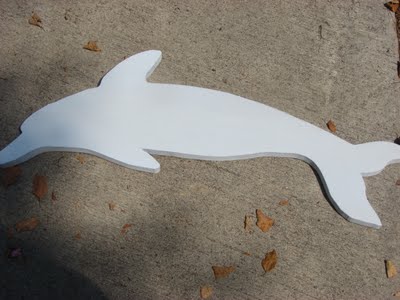
Step 1 - Cut Out Your Design – see loads of free stencils at: HEREand HERE or create your own!
Trace your design onto the material you are using for the weathervane's blade. Use a jig or coping saw to cut out the shape, and sand the edges smooth. Your blade can be flat or 3-dimensional, depending on your artistic and skill levels. Now it's time to paint and decorate your blade. Applying an Exterior Varnish at this stage will also protect your Weathervane for years to come - ask at Johnson Brothers Mitre 10 in thier Mona Vale or Avalon stores for the best product to use in this instance.

Bosch 18V Drill and 670W Angle Grinder Combo - $199.00 Drill: 15 + 1 torque settings, 10mm keyless chuck, no load speed 850rpm. Angle grinder: 100mm disc diameter, no load speed 11000rpm.
 Step 2 - Find Your Blade's Balance Point
Once you have finished decorating your blade, you'll need to find the balance point. This is the place on the bottom of the blade where it will balance on your finger with its weight evenly distributed.
Once you find this spot, drill a vertical hole (if it is wood) at least 2-inches long and as straight as possible (use a drill press if you have one). The weight of the blade should be evenly centered forward and back.
Step 3 - Attach Your Rod or Dowel to the Blade
Enlarge the blade hole to make it larger and loose enough for your dowel or rod to turn freely. Insert your dowel or rod into the blade and make sure it turns freely. Use sandpaper to narrow the dowel where it fits inside the blade if it is too tight, or use the drill to enlarge the hole more if using a metal rod.
Step 4 - Attach Your Rod or Dowel and Lettering to Your Base
Once your blade and dowel work correctly, attach the bottom of the dowel to the ball or post base. This base should not move. The letters should be screwed, glued or permanently attached or carved into the base, since they indicate the directions of the earth.
Step 5 - Attach the Base
Now that you have your weather vane and base, you can attach it to a more permanent structure, such as a roof or tool shed, or to a pole beside your bird bath. You can secure it with screws, brackets or other hardware as needed. Make sure your blade has a clear, unobstructed path to the wind and turns freely.
______________________________________________
Johnson Brothers Mitre 10 April Specials starts 27/3/2014 to 31/4/2014. See at http://www.hardwoodsaustralia.com.au/assets/johnson-bros-pw-apr-14.pdf
Also includes:
KINGSBROOK 450mm plastic leaf rake $4.95 - for Autumn leaves
Polyester batt available in 430 or 580mm r1.5 $3.90m2, r3.5 10.50m2. - to insulate
Sound screener (Rockwool) available in 430 or 580mm r2.0 $11.95m2, r2.5 $13.50m2 - if there is a teenage rock band practicing in the garage!
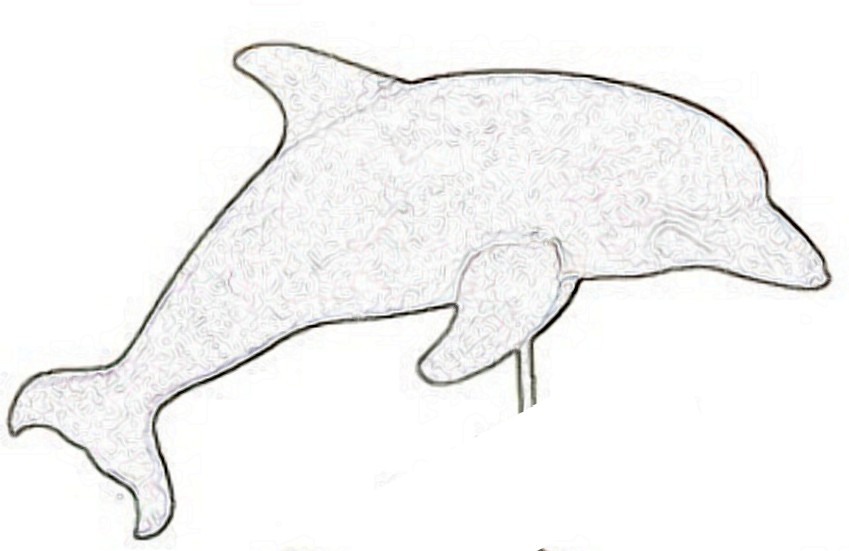
Dolphin Weather Vane Stencil - courtesy Weather Vane Patterns/Stencils to download
Products and further friendly advice available at Mona Vale and Avalon Johnson Brothers Mitre 10.
Click on logo to visit their website

Previous DIY Pages:
Decking Timbers Caring For Your Deck Decking Finishes Privacy Screens I Privacy Screens II Privacy Screening Hardwoods Autumn Paths and Lawns Insulation Batts Plasterboard Ventilation - Edmond's Ecofan Blackboards for Children and Home Spring Lawn Care Shade Sails & Watering Basic DIY Tools DIY Tools - Power Drills Recycle Your Trampoline into An Air Bed How to Build Your Own Backyard Cricket Pitch Christmas Lights Displays around House and Garden Summer Mildew - Refresh, Renew How to Fix Things That Drip and Bump in the Night Time To Plant Winter Vegetables – Raised Garden Beds Layout Orgainsing Your Tool Shed Installing A Garden Watering System Decking Oils How To Make Garden Compost How To Winter proof Your Lawn How to create Shabby Chic effect on Timber Furniture How to Build Your Own Raised Garden Bed Growing Your Own Winter Vegetables Winter Heating Guide
Copyright JBH Mitre 10, 2013. All Rights Reserved .