
We'll split it into two phases: the groundwork to ready the deck for tile laying, and the tiling itself.
Winter is a great time to begin these medium sized projects as the cooler weather lends itself to hot outdoor works while longer dry spells mean you won't have a construction site around the home due to 'rain days'.
Bear in mind with this project that changing a wooden deck to one that carries tiles will increase the load (weight) of what you bearers, joists and posts are carrying. If these have deteriorated through the years and need replacing anyway, now may be a great time to shift to something that could be much more long lasting.
For this we have used F11 Bearers: 240x75 in Hardwood H2 LVL's - 39 lineal metres(Treated wood required - that's the letters and numbers) with 240x75 H3 CCA LVLs, Joists are 190x45 LVLs, Posts 112x112 while the Noggins have been fixed at 900mm to increase strength and weight bearing capacity. Rougher Header H3 CCA: 190x45 - 12 lineal metres. F7 Rouger Header H3 Pine is treated to reduce risk of decay, borers and termites. This type of timber is mainly used for cladding fascia, pergolas (above ground), joinery, framing and decking. We also needed Pimed Pine DAR H3 41X41 - 32.4 lineal metres and Primed Pine F7 H3 92X41 - 8.7 lineal metres.
Although the standard for joists is at 450mm centres to bear 19mm cement sheets these were installed at 300mm. The extra wood/joists at closer spacing also gives added strength, so a bit of extra timber expense to begin with but you're building something that will be stronger and won't need replacement for a few decades - it'll be worth it.
The Cement floor sheets used over these are 2700x600x19mm - 20 of these. You can get these now with tongue and groove as part of the sheet itself, making installation a lot smoother and faster. They can also be fixed to the wood with nails, so are DIY friendly. A priming coat will be applied over all sheets before tiling.
The Letters and Numbers for Timbers
Builders and Renovators are required to adhere to the Building Code of Australia (BCA) even when refurbishing a deck due to wood age-wood rot when large sections need to be replaced. The following requirements for timber framing of a deck are based on the Australian Standard AS 1684 Residential Timber-framed Construction and would apply to rebuilding an all timber deck.
Bearers and joists come in a variety of stress grades. The stress grade will depend on the natural properties and characteristics of the species (e.g. density, knots, sloping grain).
F Stress grades for hardwoods and some softwoods are designated by an 'F' number (F5, F14, F17, F27 etc.). Softwoods are also stress graded with an 'MGP' number and sometimes an 'F' number. "F14", for example, which indicates that the timber's working stress in bending is approximately 14 MPA (Megapascals).
The timber stress grade is influenced by:
A) The inherent strength of the species concerned:
eg. Iron Bark (Strength Group 1) is stronger than Blackbutt (Strength Group 2), and Slash Pine (Strength Group 5) is stronger than Radiata Pine (Strength Group 6), and as all of the species of hardwood which Outdoor Structures supply for structural purposes are a minimum (& mostly) Strength Group 2, for simplicity, we use this group as our standard.
B) The quality of the sample of timber being examined:
i.e. The stress grade will vary within one timber species depending on the size and extent of faults such as knots, gum pockets, or sloping grain. For a sample of timber from Strength Group 2 to be graded as F14, it must not have:
- A knot more than 1/3 of the width, and/or
- Loose gum veins 1/4 of the length, and/or
- Want & wane 1/4 of the cross section
- For a sample from the same species to be graded as F17, it must not have:
- A knot more than 1/4 of the width, and/or
- Loose gum veins 1/6 of the length, and/or
- Want & wane 1/5 of the cross section
In most cases, the size and grade of timber required for a particular application is determined from tables contained in Timber Framing Manuals. Stress grading only guarantees the strength of the timber at the time of grading and does not guarantee other characteristics such as appearance, durability under adverse conditions, and shrinkage
H You also need to look at the treated H number of the wood - H4 or H5 timber is what is used for outdoor installations in Class 1 wood. The 'H' denotes the level of treatment and what the treated timber can be used for: H2 protects against termites and is for inside use only. H3 protects against termites and wood rot, and is for outside, above ground only. H4 is for outside, non-structural, in contact with ground, such as posts and garden edges.
H levels represent the level or degree of biological hazard that timber will be exposed to in a specified application. The appropriate level of treatment (H1, H2, H3, H4 or H5) describes the extent of preservative treatment (retention and penetration) required (when combined with the timber’s natural durability) to protect the wood against the identified biological hazard/s.
H1: The minimum level of preservative treatment required to protect the timber from attack by insects other than termites. H1 preservative treatments are suitable in above-ground, well-ventilated situations protected from weather and wetting.
H2: The minimum level of preservative treatment required to protect the timber from attack by insects, including termites. H2 preservative treatments are suitable in above-ground, well-ventilated situations protected from weather and wetting.
CCA Chromated copper arsenate (CCA) is a wood preservative containing compounds of chromium, copper, and arsenic, in various proportions. It is used to impregnate timber and other wood products, especially those intended for outdoor use, in order to protect them from attack by microbes and insects. Like other copper-based wood preservatives, it imparts a greenish tint to treated timber.
CCA was invented in 1933 by Indian chemist Sonti Kamesam, and patented in Britain in 1934. It has been used for timber treatment since the mid-1930s, and is marketed under many trade names.
DAR indicates that the timber is dressed all round, which means simply that it has been planed smooth on all surfaces.
For deck floors greater than 1,000 mm above the finished ground level, bearer sizes can be found in the span Table 49 in AS 1684. For deck floors less than or equal to 1,000 mm greater than the finished ground level, span Table 5 in AS 1684 can be used. Both these tables assume a minimum end bearing of 50 mm by bearer width, and intermediate bearing of 100 mm by bearer width for continuous bearers.
Your timber list for your deck is always going to be Length x Width. If you're going to simply refurbish with new timber decking you will need to work out lineal metres before you decide on what width of decking boards you want to use, the space between these and use those calculations to work out a 100% timber list. The timber sizings we have chosen are on the side of a bit more than required for this particular project, while closer together means more lumber.
For a deck 8m x 2.5m, for example, you will need 6x Stumps, 8 x Bearers (we've done double as per AS 1684.2 with 3 x LVLs; 4x across front and 2 x at each end) and 30 x Joists for under the cement sheeting.
The timber cost for this refurbishment is around $2000.00 which includes the Batten Screws, Hanging brackets, Glues etc. for the Cement Sheets. The Cement sheets are $2500.00 for the 20. The tiles we have chosen will be around $3500.00. The Membrane installation and works associated with pre-tiling prep will also form part of your budget - and there are AS there too.
In any renovation or Build works the Labour costs are the biggest part of your budget - around 2/3 of all costs. Although you will need a hand with some parts of this project, the more you do yourself, the more you will save at the end of the project to put towards plants, pots, water features etc. for those final touches.
What are Bearers, LVLs, Joists and Noggins?
Bearers: are the timbers that are attached to the stumps or posts that support the deck and Joists are the timbers that are attached across the bearers to which the decking boards are in turn attached.
LVLs: Laminated Veneer Lumber (LVL) is a high-strength engineered wood product used primarily for structural applications. It is comparable in strength to solid timber, concrete and steel and is manufactured by bonding together rotary peeled or sliced thin wood veneers under heat and pressure.
Joists: are the timbers that are attached across the bearers to which the decking boards are in turn attached. We have used continuous joists.
.JPG?timestamp=1564231615099)
Joists
Noggins: are sometimes called bridging or blocking are timbers used all over the place during first fix/structural carpentry to strengthen and stiffen wall, floor and other timber structures. They stop the joists from twisting or buckling when used in a deck.
.JPG?timestamp=1564231665729)
Noggins installed
Posts: also called stumps, are set vertically to support the deck framing. Posts can be cut off below the deck surface, or they may rise above the surface to provide support for the railing. Posts may rest on top of concrete footings or they can be set plumb in the hole before the concrete is poured. Holes for embedded posts should be filled with 100 mm depth of coarse gravel (to allow water to drain) before backfilling with concrete or rammed earth. The top of backfill must be sloped away from posts to shed water. Termite management systems to embedded posts need to be provided by stainless steel mesh (Termimesh) socks or caps or by chemical treatment to the surrounding ground.
Footings: Concrete columns that support the posts and, thus, the deck. Footings for decks need to be in accordance with the BCA regulatory requirements. Timber posts should preferably be fixed to hot dipped galvanised steel stirrups set in concrete. A minimum clearance of 75 mm shall be provided between the top of the concrete footing and the bottom of the post as a termite inspection zone.
Joist hangers: Metal fasteners that allow you to fasten the joists in place without notching the ends of the board. Use stainless steel. Those installed here are 100x100
While on stainless steel - use those for your deck screws too.
.JPG?timestamp=1564229484041)
Joist hanger in place
What is called the continuous span should be known too. A Bearer that is considered to be single span, is fixed to stumps at each end of it’s length with nothing in between to support it. A continuous span bearer is one that is supported at more than two points along it’s length. For example, a deck that is 1 metre long and 1 metre wide may have only two bearers, one either side (running the length of the deck) and will be considered single span as each Bearer will be supported only at each end. When you go larger, a deck that is 1m wide and 10m long for example, will still have two Bearers each running the length of the structure, but they will need support along the 10m length from several Posts.
To correctly calculate the minimum strength and placement of the timber that you should use on your deck, you need to establish first the floor load width (FLW) of your Bearers, and then the spacing of your posts.
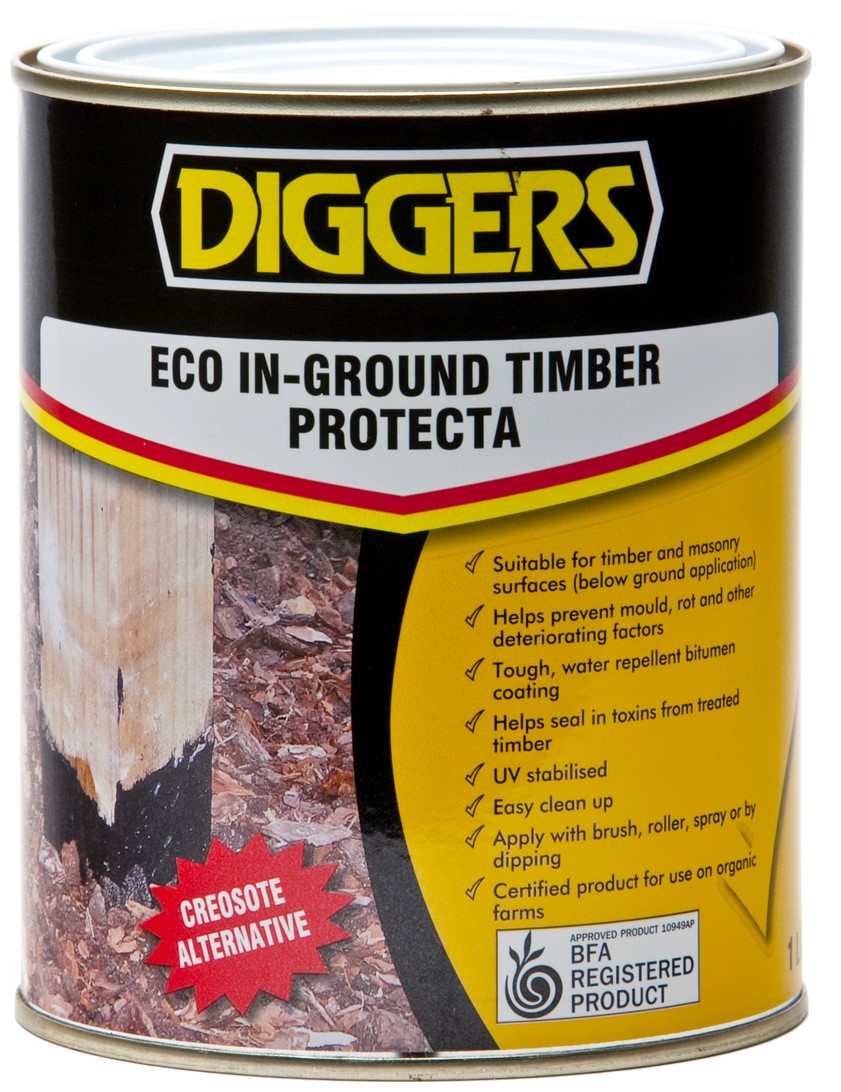
As well as using H2, H3 to H4 Treated Pine and LVLs it's worth applying coats of an extra protection product. As an alternative to the old toxic creosote we always use Diggers Eco Protector. You can get this at Johnson Brothers Mitre 10 Mona Vale Store if this bit of info is reminding you of a few others jobs you want to get done while it's still cold.
Diggers Eco In-Ground Timber Protecta is a non hazardous 'creosote alternative' that provides a tough bitumen coating to improve protection against moisture and deterioration on timber and masonry surfaces. It increases the life of building materials in outdoor, below ground applications by sealing toxins in and moisture out.
Typically used on: Fences, veranda posts and sleepers, Garden stakes, logs, poles, retaining walls and raised beds
Features: Easy to apply with brush, roller or by dipping; Contains ingredients that help inhibit mould, rot and other corroding effects; BFA (Biological Farmers of Australia) Registered Product - suitable for use on organic farms; Contains no hazardous ingredients (as defined by the Australian Safety and Compensation Council); Safer alternative to common timber treatments; Flexible UV coating which expands and contracts with the timber.
.JPG?timestamp=1564236655257)
Digger Protecta painted on Bearers prior to adding Joists
List of what you will need
If you are going to replace the full deck - we're just replacing the Bearers and Joists at this stage - two lists of materials and tools you will need run below. If you need to replace the Posts that hold the Bearers Up, that will be run in a future DIY Idea article:
Also available: Repairing and Replacing Damaged Decking boards, Summer Spruce Up: Interior Paint Tips and Three easy steps to rejuvenate your timber deck
Materials
Timber Posts
Bearers
Joists
Decking boards
Concrete/Rapid Set
Nails (GAL)
Dyna bolts
Coach Screws
Decking Screws (GAL or Stainless)
Joist Hangers
Framing Anchors
Post Anchors
5mm Spacers
Construction grade adhesive (glue)
Tools
Tape measure
Pencil
Hammer
Power Drill w/ bits
Power Saw/Hand Saw
Spirit Level
String Line
Carpenter’s Square
Adjustable Spanner
Trowel/Chisel
Dust Mask
Framing
Measure the Decking,Joist and Bearer thickness. You may not need to replace this, but good to know: against the house wall measure this thickness down from the intended floor height of the deck.
If your house is brick then connect a 140 x 45mm F.7. timber Ledger to the brickwork using dyna bolts at 450mm intervals. If you have a weatherboard house, ideally Bearers should be joined to the existing Bearers of your house; however you may use a timber Ledger in a similar fashion as a brick house, using coach screws instead of dyna bolts.
Once the plate has been fixed and therefore the bearer height determined, the posts can be marked for cutting to height. Make sure that allowance is made for the method of fixing the bearer before determining the cutting height of the posts, then using a square, string line and level mark all the remaining posts and cut them to the correct height.
Tip: even the experts measure three times and cut once - once you have cut that wood, if you got it wrong, it's back to the hardware store you go for a replacement piece.
Fix remaining bearers to posts, using either a framing anchor or housing joint. Check all levels and angles once again.
Set the Joists on top of Bearers every 400 – 600mm for hardwood decking using framing anchors. You need to put some fall to the Joists for water run-off - 1:100. In connecting your Joists to the Bearers you can either lay the Joists directly over the top of the Bearers or slot the Joists into a Bearer. This is into:
.JPG?timestamp=1564233752997)
Cement Sheet Installation
Next we are installing the cement sheeting over these. First off, please put on a dust mask and cut these, if you need to, outdoors. Determine sheet layout and expansion joint placement for using tongue and groove boards. This is measuring thrice and installing once!
.JPG?timestamp=1564237178263)
Cut desired sheets (if cutting is needed) and seal cut and exposed sheet edges with two coats of Wattyl Killrust Heavy Duty Primer or equivalent.
Apply a continuous bead of construction grade adhesive to all timber framing you are going to lay cement sheets over (all those joists). As some of these adhesives can be quick to dry it is recommended you do this part of the project in sections/halves or call in some mates to help you out for an hour or two.
.JPG?timestamp=1564236767842)
Install the first sheet with mesh facing down. NB: fasteners (nails) should be installed later. Install second sheet in place and fix fasteners (nails) into first sheet adjacent to tongue and groove.
Install 2 x 5mm spacers at butt joint for next sheet. Install next sheet to create butt joint on joist. Remove spacers once sheet is installed.
Fill 5mm gap with construction grade sealant. Once we get to the tiling stage a membrane will be applied as per the manufacturers instructions - this is not part of that - this is part of correctly installing the cement sheets.
.JPG?timestamp=1564236897644)
Continue in this process of glue onto joists, sheet lay, gap, tongue and groove fit.
Double Secure: All Tilers will recommend that you also double fasten along each sheet with 50ml sheet screws or Batten screws. This will add extra strength to the deck - make it extra strong. We used Bugle Head Timber Batten Screws. You can do this part after all the sheets are glued down.
Once you have laid all the cement sheets for that day, make sure there are plenty of fasteners connecting each sheet to the joists below. Then fill all the tongue and groove and butt joints with a construction grade sealant and scrape with your spatula to ensure they are all flush after the sealant has been put on.
.JPG?timestamp=1564236962855)
.JPG?timestamp=1564237018903)
Avoid excessive foot traffic on the deck for at least 24 hours to allow sealant to set and dry out. Adverse weather conditions may increase this period to 48-72 hours. Once sealant has fully dried, the sheets should be protected from damage and the likelihood of excessive water until the final finishes are applied.
While that's happening, measure out the other half of the deck and think about the membrane installation and picking out some tiles and maybe think about how all that rainwater that would have soaked into the wood can now be caught and funnelled into the garden!
Tools And Products To Help You Get It Done From Johnson Brothers Mitre 10 Hardware

Makita 18V Li-Ion Circular Saw Skin* - $199.00
• 165mm. • Bevel cuts up to 50°. • DSS611Z. *Batteries & charger sold separately.
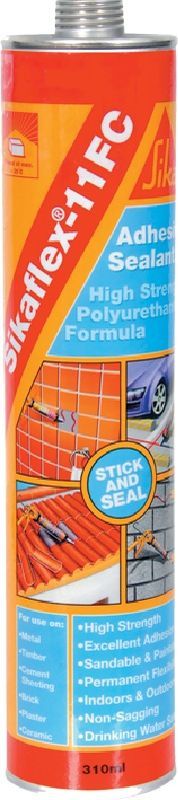
Sikaflex Adhesive: $18.25
Ideal for sealing and bonding timber, concrete, bricks, ceramics, metals, polyurethanes and epoxies.

MAKITA 18V BRUSHLESS 2 PIECE COMBO KIT: $399.00
18V. 3.0Ah. Kit includes: 18V Brushless Hammer Driver Drill, 18V Brushless Impact Driver, 2 x 3.0Ah Battery with Gauge, Fast Charger and 18V Brushless Compact Twin Case.
Ride With Bahco
Purchase any BAHCO® product between the 1st of July to 31st of August 2019 for your chance to WIN an indian® Scout® Bobber valued at $19,995*
*Only available at participating stores.*T&C’s apply.
See the bike at Johnson Bros Mona Vale
http://info.bahco.com/Ride-with-Bahco.html


Click on logo to visit Johnson Brothers Mitre 10 website
Johnson Bros Mitre 10 - Avalon (02) 9918 3315
Johnson Bros Mitre 10 - Mona Vale (02) 9999 3340
JBH Timber & Building Supplies (02) 9999 0333
JBH Fencing & Landscape Supplies (02) 9970 6333
www.johnsonbros.com.au Online store: jbhmv.com.au
