May 14 - 20, 2017: Issue 312

Go Outside And Play: Creating Garden Spaces To Connect Children With Nature

Johnson Brothers Mitre 10 New Store
73 Bassett Street
Mona Vale - Online Store: Jbhmv.Com.Au

Johnson Brothers Mitre 10 Hardware have moved their Mona Vale store to 73 Bassett St Mona Vale. Only 300m west on the same side of the road. The great new store opened on Monday April 3rd and means residents don’t have to lose time in traffic going further afield to pay higher prices. The great Online Store (link above) has thousands of items listed under 114 headings - some of the items shown here drawn from the Garden lists.

One of the favourites among residents is the new Greenlife Garden Centre, filled with natives, annuals and some wonderful pots from small to gigantic, as well as water features. Johnson Brothers have an on-staff Horticulturist who can help you with whatever you need to know. The new store has parking for 150 cars as well, so no weekend hassles in car parks either.

This week, a few Garden ideas to make your garden a place your children will want to enjoy year round.

Features that enable children to explore and experience the natural environment are a great way to keep your young adults in touch with the real world and get plenty of fresh air and roses into those little cheeks.

For many of us having children and grandchildren now what we heard while growing taller was “Go outside and play.” This remains one of the best bits of advice any generation can pass on to the next.

As you can see from the photograph above we have a few dads in our community who would rate 10/10 for making adventure spaces for children that will inspire, make a place to play or a place to simply relax ‘among the gum trees’- all without harming the gum tree! Gardens that spark imaginations and connect children to nature are easy to do - they just require a little bit of looking at things from a smaller person’s height and listening to what those who have created spaces for youngsters recommend.

A natural environment in a children’s service is an environment which includes natural elements. 
Natural environments may include: 
• gardens where children can grow their own plants – edible gardens!
• sandpits for sensory, symbolic and physical play 
• digging patches where children can use garden equipment 
• a range of planting to encourage a variety of modes of play such as playing with gum nuts, small branches, flowers, stones and bark 
• small pits of pebbles, gravel, course sand and smooth river rocks for fine motor and imaginative play 
• plants for smelling and picking 
• plants that encourage birds, butterflies and other insects 
• trees which provide shade 
• worm farms and compost areas for environmental education 
• water play areas for sensory play.

When thinking about the design of an outdoor space for children the following opportunities for children should be provided: 
• to explore and develop a relationship with the natural environment; 
• to gain a sense of freedom; and 
• to explore and to learn the skills required to manage self risk. 

It is not necessary to redesign the whole outdoor space in order to include natural features. 
In addition to trees and other smaller plants and shrubs, pots, tyres and tubs may be used to contain natural materials for play such as stones, sand, soil etc. Flowers can be grown in small tubs and gardens for the children to grow their own plants can be created in raised beds which can be constructed or bought. The Vegepods available through Johnson Brothers are a great way to interest children in where what is on their plates stems from.


HEXIES TIERED RAISED GARDEN BED: $99.00 - 35(H) x 77(W) x 90(L)cm. Paperbark or woodland grey.  (Plants sold separately). Garden Products and Wheelbarrows Are Ready to Assemble. Prices May Be Higher in Some Areas Due to Freight.


GARD&GROW® MESH GARDEN CART: $99.00 - 300kg carrying capacity.  Steel frame. Waterproof tray liner.  Foldable sides.


GARDMAN 3 TIER MINI GREENHOUSE: $29.00 - 126(H) x 69(W) x 49(D)cm. Sturdy steel frame. (Pots & plants sold separately.) 
Garden Products and Wheelbarrows Are Ready to Assemble. Prices May Be Higher in Some Areas Due to Freight. 

Or make your own - try out this version from an earlier DIY page:

How to Build Your Own Raised Garden Bed
by Paul Johnson

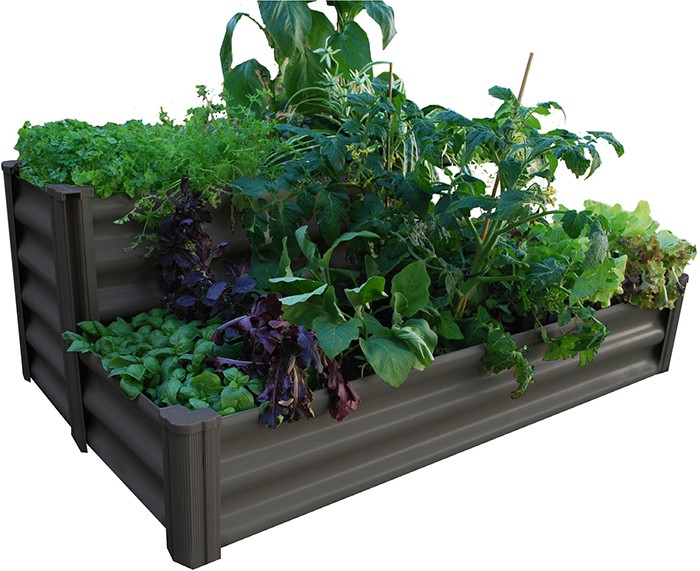
We are now coming into the final month of autumn, and this is the optimal time for planting your veggies. Anyone who has attempted to create a ground level veggie patch will no doubt have experienced the inevitable back pain and frustration of compacted soil. For this reason I have provided a step by step guide to building your own raised garden bed that allows you to bring in quality soil that is at a comfortable height.

What you will need:

For the garden bed:
1 lengths of 100 x 100mm timber @ 2400mm (cut into 600mm lengths)
6 lengths of 50 x 150mm timber @ 2400mm
6 lengths of 50 x 150mm timber @ 1200mm
48 x 75mm galvanized woodscrews

It is important not to use treated timber in this application since the chemicals can affect the edibility of your garden produce. For the ecologically conscious JBHT (Johnson Bros’ timber yard at the Mona Vale branch) offers a section of plantation grown hardwood that is perfect for in ground applications.

For animal proofing:
16 x 50mm galvanized woodscrews
1 x 3m length of 25mm PVC pipe (cut 4 x 300mm lengths off)
2 x 3m lengths of 12mm PVC pipe (cut 2 x 2m lengths off)
8 x 50mm pipe brackets
1 length of 2400 x 1200mm mesh
1 roll of bird netting at least 3m in length

Start on a flat surface with one piece of 100 x 100mm and one 2400mm length of 50 x 150mm timber. Lay the 2400mm length on its thin edge and fix the 100 x 100mm length perpendicular to it at one end with two 75mm screws. Fix another 100 x 100mm length at the opposite end in the same fashion. Repeat this with a short length at each end before adding the next two layers of each side.

Once all lengths are secured there should be a 150mm length of 100 x 100mm timber protruding from each corner. Flip the bed and move into place so that these protrusions are supporting it. Mark the position of each leg in the soil and then dig a 300mm deep hole for them to slide into. Once the bed is in place, line the ground inside it with mesh in order to keep out burrowing rabbits.

Next comes the animal proofing to prevent birds and possums from attacking your crop. Fix the four pieces of 25mm PVC at even spacing on the inside of the 2400mm lengths using two pipe brackets and four 50mm woodscrews per piece of pipe.

Fill your bed using high quality soil, and then place the 12mm pipes across the width of the bed by inserting each end into the 25mm pipes. Throw your bird netting across the pipes and you have a pest proof garden bed that is ready for planting.

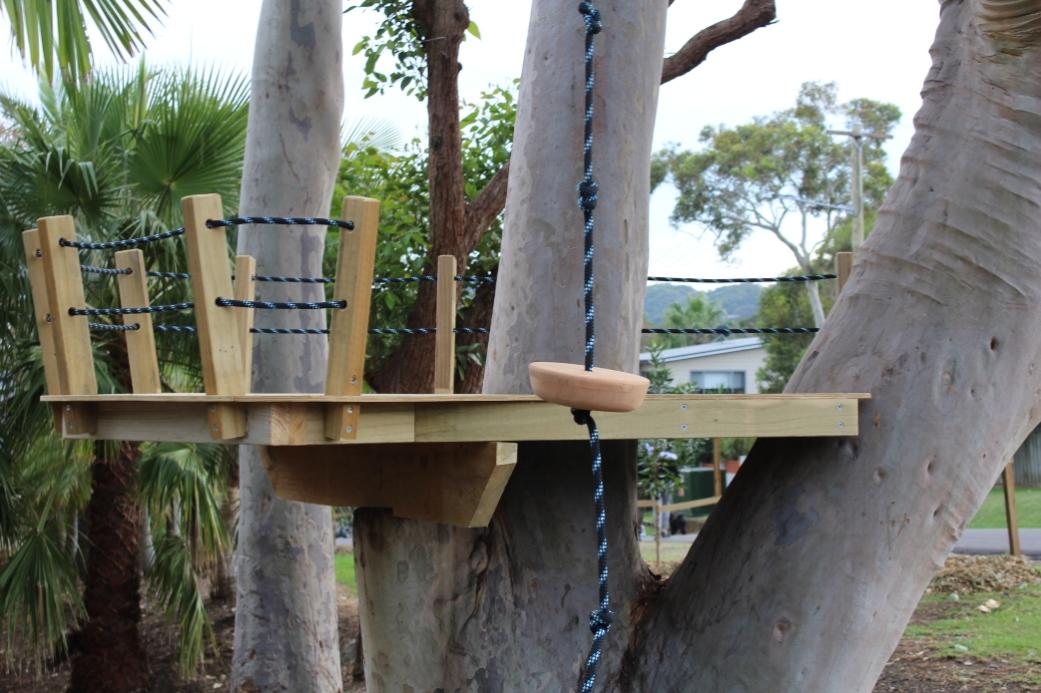
How to Install A Sand Pit for Play

We may not need a sandpit in our backyard, being already surrounded by areas where children may be taken to build sandcastles and all sorts of sandy worlds. If you have younger children who may enjoy being out of colder winds, this idea may be more suitable for a few years until they grow out of wanting a sand pit and then you could utilise it for use as another garden bed. 

As stated above, don't use a timber that has been treated with chemicals for this idea - some sleepers have been treated with chemicals which will not be suitable for use - ask the trained Johnson Brothers Hardware staff which sleepers they would recommend for such a purpose. 

For the Sand Pit;

Treated Pine Sleepers or Hardwood Sleepers
Sand
Galvanised nails or spikes
Perforated drainage pipe or tiles
Wooden pegs
Rocks, stones or coarse gravel

Choose the site for your sand pit, taking into consideration trees that may drop leaves and in particular exposure to the sun. Measure out what size you want it to be and peg with string these four sides as markers. Excavate the selected area to about 200mm below the grass or finished sand level. The top layer of grass, if digging this, can be used to repair bare spots in your lawn. 


   HORNET GENERAL PURPOSE TOOL KIT: $17.95 - 6pce.       LUFKIN TAPE MEASURE: $19.95 - 8m x 25mm.

    
SUPERCRAFT 7PCE HEX KEY SET: $18.00 -                           SUPERCRAFT 3PCE ADJUSTABLE WRENCH SET: $29.00 -                                  Available in metric or imperial.                                                           Includes 150mm, 200mm and 250mm wrenches

Prepare a flat bed for the sand to sit on. If your subsoil is clay install a perforated drainage pipe, drain tile or a deep hole in the middle of the pit and then cover with crushed rock, stones or coarse gravel before replacing the soil.

Cut your timber sleepers to the measurements you want and then lay these along the four sides and then fasten together using galvanised nails or spikes. You are now ready to fill the pit with sand. Some may choose to lay a weed mat prior to this, if they have a problem with weeds. Ensure you use clean washed sand so that when your littlies outgrow their sandpit this too may be mixed in with other soil to benefit some other area in your garden.

A Tree Stump Circle

Another nice idea, if you know a tree lopper, and one that can also disappear once outgrown, is a circle of tree stumps for all those young conferences or doll Tea Parties that take place in the great outdoors. Just choose some that are the right height and size for your youngsters and let the games begin by asking the children where to put these and helping them design some artistic details to put on them - these have been painted with glow in the dark paint - but little butterflies and flowers or a VJ or two may be what your youngsters could put on theirs:


Slices of tree stumps also make great heavy-duty rolling plant stands for those who have installed gigantic pots in their outdoor areas, filled with resplendent plants, that they sometimes want or need to move for when that area is needed to be used for something else or the plant needs to be moved to get some winter sun. Simply attach some load bearing wheels to one side of your slice of stump and ease the pot onto it and wheel away. When you have moved it to where you want it to be, simply chock the wheel.

Tax Time Tool Blitz
The products shown in this page are from the current Johnson Brothers Mitre 10 catalogue which runs until May 21st and available to read online HERE
Johnson Brothers Mitre 10 have also extended their online store range (link above) with thousands of products available. 


MAKITA 18V BRUSHLESS 2PCE KIT: $645.00 - Includes hammer driver drill, impact driver, 2 x 5.0Ah batteries, rapid charger and carry case.DLX2176T. Free Brushless Angle Grinder Via Redemption* Redemption website: Makita.com.au/redemption offer available until 30th June 2017. 


MAKITA 18V LI-ION 4PCE BRUSHLESS KIT: $1, 049.00 - Includes hammer drill, impact driver, circular saw, angle grinder, 2 x 5.0Ah Li-Ion batteries, rapid charger, bag and bonus accessories. DLX4096TX1. Free Brushless Laminate Trimmer Via Redemption* Redemption website: Makita.com.au/redemption offer available until 30th June 2017.


GEELONG SITE BOX: $349.00 - 700(H) x 1230(W) x 636(D)mm. Gas struts. 
Also available - Site Box Castor Set. 4pce: $79.00

Products advice is available from the trained friendly staff at Narrabeen, Mona Vale and Avalon Johnson Brothers Mitre 10. 

Click on logo to visit Johnson Brothers Mitre 10 website

Johnson Bros Mitre 10 - Avalon            (02) 9918 3315

Johnson Bros Mitre 10 - Mona Vale     (02) 9999 3340

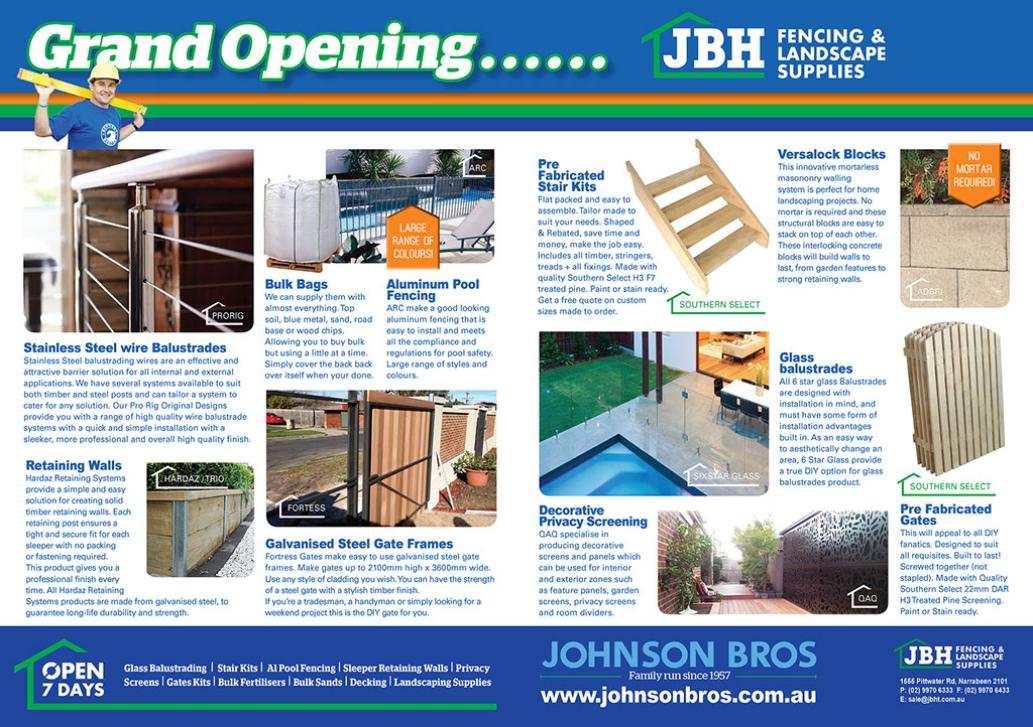
JBH Timber & Building Supplies          (02) 9999 0333

JBH Fencing & Landscape Supplies    (02) 9970 6333

www.johnsonbros.com.au Online store: jbhmv.com.au

Important 
All information and tips in this publication are of a general nature only and neither Johnson Brothers Mitre 10 or Pittwater Online News does not warrant the accuracy or completeness of the information and tips in this publication. This publication is not intended to be a substitute for expert advice. Johnson Brothers Mitre 10 advises you to always consult an experienced and qualified person when undertaking jobs of this kind (including consulting a qualified tradesperson such as an electrician or plumber where relevant expert services are required). 

You should also consider any safety precautions that may be necessary when undertaking the work described in this publication (including wearing any necessary safety equipment such as safety glasses, goggles or ear protectors or hard hats). The information and tips in this publication are provided on the basis that Johnson Brothers Mitre 10 and Pittwater Online News excludes all liability for any loss or damage which is suffered or incurred (including, but not limited to, indirect and consequential loss or damage and whether or not such loss or damage could have been foreseen) for any personal injury or damage to property whatsoever resulting from the use of the information and tips in this publication. 

Pittwater Online News and Johnson Brothers Mitre 10 also advises there may be laws, regulations or by-laws with which you must comply when undertaking the work described in this publication. You should obtain all necessary permissions and permits from council and/or any other relevant statutory body or authority before carrying out any work. Major projects published in this publication always list these and/orlinks to where you may research what your own project requires to meet regulations.

Previous DIY Pages:

Decking Timbers  Caring For Your Deck Decking Finishes  Privacy Screens I Privacy Screens II  Privacy Screening Hardwoods  Autumn Paths and Lawns  Insulation Batts Plasterboard  Ventilation - Edmond's Ecofan Blackboards for Children and Home Spring Lawn Care Shade Sails & Watering  Basic DIY Tools DIY Tools - Power Drills Recycle Your Trampoline into An Air Bed  How to Build Your Own Backyard Cricket Pitch Christmas Lights Displays around House and Garden Summer Mildew - Refresh, Renew How to Fix Things That Drip and Bump in the Night Time To Plant Winter Vegetables in  a Raised Garden Beds Layout Organsing Your Tool Shed  Make Your Own Weathervane Installing A Garden Watering System  Decking Oils  How To Make Garden Compost  How To Winter proof Your Lawn How to create Shabby Chic effect on Timber Furniture How to Build Your Own Raised Garden Bed  Growing Your Own Winter Vegies Winter Heating Guide Prepare Your Yard For Winter Eradicating Noxious Weeds From Your Yard How to Fix Furniture Finishes Part I How to Repair Scratches, Dings, and Dents of Furniture Surfaces - Part II Winter Draughts Fix  Classic Wooden Tool Carrier Spring Garden Checklist Part I  Install Your Own Skylight  Retaining Walls for Saving Soil and New Spring Garden Beds  Summer Salad Garden Native Plant Garden for A Fairy Arbour Renewing Short Flight of Exterior Stairs Deck Maintenance DIY Summer Tasks You Can Do In Time to Get to the Beach  Garden Ponds for Attracting Birdlife, Dragonflies and for the Soothing Sounds of Water  Salt Air: Maintenance and Protection Creating an Outdoor Dining Arbour, Gazebo or Patio - Part I Creating an Outdor Dining Arbour, Gazebo or Patio Part II Autumn Garden Tasks  Autumn DIY Jobs: Waterproof Your Home Checklist  Dealing With Dampness Inside the Home  Fixing Your Fence  Repairing and Replacing Damaged Decking boards  DIY Toy Box and Snow Globes: School Holidays Fun - Winter 2015  DIY Wooden Toy Cars and Perfect Painted Flowerpots: School Holiday Fun - Winter 2015  Shoring Up an Under House Earth Bank – Installing a Basic Retaining Wall  DIY One Shelf Sideboard  Early Spring 2015 Garden Care Salad Garden For Children  Keeping Your Garden and Home Cool in Hot Weather  Classic Beach Garden and Camping Chairs 3 Portable Versions Anyone Can Make DIY Outdoor Furniture Mark I: Park Benches for Your Garden Make Your Own Scooter or Skateboard: Summer 2016 Fun  How to Install a Solid Core Door and Door Furniture  Summer Garden Jobs: Pruning A Hedge  How to Make A Swing Chair - With A Frame for Garden Setting  Garden Jobs for March to Make A Beautiful and Healthy Spring  Keeping Outdoor Nooks Warm During Cooler Months  Children’s Step Stool with Storage  Stop Winter Rain Lawn Loss and Soil Erosion on Slopes  DIY Garden Shed: Part 1 of 4 - Base  DIY Garden Shed: Part 2 - Framing Walls  DIY Garden Shed: Part 2b - Gable Roof Framing  Garden Shed Part 3: Roof Installation  DIY Garden Shed: Weather- boards - Door And Window Installation And Paint Finish DIY Coffee Table With Chessboard Inlay  Spring Gardening: Feeding Your Soil And Plants - What Works For Each Plant  DIY Sandstone Flagging Parking Area - Platform  DIY Pre-Summer Checklist For A Safe Home   Summer Spruce Up: Interior Paint Tips and Three easy steps to rejuvenate your timber deck The Perfect BBQ Garden Setting DIY Water Wise Garden   DIY Side Gates  DIY Storm Preparation And Home Protection  One To Two Day DIY Weekend Spruce Ups  Vegepods For Autumn Planting + Easy To Make Lego Table Or Student Desk That Can Be Dismantled + Johnson Brothers Mitre 10 Online Store  Johnson Brothers Mitre 10 Great New Mona Vale Store: Still In Bassett Street - number 73  Johnson Brothers Mitre 10 New Mona Vale Store: The Greenlife Garden Centre  

______________________

John and Bob Johnson - The Johnson Brothers Profile  John William Alfred Johnson - The Eulogies for those who could not attend Mass

Australia's Prime Minister Visits Mackellar - Informal Afternoon Tea with Hon. Malcolm Turnbull October 2016

Copyright JBH Mitre 10, 2017. All Rights Reserved.