November 30 - December 6, 2014: Issue 191
Late Spring Deck Maintenance
Now is the best time to do some deck care – an annual task, cleaning then restaining or resealing your deck woods now will protect them against high Summer’s hot sun and prevent wood rot and deterioration, which can lead to the necessity of replacing some parts or the whole of your outside decking areas.
As an added incentive JBH – Mitre 10 are currently running a competition which will add a great new BBQ or 45L esky to your decking area. The product being promoted is Intergrain, which is also what we prefer to use due to its long wearing and high quality finishes.
You can find out more about this competition here: www.johnsonbros.com.au/intergrain-summer-giveaway-2014
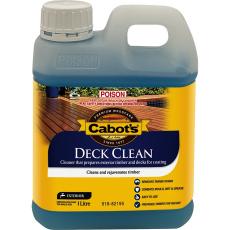
The first part of this annual task is to clean the deck itself – high pressure water cleaners work well here or there are now available products designed specifically for cleaning decks. Johnson Brothers Mitre 10 stock these – just ask in store for advice on what suits your deck best and ensure you also buy a long handled stiff bristled applicator – will save your back!
Deck finishes
Deck finishes fall into two categories: sealers and stains. Sealers are clear finishes while stains are available in different "tones" or colours. Both sealers and stains penetrate the wood, stand up to foot traffic and protect from the elements. Paint, an opaque finish, forms a surface film on the deck and eventually shows wear from foot traffic, which is tricky to fix when reapplying the finish.
With so many deck finishes available, making the right choice may seem daunting. Take into consideration the location of your deck (does it get sun all day or shade?), what type of wood it is and how you want the finished, treated deck to look. Paint, clear finish, semi-transparent or opaque stain are all possible finishes.
Select a finish that will repel water, preserve the wood (with a mildew inhibitor) and screens out UV rays – the label should list all 3 features.
While clear deck finishes allow the natural grain of the wood to show through, they are not as effective as pigmented finishes at blocking UV rays. The best UV protection is found in a combination of pigments (colour) and chemical inhibitors, but even these must be re-applied every year. Another point to remember is that heavily shaded decks are prone to mildew. After the initial cleaning and finishing, apply a deck cleaner containing a mildew inhibitor on an annual basis.
Using coloured finishes
If you are looking to apply a coloured finish to your deck, the good news is that the more pigmented the finish, the more efficient it will be at blocking UV rays and the longer you can go without having to re-apply it (sometimes up to 3 years). However, heavily pigmented finishes are a little more difficult to apply as they can leave "lap marks" where the finish may not have been applied evenly. Choose solid-colour finishes made specifically for deck surfaces.
Deck finishes can be applied with a brush, pad, roller or sprayer. A roller or sprayer can get the job done quickly but you should use a brush for the first coat of finish on a new deck. Wood will absorb more finish if it is worked in with a brush which results in better protection. Be sure to use the right brush for the type of finish you are applying. Natural bristle brushes are usually recommended for oil-based finishes; synthetic brushes are best for water-based finishes.
Lastly - Do not apply product during midday when the sun and heat are at their height, choose early morning or late afternoon to finish the project. Whichever finish or method of application you choose, be sure to let each coat dry and cure for at least 3 days.
Unless it is constructed with composite material, a wood deck is a surface which must be maintained on an annual basis. Be sure to also check for exposed nails or screwheads and loose deck boards in steps and benches. While a deck is a big commitment, if treated with care it will offer many years of outdoor enjoyment to come.
Key Points for Cleaning your Deck
 1. Remove debris from between deck boards using a putty knife. Pay special attention to the areas where deck boards cross the joists — the structural members underneath the decking.
2. Protect all shrubs and plantings. Wet them and cover them with plastic sheeting.
3. Thoroughly sweep the deck.
4. Choose an appropriate cleanser.
5. Cleaning the deck: Choose a cloudy day when the decking is cool and the sun won’t evaporate the cleaner.
Wood deck: Use a paint roller, a garden sprayer, or a stiff-bristled brush broom to apply the cleaner. Don’t let it pool. Don’t let the deck dry until you’ve scrubbed it clean. Then let it soak according to manufacturer’s instructions (usually about 10 minutes). Rinse thoroughly with clean water.
To clean wood railings: Working from the bottom up, apply the cleaner, scrub, and then rinse. Working from the top down splatters the cleaning solution onto dry wood where it can double-bleach the surface, leaving marks that don’t go away when the lower area is washed. Working from the bottom up means you’ll be splattering onto a wet surface where the cleaner is diluted, leaving no marks.
6. Let deck dry. Wait two days before sealing.
Re-Seal the Deck
 Expect to reapply clear sealers and toners annually. Reapply stain finishes as needed (every other year is a good routine) using the same or a slightly darker colour. Be sure to wear gloves, a safety mask, and eye protection when applying stain and sealers.
1. Choose a two-day period when you’ll have clear skies and moderate temperatures.
2. Lightly sand the deck. Use a pole sander equipped with 80-grit paper to remove any furriness caused by washing.
3. Replace any missing or popped nails and screws. Replace protruding nails with deck screws slightly longer than the nail. If a nail only slightly protrudes, you may do more harm than good trying to pull it out; simply nail back down.
4. Apply the sealer or stain. Use a roller to apply the sealer to the decking, covering three or four boards at a time. Use brushes and small rollers for railings, planters, and benches. Don’t let the sealant dry or puddle. Two thin coats is better than one thick one.
And in Midsummer: Inspect and Repair Your Deck
When the weather is warm and dry, it’s a good time to give your deck’s structure a close inspection. Pay particular attention to any areas within 6 inches of the ground or close to sources of water, such as downspouts and planters.
1. Look for signs of rot. Probe structural members with a flat-blade screwdriver. Begin by checking stairs, especially where the stringers (the saw-tooth notched pieces that support the steps) meet the ground. Also check each perimeter post. If you can push the screwdriver a quarter-inch or more into a suspect area, you probably have rot.
Areas of rot that are no bigger than a fifty cent piece can be removed with a chisel, and the hole can be treated with wood preservative. Larger areas may require the structural member to be replaced. Consult a professional carpenter or builder for an estimate for repairs.
2. Inspect the ledger. Using a flashlight underneath your deck, pay special attention to the ledger — that all-important piece of framing that attaches the deck to the house. A damaged ledger is the cause of 90% of all deck collapses.
The ledger should be attached with lag screws, not just nails. The flashing — the metal cap that covers the top of the ledger and prevents moisture from getting behind the siding — should be free of rust and holes.
3. Check remaining joists, posts, and beams. Check all the hardware underneath, especially joist hangers, and replace any that are seriously rusted. Probe for signs of rot on the posts and joists. If anything looks doubtful, call in a pro to provide an estimate for any needed repairs. If a framing piece can’t be easily removed and replaced, reinforce it. For example, if a joist shows areas of rot, you can add a splint of comparable pressure-treated lumber alongside it, attaching the splint with two or three 3-inch deck screws every 12 inches. Then chisel away the rotten area and paint the raw wood with preservative.
4. Check for cracks or rotten decking boards. Not all cracks are a structural threat, but they’ll get worse with time. If you find damage, replace the piece.
5. Check the railing. Give it a good shake to be sure posts are not loose or damaged — loose connections may be remedied by drilling pilot holes and adding galvanized lag screws. Look for cracks that, over time, may have developed around fasteners such as nails or screws. To remedy, remove the fastener and seal the crack with an exterior-grade adhesive. Then, drill a new pilot hole and add a new galvanized deck screw.


Products advice is available from the trained friendly staff at Mona Vale and Avalon Johnson Brothers Mitre 10.

Previous DIY Pages:
Decking Timbers Caring For Your Deck Decking Finishes Privacy Screens I Privacy Screens II Privacy Screening Hardwoods Autumn Paths and Lawns Insulation Batts Plasterboard Ventilation - Edmond's Ecofan Blackboards for Children and Home Spring Lawn Care Shade Sails & Watering Basic DIY Tools DIY Tools - Power Drills Recycle Your Trampoline into An Air Bed How to Build Your Own Backyard Cricket Pitch Christmas Lights Displays around House and Garden Summer Mildew - Refresh, Renew How to Fix Things That Drip and Bump in the Night Time To Plant Winter Vegetables – Raised Garden Beds Layout Orgainsing Your Tool Shed Make Your Own Weathervane Installing A Garden Watering System Decking Oils How To Make Garden Compost How To Winter proof Your Lawn How to create Shabby Chic effect on Timber Furniture How to Build Your Own Raised Garden Bed Growing Your Own Winter Vegetables Winter Heating Guide Prepare Your Yard For Winter Eradicating Noxious Weeds From Your Yard How to Fix Furniture Finishes Part I How to Repair Scratches, Dings, and Dents of Furniture Surfaces - Part II Winter Draughts Fix Classic Wooden Tool Carrier Spring Garden Checklist Part I Install Your Own Skylight Retaining Walls for Saving Soil and New Spring Garden Beds DIY Summer Salad Garden Native Plant Garden for A Fairy Arbour Renewing Short Flight of Exterior Stairs