This Issue two great beginner woodworking projects that will get younger DIYers comfortable with the basics of building with wood. Some of the projects can be completed in a weekend and others in just a few hours. These are also projects you can do together and can be expanded, in the case of the Simple storage box, by allowing that young creative to decorate it as they choose – something mural like, or flowery, or a simple paint or varnish. Then they have something they have made that may inspire cleaning up their room (only joking!) and which they can have for years to come.
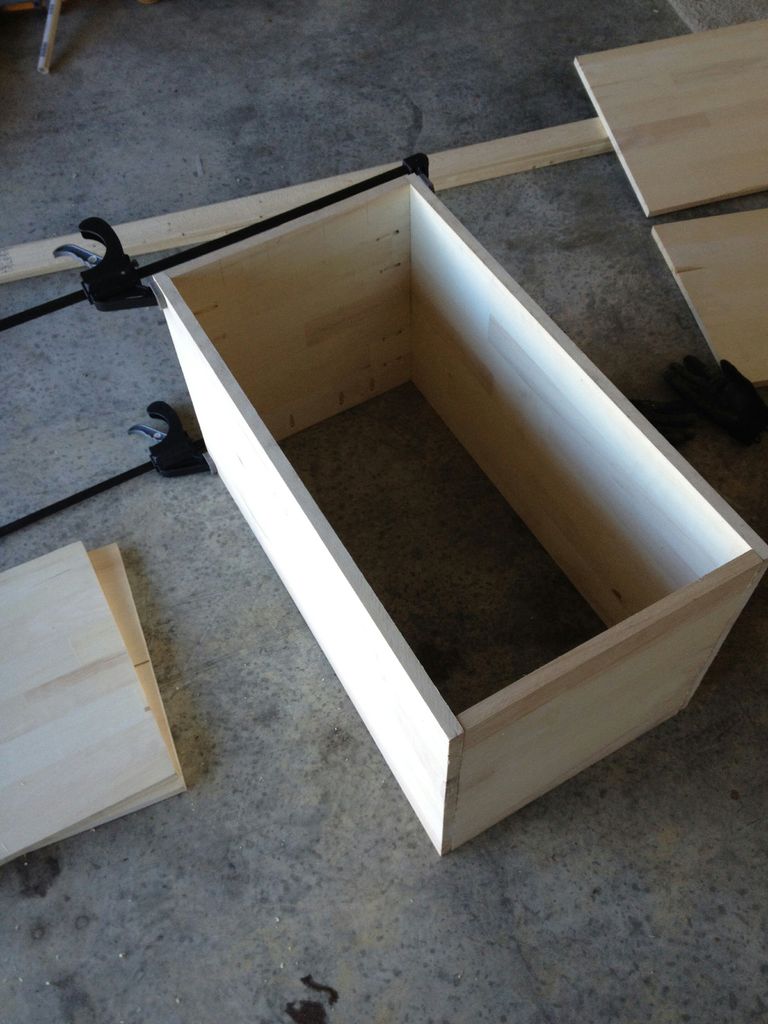
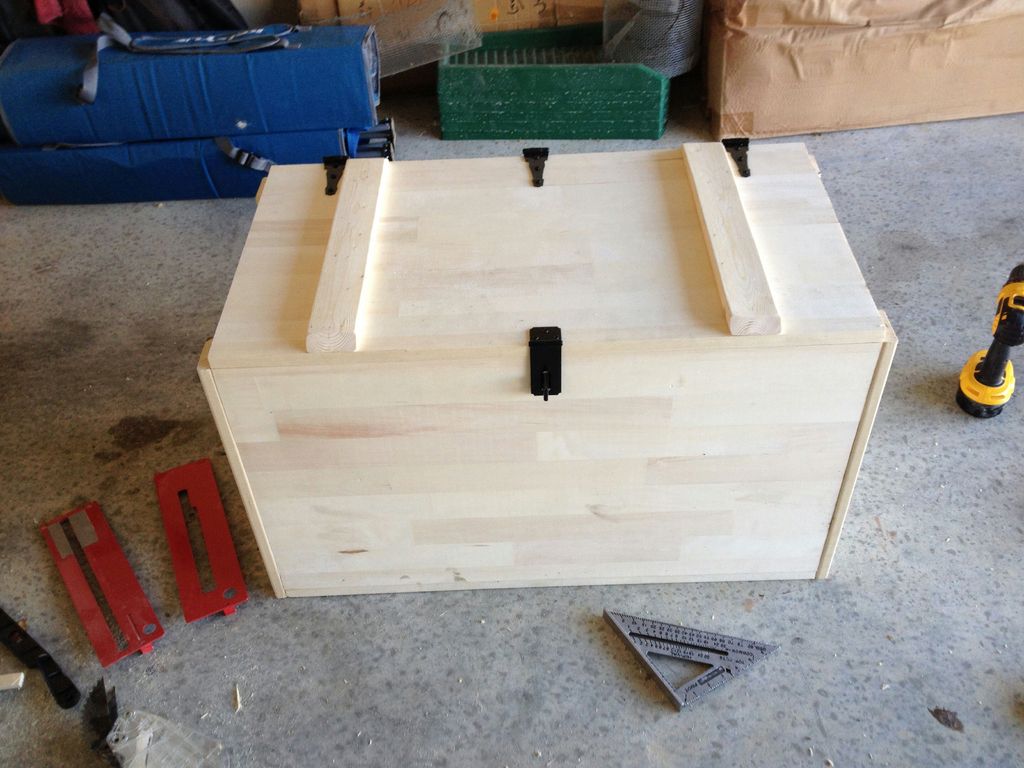
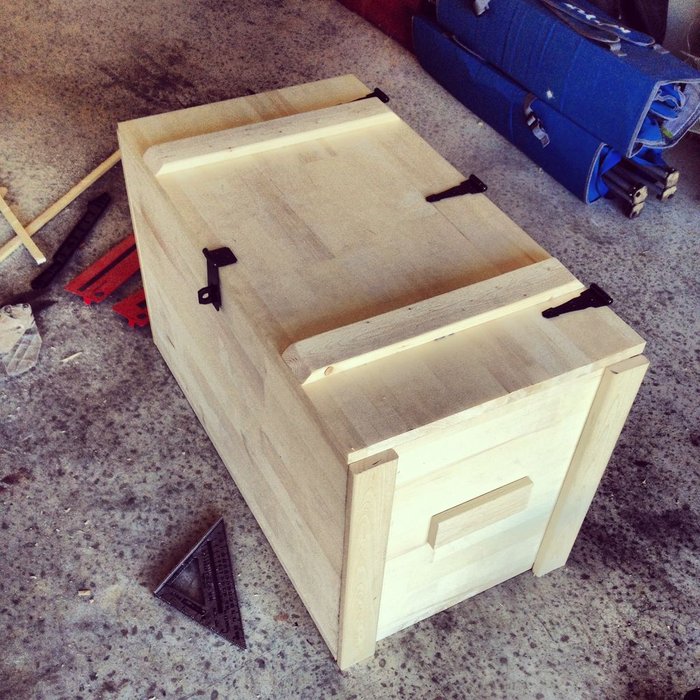
Simple Storage Box
This DIY will show you the basic concept behind the construction of this box. These boxes can be different sizes but this one is roughly the size of a small chest alike the blanket boxes used at ends of beds. Simply adjust the sizings of the timber lengths to suit what size you want.
Materials Needed
2 boxes of 2.5cm wood screws 50
3 hinges (what ever you decide)
2 at 630mm x 685mm - wood of your choice
2 at 665mm x 685mm
1 at 630mm x 630mm
Corner inside holding pieces - x 4 extra lengths
Exterior holding pieces - x 4
Handles x 2 at 15cm
1 clasp hinge
Sandpaper
Varnish or paint finish of your choice
Tools
Drill or hammer
Miter saw
Table saw
Tape measure
Protecting eye wear
Disposable mask
Carpenters pencil
Cut the Wood and Drill Pocket Holes
Cut two pieces for your sides at 630mm x 685mm, the top and base pieces at 665mm x 685mm and the back piece at 630mm x 630mm. It can be a good idea to label each piece of timber. On the base piece, also mark out where the front, back and sides are. After your cutting is done give the pieces a good sand to smooth the edges.
Making the Frame
Lie the base piece on your bench and place the back of the box flush against it. Line up the side pieces and tape them to the back piece so they sit in place. Put the third and final side in place and tap it in place prior to checking is flush and nailing/screwing in place to create the four sides. Tap in some holding nails at ends and mid way prior to either using nails or screws to hold pieces together. Measure the height on the side and cut the to size (4 pieces) and screw them on from the inside.
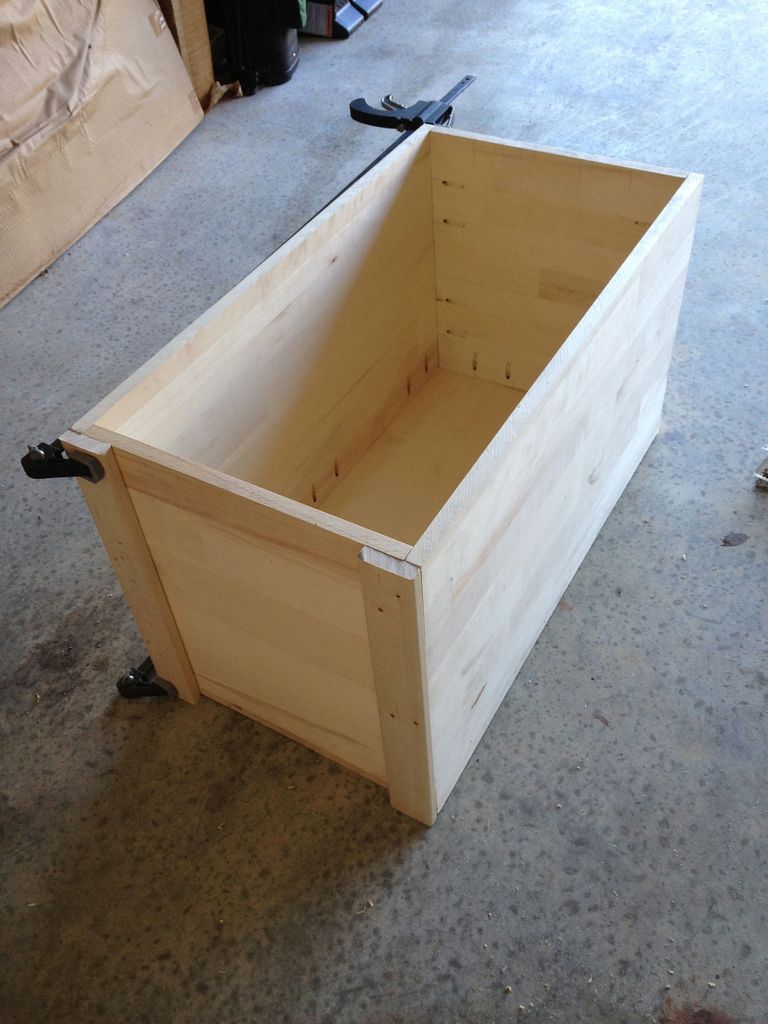
Attach the base of the storage box
Place the base at the bottom of the box, tap holding nails in place at each corner and midway again, check that piece is flush and level and then work your way around the box with a nails or screws to fix the sides to the base.
Lid, Handles, and Hardware
Lay the last panel on the top of your box and mark it and cut it just like you did the base.
Cut 2x 15cm pieces from the and these will be the handles. Measure how high you want to have the handles and screw them into place from the inside. Place the hardware in the places you want them and screw into place. Lastly measure the short length of the lid and cut 2 pieces to that length. Use the miter saw to cut the ends at 45 degree angles. Screw them on the lid from inside.
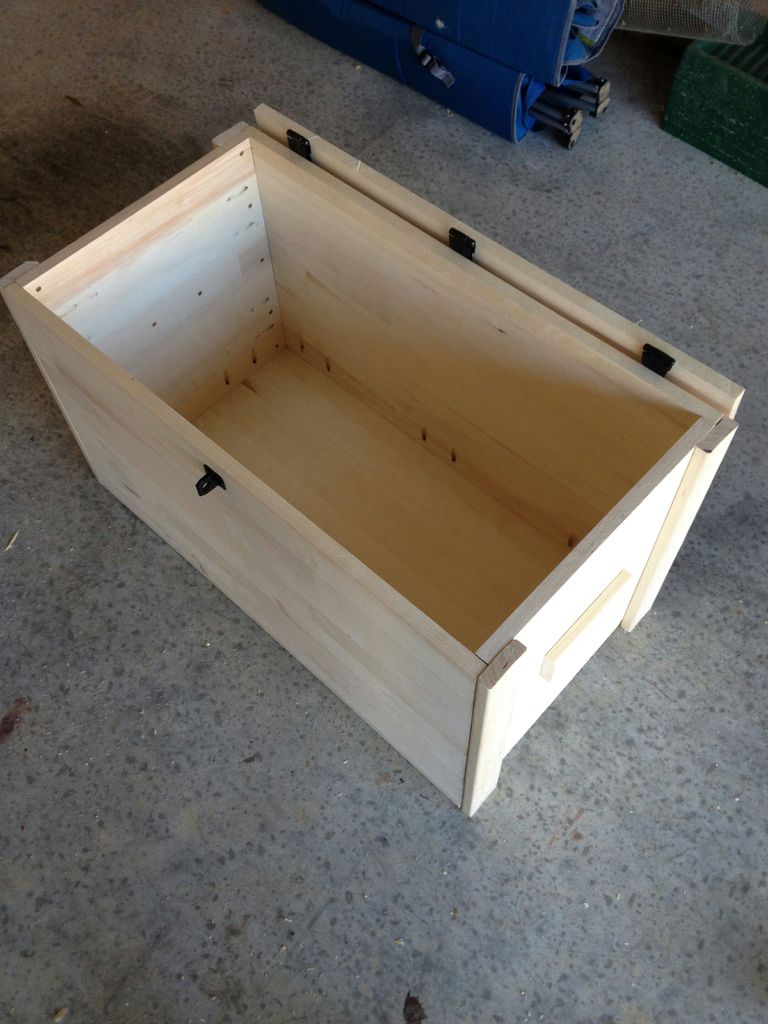
Stain it - Paint it
Now you're ready for some fun - either stain it or paint it, but make sure you seal that raw wood so you have something you will be able to keep with you for years to come.
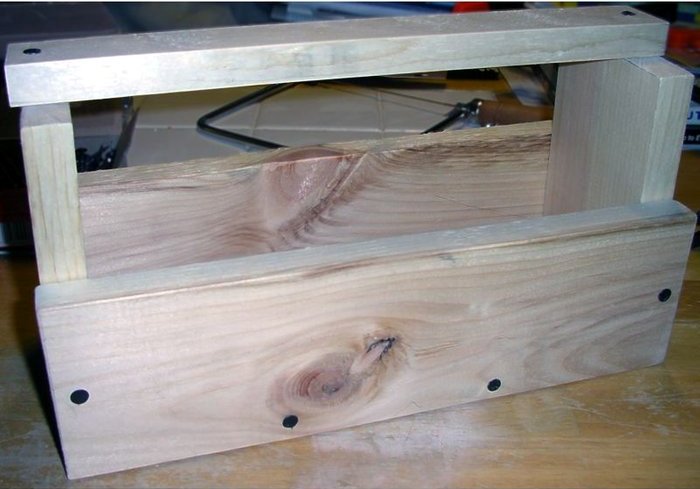
Wood Tool Box
We've run a version of this easy DIY project for littler boys before and had such a great response that running it again for all those littler boys who have started toddling since then may be a great way to spend time having fun with your youngster this school holidays. Once again you can get those little hands busy with some creative decoration once the 'hard work' has been done by bigger hands and thumbs.
Materials
One 19mm x 140mm wooden board, 2.4384 metres long
One (1) Piece of 25 x 89 mm Dowel, 60.960 mm long
Tape Measure
Pencil
Waterproof Woodworking Glue
Sandpaper
Finishing nails
Dowel rod
Varnish or wood stain
Sand paper
Clean cloth
Tools
Hammer
Circular saw (or plain saw)
Drill
Jig saw
Tape measure
Step One
Cut the board into three x 60.96 centimetres (2-foot sections) and two x 30.48 ( 1-foot) sections.
Step Two
Drill 3.8cm (1 ½ Inches) holes 5cm (2 inches) down from the top of the 30.48cm boards.
Step Three
Use the jig saw to cut 45-degree angle triangle from the 30.48 cm boards on either side of the drilled holes.
Step Four
Position the 60.96 cm boards with one laying flat and the other two at right angles on either side. Position the 30.48cm boards at either end of the other three boards to form a box with the drilled holes located at the top. Depending on the finish you choose, sand all the pieces before final assembly.
Step Five
Next, glue and nail the sides to the bottom and ends. Then fasten the ends to the bottom with glue and two or three nails. Nail the box together with finishing nails.
Step Six
For the dowel; trace the outline of this in the end pieces (Inside). We drilled the hole at 1/2", same diameter as the dowel itself. Insert the dowel rod into the holes of the toolbox, as a handle. This is pretty snug so you may not need glue to hold it in, but a little never goes astray if you’re building for longevity. Assembly would probably be a little bit easier if you drill the hole slightly larger and then glued it in place.
Finally, slide the dowel through the ends and glue in place, if necessary.
Step Seven
Give the toolbox once last sand with a coarse-grit sandpaper, sanding with the grain of the wood to avoid scratches. Wipe off the toolbox with a soft cloth. Continue sanding with a fine-grit sandpaper until the box is smooth. Wipe the toolbox again with the soft cloth.
Step Eight
Sand the dowel rod with a fine-grit sandpaper. Varnish or stain the rod in the desired finish. Varnish or stain the toolbox in the desired finish. Allow the toolbox to dry completely for 24 to 48 hours before using.
If that's too many steps - look at this version - easy as!;
The Tools To Get These Projects Done - All At Johnson Brothers Mitre 10
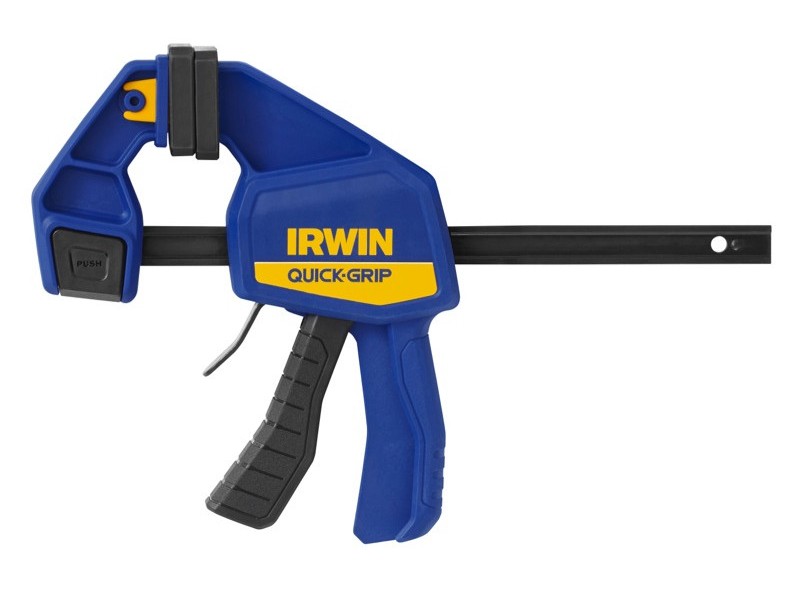
IRWIN QUICK GRIP CLAMP 300MM: $29.99
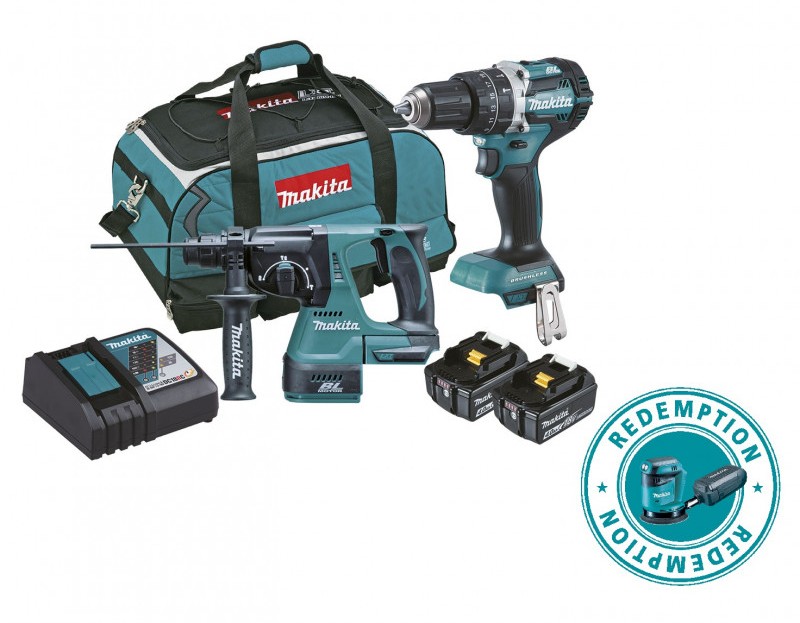
MAKITA 18V BRUSHLESS 2 PIECE COMBO DLX2204M: $659.00
Kit includes: DHP484Z, DHR242Z.
2 x BL1840B, DC18RC & carry bag.
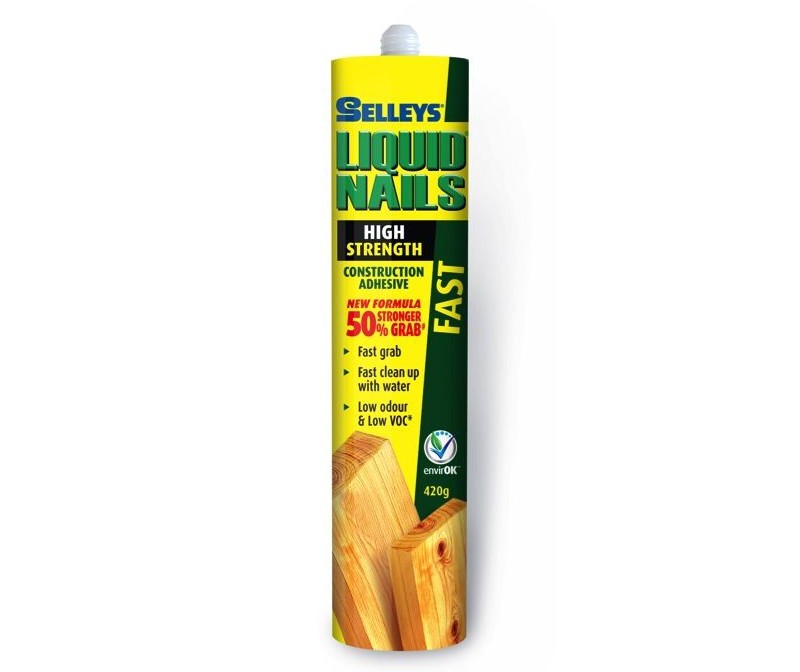
SELLEYS LIQUID NAILS FAST GRAB 420G: $5.95
Fast grab minimises slippage when adhering on vertical surfaces. Water based. Low odour. Heat resistant. Paintable when dry.
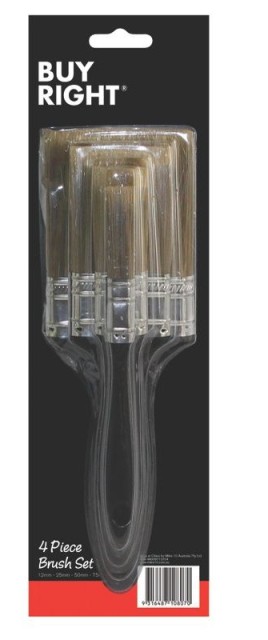

BUY RIGHT® PAINT BRUSH PACK OF 4: $4.50 ACCENT® POLYURETHANE GLUE 100G: $5.19
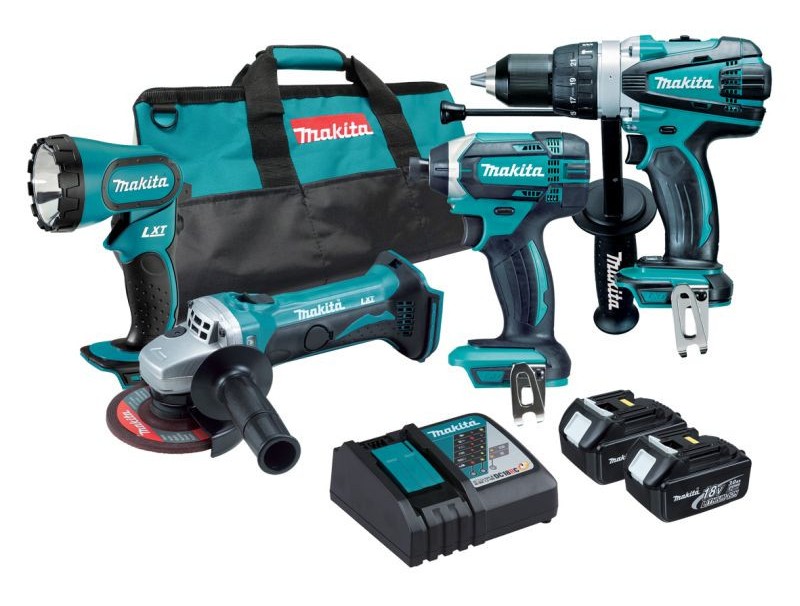
MAKITA 18V 4 PIECE COMBO KIT: $549.00
18V. 3.0Ah. Kit includes: 18V Hammer Drill Driver, 18V Impact Driver, 18V Angle Grinder, 18V Torch, 2 x 3.0AH Slide Batteries, Fast Charger and Tool Bag.
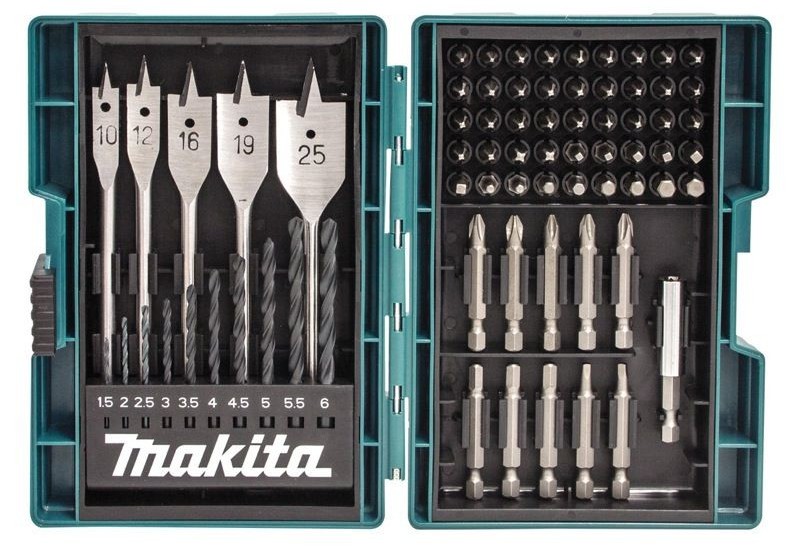
MAKITA 71 PIECE DRILL AND SCREWDRIVER BIT SET: $45.00


Click on logo to visit Johnson Brothers Mitre 10 website
Johnson Bros Mitre 10 - Avalon (02) 9918 3315
Johnson Bros Mitre 10 - Mona Vale (02) 9999 3340
JBH Timber & Building Supplies (02) 9999 0333
JBH Fencing & Landscape Supplies (02) 9970 6333
www.johnsonbros.com.au Online store: jbhmv.com.au