May 25 - 31, 2014: Issue 164
How to Fix Furniture Finishes - Part I
Unless you live in a display home your furniture will take a lot of hits during the normal course of the days; wet glasses leave behind white rings, daily use wears away the finish on the edges of tables and chairs, ink splotches, scratches, dents, and divots that mysteriously appear on wood surfaces can give it a rustic look but if you want to restore it to somewhere near its original beauty a few ideas on how to do this may come in handy. Please note that these would not apply to your antique pieces – leave those to an expert.
 It is also a good idea to identify the wood type your furniture is made from – this will help when choosing wood stains, woodblend putties and finishes for repairs you undertake. If a repair is too big, eg: a large gouge or crack, it is worth thinking about sanding back the whole piece and re-staining or revarnishing it. Although this will take longer the results will be better and it’s very satisfying restoring a piece of furniture that has some family history to it and keeping it for your generation and those to come. A lot of our original Australian furniture has been made by grandfathers and uncles past and their skills, and the pieces made cannot be bought today.
When sanding back an entire piece ensure you are wearing a mask to protect yourself from sawdust inhalation. We also find that removing doors (retain the screws!) will produce better results and make it easier. When using the oils and liquids described below please ensure you are wearing gloves for protection.
For simple repairs and common problems - Finishes
White rings on wood finishes
White rings caused when water vapour penetrates into a finish can be removed by wiping them gently with a cloth barely dampened with methylated spirits. (Black rings indicate damaged wood and require complete removal of the surrounding finish before any repair can be attempted.) Too much alcohol can dull the finish. If that happens, restore a satin sheen by rubbing with extra-fine 0000 steel wool and paste wax. To bring back a gloss finish, use a car polishing compound applied with a rag. To make the repair blend in, go over the damaged area and the entire adjacent surface.
Some people also recommend placing a light cloth over the stain and ironing it for 10-20 seconds, or combining a mix of toothepaste and bicarbonate of soda and using these as a 'buff' before wiping clean; we have not tried either of these methods.
If the underlying colour has been damaged Intergrain wood blend comes in a variety of wood tones to match common furniture finishes. Use them to colour large scratches or edges where the stain has worn away. Apply only to damaged areas, and follow the instructions to achieve best results.
White spots
Shellac and lacquer finishes are not resistant to water and alcohol. Spills and condensation from glasses can leave permanent white spots or rings on these finishes. To remove these white spots, first try polishing the surface with liquid furniture polish; buff the surface firmly. If this doesn't work, lightly wipe the stained surface with methylated spirits. Use as little alcohol as possible; too much will damage the finish.
If neither polishing nor alcohol treatment removes the white spots, the damaged finish must be treated with abrasives. Gentle abrasives can be purchased from your JBH Mitre 10 hardware store. To make your own gentle abrasive, mix cigarette ashes to a paste with a few drops of vegetable oil, light mineral oil, or linseed oil. Rub the ash-oil paste over the stained area, along the grain of the wood, and then wipe the surface clean with a soft cloth. If necessary, repeat the procedure. Stubborn spots may require several applications. Then wax and polish the entire surface.
If rubbing with ashes is not effective, go over the stained area with a mixture of rottenstone and linseed oil. Mix the rottenstone and oil to a thin paste, and rub the paste gently over the stain, along the grain of the wood. Rottenstone is a fast-cutting abrasive, so rub very carefully. The Australian producers of this product recommend you test an area beneath the furniture, where it cannot be seen, to see what effect it has on your wood to begin with.
Check the surface frequently to make sure you aren't cutting too deep. As soon as the white spots disappear, stop rubbing and wipe the wood clean with a soft cloth. Then apply two coats of hard furniture wax and buff the wood to a shine.
Blushing
Blushing is a white haze over a large surface or an entire piece of furniture and is a common problem with old shellac and lacquer finishes. The discoloration is caused by moisture, and it can sometimes be removed the same way white spots are removed. Buff the surface lightly and evenly with No. 0000 steel wool dipped in linseed oil. NEVER use sandpaper on old veneers. Work with the grain of the wood, rubbing evenly on the entire surface, until the white haze disappears. Then wipe the wood clean with a soft cloth, apply two coats of hard furniture wax, and buff the surface to a shine.
Blushing can sometimes be removed by reamalgamation. If the surface is crazed or alligatored, reamalgamation should be used instead of steel-wool rubbing. Purchase a store-bought amalgamator or mix your own. Use methylated spirits on shellac, lacquer thinner on lacquer, a three-to-one mixture of alcohol and lacquer thinner on a lacquer/shellac mixture. If neither rubbing nor reamalgamation removes the haze, the piece of furniture must be refinished in its entirety.
Black spots
Black spots are caused by water that has penetrated the finish completely and entered the wood. They cannot be removed without damage to the finish. If the spots are on a clearly defined surface, you may be able to remove the finish from this surface only; otherwise, the entire piece of furniture will have to be stripped. When the finish has been removed, bleach the entire stained surface with a solution of oxalic acid as the black colour indicates mildew is settling into your furniture. Then refinish as necessary.
Ink stains
Ink stains that have penetrated the finish, like black water spots, these cannot be removed without re-finishing. Less serious ink stains can sometimes be removed. Lightly buff the stained area with a cloth moistened with mineral turpentine; then rinse the wood with clean water on a soft cloth. Dry the surface thoroughly, and then wax and polish it.
If this does not remove the ink, lightly rub the stained area, along the grain of the wood, with No. 0000 steel wool moistened with mineral spirits. Then wipe the surface clean and wax and polish it. This treatment may damage the finish. If necessary, refinish the damaged spot as discussed below. If the area is badly damaged, the entire surface or piece of furniture will have to be refinished.
Grease, tar, paint, crayon, and lipstick spots
These spots usually affect only the surface of the finish. To remove wet paint, use the appropriate solvent on a soft cloth; mineral turpentine for oil-base paint, water for latex paint. To remove dry paint or other materials, very carefully lift the surface residue with the edge of a putty knife. Do not scrape the wood, or you'll scratch the finish. When the surface material has been removed, buff the area very lightly along the grain of the wood with No. 0000 steel wool moistened with mineral turpentine. Then wax and polish the entire surface.
Wax and chewing gum spots
Wax and chewing gum usually come off easily, but they must be removed carefully to prevent damage to the finish. To make the wax or gum brittle, press it with a packet of ice wrapped in a towel or paper towel. Let the deposit harden; then lift it off with your thumbnail. The hardened wax or gum should pop off the surface with very little pressure. If necessary, repeat the ice application. Do not scrape the deposit off, or you'll scratch the finish.
When the wax or gum is completely removed, buff the area very lightly along the grain of the wood with No. 0000 steel wool moistened with mineral turpentine. Then wax and polish the entire surface.
Spot Refinishing
Any repair that involves removing the damaged finish completely - deep scratches, gouges, burns, or any other damage - also involves refinishing the repair area. Spot refinishing is not always easy, and it's not always successful, especially on stained surfaces. If the damage isn't too bad, it's worth trying. If you'll have to touch up several areas on one surface, you're probably better off refinishing the surface or the piece of furniture completely.
To stain one area on a surface, use an oil-based stain that matches the surrounding stain. You may have to mix stains to get a good match. Test the stain on an inconspicuous unfinished part of the wood before working on the finished surface.
Before applying the stain, prepare the damaged area for finishing. Sealing is not necessary. Apply the stain to the damaged area with an artists' brush or a clean cloth, covering the entire bare area. Let the stain set for 15 minutes and then wipe it off with a clean cloth. If the colour is too light, apply another coat of stain, wait 15 minutes, and wipe again. Repeat this procedure until you're satisfied with the colour; then let the stain dry according to the manufacturer's instructions.
Lightly buff the stained surface with No. 0000 steel wool, and wipe it clean with a tack cloth. Apply a new coat of the same finish already on the surface - varnish, penetrating resin, shellac, or lacquer - over the newly stained area, feathering out the new finish into the surrounding old finish. Let the new finish dry for one to two days, and lightly buff the patched area with No. 0000 steel wool. Wax the entire surface with hard paste wax, and polish it to a shine.
In our next DIY Page we will run Part II of Wood Furniture repairs - How to Repair Scratches, Dings, and Dents
________________________________
INTERGRAIN Woodblend Putty - varying wood types – teal/blackwood
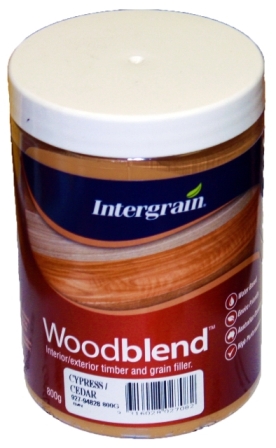 Surface must be in sound condition, clean, dry and free from dust, grease, wax and oil. Indentations and holes must be clear of all loose material. APPLICATION Apply Woodblend with a flexible filling blade or knife. Fill deep holes in approx. 10mm stages, allowing 2 hours drying time between each stage. To ease application, dampen blade with water. Wipe off excess with a slightly damp sponge. When dry, sand to a smooth finish. When using clear finishes, apply Woodblend after the first coat of clear to minimise smudging. For use as a grain filler, thin Woodblend with 5-10% water to achieve required consistency. Apply with a flexible filling blade or knife and allow to dry. When dry, sand back to bare timber, leaving filler only in the grain. IMPORTANT: Keep container tightly closed when not in use.
Clean Up: Water
Uses: Use on all interior and exterior timber surfaces including weatherboards, decking, flooring and furniture. Woodblend can be used to fill nail holes, splits, knot holes and as a grain filler to give a smooth finish to timber surfaces.
Sizes: 180g, 800g
Bases: Vic Ash/Meranti, Jarrah/Merbau, Walnut/Dark Oak, Cypress/Cedar, Teak/Blackwood, Radiata Pine/Baltic
Use and typical specification: Intergrain Woodblend is a water based timber putty and grain filler, suitable for both interior and exterior use. Woodblend has excellent durability, minimal shrinkage and low odour. It is easy to apply and sands to an extremely fine, smooth finish. Woodblend is suitable for use on all timber species and can be coated with water or oil based paints, stains and timber finishes. Woodblend is available in a range of popular timber colours which can be mixed to achieve custom shades.
A large range of Intergrain products are available at Johnson Brothers Mitre 10 stores at Mona Vale and Avalon. Always ask the friendly trained staff for the best products for what you wish to use them for.
Liberon Rottenstone
A very fine abrasive for polishing French polish finishes. Ideal for producing an aged dusty look on newly restored antiques, modern furniture and picture frames etc. Cuts back French polishes. Can be used wet or dry. Apply with a light oil such as liquid paraffin or linseed oil and a cotton or felt pad. Dip the pad into the oil and then into the Rottenstone. Using moderate pressure rub along the grain until the desired level of sheen is achieved. Wipe off excess with a cotton cloth then wipe over with a cloth dampened with white spirit to remove the oil film. Allow to dry before applying a wax. Liberon Ultra Fine Steel Wool (0000) may be used for preliminary cutting back. Always test product on a spare surface or inconspicuous area for colour, compatibility and end result.
Products advice is available from the trained friendly staff at Mona Vale and Avalon Johnson Brothers Mitre 10.

Previous DIY Pages:
Decking Timbers Caring For Your Deck Decking Finishes Privacy Screens I Privacy Screens II Privacy Screening Hardwoods Autumn Paths and Lawns Insulation Batts Plasterboard Ventilation - Edmond's Ecofan Blackboards for Children and Home Spring Lawn Care Shade Sails & Watering Basic DIY Tools DIY Tools - Power Drills Recycle Your Trampoline into An Air Bed How to Build Your Own Backyard Cricket Pitch Christmas Lights Displays around House and Garden Summer Mildew - Refresh, Renew How to Fix Things That Drip and Bump in the Night Time To Plant Winter Vegetables – Raised Garden Beds Layout Orgainsing Your Tool Shed Make Your Own Weathervane Installing A Garden Watering System Decking Oils How To Make Garden Compost How To Winter proof Your Lawn How to create Shabby Chic effect on Timber Furniture How to Build Your Own Raised Garden Bed Growing Your Own Winter Vegetables Winter Heating Guide Prepare Your Yard For Winter Eradicating Noxious Weeds From Your Yard
Copyright JBH Mitre 10, 2013. All Rights Reserved .