April 12 - 25, 2020: Issue 446


Autumn Holidays Projects: Let's Go Fly A Kite + Some handy Painting Tips for Interiors and Sprucing up that Outside Deck

Thank You And Happy Easter

We want to publicly thank all our staff and our customers for the way that they have adapted to the changes that the last month has thrown at us.
As always, we are open for business and our hardware stores are opening extra hours over the long weekend. Our hope is that a trip to your local hardware store might help to make your little part of the world that little bit more enjoyable to be in during these challenging times.

We also want to highlight below some alternative methods of dealing with us for people who are either isolated or wary of entering our stores.
Be it by a bit of painting, a bit of work in the garden or simply satisfying your cleaning OCD, we look forward to helping you with your projects over this long weekend.
Happy Easter,
The Johnson Family

For those that aren’t aware Mona Vale and Avalon now offer eCommerce stores with pick up and local delivery options.
Jbhmv.com.au (Mona Vale)
Jbhav.com.au (Avalon)

Both stores also have an Express 2 hour pick up for phone orders either through the undercover Trade Drive thru at Mona Vale or the back lane off Bellevue Avenue at Avalon
Mona Vale - 02 9999 3340 
Avalon - 02 9918 3315


The Johnson family knows all about loyalty and the Mighty Rewards Program has seen a lot of freebies given to our customers. It currently gives 5 cents in points for every dollar spent, as well as a range of exclusive deals & freebies. Oh, and did we mention it's free to join. Sign up in store today

Johnson Bros Hardware
Email: sales@johnsonbros.com.au
Website: www.johnsonbros.com.com.au

Happy Easter Everyone!
To celebrate Easter and the long weekend of family, rest and DIY Painting, we've got a limited number of limited edition large "Johnson Bros Chocolate Coins" to give away with any paint purchase.


Some Handy Products Available


Scotts Australian Made hand sanatiser back in stock


 An Aussie Natural Antiseptic - JBH have plenty of Bosisto's Eucalyptus Spray in stock

Brrrr - 12 degrees Celsius on Easter Saturday night - time to get toasting marshmallows: 


For Youngsters: Let's Make A Kite

Let's go fly a kite
Up to the highest height!
Let's go fly a kite and send it soaring
Up through the atmosphere
Up where the air is clear
Oh, let's go fly a kite!*

The Autumn-Easter School Holidays have begun and this is a project you can make then try out - as long as you keep moving. As Autumn always brings fresh breezes and some fine weather, now is a great time to get outdoors and have some fun getting some exercise and trying out some of these basic and ever popular kite designs.

Kite making and flying is an ancient art and fun exercise with some of the earliest kites said to have been made in China in the 5th century B.C.

Kites have been employed for more than just fun though - Australian inventor Lawrence Hargrave developing a box kite led to the development of what we call today the aeroplane and all that has developed aviation. His kites were also employed for gathering weather information where the box kites were carriers of data collection instruments such as the Marvin Meteorograph which measured against time, air pressure, temperature and humidity.

Lawrence Hargrave [working on a boxkite, Woollahra Point, ca. 1910] / photographer unknown
"Extract from Miss Gray's [the donor's] letter dated 8th Feb 1979. / My own view is that it [the photograph] was taken on the lawn at the back of his house at Wollahra [sic] Point, and Bradley Head is in the background. I appreciate that I may be mistaken. I think some of the Stanwell Park pictures show him as a dark-haired man." --Digital order no:a4217010- courtesy State Library of NSW

Interestingly a similar design to this was used in a 'plane' for Australia's first recorded flight, which happened at Narrabeen:


SOARING AT NARRABEEN, N.S.W., 1909 - This version: 'George Taylor flying at Narrabeen', N.S.W., 1909. Courtesy National Library of Australia. Pictures nla.pic-an24152661

So -  how to make some kites - and since that too is something that has been around for so long; some classic designs people have made before today from those yesterdays. As these are also done in measurements of inches in some cases, this table will help you change those measurements to suit today's rulers and tape measures:

Inches to centimetres conversion table
Inches (") Centimetres (cm)
0.01 ″         0.0254000 cm
1/64 ″         0.0396875 cm
1/32 ″         0.0793750 cm
1/16 ″         0.15875 cm
0.1 ″         0.2540 cm
1/8 ″         0.3175 cm
1/4 ″         0.635 cm
1/2 ″         1.27 cm
1 ″                 2.54 cm
2 ″                 5.08 cm
3 ″                 7.62 cm
4 ″                 10.16 cm
5 ″                 12.70 cm
6 ″                 15.24 cm
7 ″                 17.78 cm
8 ″                  20.32 cm
9 ″                  22.86 cm
10 ″                  25.40 cm

How To Make A Kite.

Having decided upon the size, the skeleton is to be prepared in the following manner (see Fig 1). A straight, strong, but light, lath should be obtained, of the required length, to form the backbone of the kite; it should be shaped to a point at the 'top. A small piece should be notched out of the lath a short way from the top on each side, and also on each side a little way from the bottom. The former notches are to hold the string which fastens on the bow, the hitter are to catch the strings over which the paper or calico is to be pasted. A notch is also to be cut at the point marked H in the figure. 


The backbone is also known and may be described as the 'standard,' ' straighter,' or' upright,' and is marked in the diagram A b. The ' bow ' or ' bender,' marked c B, should be of a piece of pliant wood, such as may be obtained from the ash or hazel, should a piece of cane not be readily procurable. A piece of a wooden hoop, thinned down to the thickness of a common cane, will be found useful, out of which to form the bow. Whatever it be, it is essential that it be of equal thickness and weight throughout its whole extent, and that its length be about the same as the backbone. 

The exact centre of the bow should be next ascertained, and fastened with thin string to that point of the backbone where the first two notches were cut. A small notch is then to be cut at each end of the bow, and the bow bent down to the points marked B and p. In the diagram the thick lines represent the bow and the backbone of the kite, which are made of wood, as above described ; the thin lines represent string, and should be secured to the wooden frame as follows :— Secure the end of the string at the point e, pass it on then in succession to the points b, f, e, A, f, h, and e, fastening the string at each point, and upon fastening the string from F to E twist it once round the backbone at the point G. The skeleton is then complete; but if the balance is not quite true, shavings from the heavier -side should be sufficient to remedy the defect. The point next to be decided is the covering. All things considered, paper is best for an all-round kite ; paper kites truly are very easily damaged, but then the damage is as easily repaired, and paper is inexpensive and always to hand, old newspapers serving the purpose as well as any other kind of paper. For the largest kites, calico, silk, or thin gutta-percha cloth may be preferable, but even for these very stout paper will be found to answer every purpose. It is to be remembered that small kites require to be made of thinner and lighter material than larger ones. Having agreed to use paper as the covering, it should be cut the size of the kite, leaving a margin just sufficient to overlap the bow and the strings, so as to curl round; the edges of the paper should then be fastened to the frame of the skeleton by means of gum or paste, and left to dry. 

The covering is to be secured to the backbone of the kite by pasting some slips of paper across the back of the kite. If the kite is large it is also well to secure the covering to the cross strings in the same manner. Should it be found that one sheet of paper is of insufficient size, two or more sheets may be pasted together, the edges of which should overlap about an inch. Calico, or materials of that nature, may be sewn on the strings and bow instead of being pasted on, and should in that way also be secured at the back to the cross strings and the backbone. Before securing the. covering to the backbone two holes should be pierced therein, the one at the fifth of the whole length from the top, the other at a trifle less than the same distance from the bottom. Through these holes a string is to be passed and fastened at the back of the kite; this string is known as the 'belly-band,' and to it is fastened the string by which the kite is flown. The kite proper is now complete; but as the kite cannot fly without a tail, the construction of that appendage is next to be proceeded with. Ordinarily, the tail is a long string with pieces of folded paper fastened on to it at regular intervals. Its length depends on the size of the kite and the weight of the string and paper out of which the tail is made, together with, a number of other considerations, all of which experience will soon point out. It should, however, never be less than twelve times the length of the kite, and the longer it is the better, so long- as the kite is big enough to carry it. The tail papers should be tied on by noose knots, and at intervals or from three to four inches. A paper tassel tied to the end of the tail forms a graceful finish. The tail is then complete and ready to be fastened to the bottom of the kite; for convenience of carrying, it is better to keep it rolled up, and to fasten it on only when the kite is in its field from which it is to be flown. 

The use of the tail is to steady the kite and to keep the kite's head to the wind. If the kite seems to rise with difficulty the tail has probably been made too heavy; should the kite dip and plunge, or show a tendency to topple over, the tail is probably too light, and may be weighted with any convenient object, a stone or piece of turf being generally found handy and serviceable. Wings or tassels attached to the end of the bow add to the graceful appearance of the kite, but will be usually found to diminish its flying powers. Experience will in this matter, as indeed in all others, soon teach when tassels may be judiciously affixed and when removed, the state of the wind having very much to do with, all these questions of additions to and ornamentations of kites. How to Make a Kite. (1886, April 24). The Sydney Mail and New South Wales Advertiser (NSW : 1871 - 1912), p. 878. Retrieved from http://nla.gov.au/nla.news-article162815769 

HOW TO MAKE A KITE

Material, needed: A lath 38 inches long, a, piece of string, a piece of thin cane 34 inches long, a sheet of strong paper or 1 yard of balloon fabric. Several newspapers.


First make two notches in the lath, or spine; each about 1 ½ inches from the ends. Make a similar notch in the centre of the cane and attach it firmly to the notch at one end of the spine. Bow the cane by tying a piece of string between the ends; the distance between should be about 28 inches. Without cutting the string, carry it down as far us the notch as thee lower end of the spine; tie it tightly here, and carry it up to the other end of the bow.
Now you have the outline of the kite. Lay it over the material and cut out in the balloon fabric, allowing 13 inches all round for turnings. Tuck in the ends over the framework and sew tightly with strong thread, using over and over stitches. The tail can be made from a long piece of string with twisted 4-inch lengths of paper, tied at intervals about 4 inches apart. In the spine of the kite make two holes for the string; the holes should be about 18 inches apart, the top hole coming about 7 inches from the top of the kite. HOW TO MAKE A KITE (1928, February 22). Northern Star (Lismore, NSW : 1876 - 1954), p. 12. Retrieved from http://nla.gov.au/nla.news-article93662971 


Things To Make And Do: KITES ARE IN— So Make This WHISTLING BOY KITE

AMONG the people of the Far East (who are the world's kite experts) whistling kites are common. This week we give directions for making a whistling kite of a rather unusual design. The sketches show clearly how the kite is made up, in the shape of a boy, the whistle in this case being placed in the boy's mouth. In the East reed whistles are used. You will find it easier to use one of the round, flat whistles that are sold very cheaply, but if you are one of  those boys or girls who prefer to do everything your own way, you can easily make a whistle as shown. The framework is made of straight, light sticks. The spine is 2 ft. 5 in. long. For the boy's head, make a circle of cane 8 Inches diameter, and bind it to the top of the spine with thread, making sure that the spine divides it exactly. Cut a stick 3 ft. 6 in. long for the cross stick that makes the arms; bind it at its exact centre to the spine, at a point 3 inches below the bottom of the head. Two sticks 3 ft. 9 in long form the legs, bound to the spine and the arms in the diagonal positions- shown. The tops at these sticks are bound at points 7 Inches on either side of the spine. 

The distance between the lower ends of the legs should be 3 feet. The hands and feet are loops of cane, each 3 in. across, and bound at the ends of the respective sticks. The hands and also the feet must match exactly, or the kite will not balance properly. Four more short sticks, 3 inches long, are bound to the frame to form the ends of the boy's sleeves and the bottoms of his trousers. Bind them at right angles to the arms and legs, just at the tops of the hands and feet. One of the diagrams shows how to string the kite. Be sure that the strings are evenly placed on either side of the spine. Where the strings cross the spine, arms or legs, give them a turn around these sticks. Keep the lines parallel and at equal distances on either side of the limbs. Japan tissue, the material used for covering model aeroplanes, makes a good cover for this kite, but any other strong, light paper can be used. First paste sheets of tissue or paper together until you have a piece a little larger that the frame. 

Then cut around the frame, leaving a margin of about an Inch all round for the overlap, and paste the flaps, over the strings. In order to make the paper fit smoothly, cut silts in the overlap at every point where the angle changes. Make slits about an inch apart around the circular parts (heads, hands and feet), Keep the paper tight as you paste it down. A coating of aeroplane "dope," applied to the paper after the paste has dried, will toughen and waterproof it. Now you are ready to paint on the design, which should be done in colors. The hair may be made with a few wisps of colored wool pasted to the head. The whistle you use must be very light. If you make it yourself, use two small blocks of balsa. It should not be more than l1 ¼ in. long, and almost round. Hollow out the blocks on one side. Stretch a piece of thin tubber tightly across- the opening, then bind the blocks together with adhesive tape. The whistle is attached in the exact centre of the face with thin strips of adhesive tape, a ½ inch hole being made through the painted mouth to let the air through. Two strings tied across the body from the shoulders to the legs, and tied where they cross, as shown in the sketch of the finished kite, form the bridle to which the flying string is tied. The kite will need a tail. This is attached to a loop of string tied between the two legs. Things to Make and Do (1937, October 15). The Age (Melbourne, Vic. : 1854 - 1954), p. 4 (JUNIOR SECTION). Retrieved from http://nla.gov.au/nla.news-article206729756 

SOMETHING TO MAKE: THE ARGUS JUNIOR - A BOX KITE

TO MAKE THIS KITE, you will need four sticks of soft, white wood measuring 2ft by 4in by 1/4 in square, four pieces 16 1/2 in. long by 1/4 in. square, some thin brown paper 4ft 2in long, glue, 10 fine long tacks or brads 3/4 in long, and a ball of string with which to fly the kite.


Diagram 1 shows the finished model, and you will notice that no tail is needed on this kind of kite.

Diagram 2 shows how to tack together two of the shorter pieces after they have been notched each end. Flatten out the end of the tack underneath. Make two crosses in this way.

Next, fix these two crosses 5in from the top and bottom ends of the long sticks. Glue the notched end on to the big stick as shown in Diagram 3: If you hammer a fine tack or nail in carefully, it will help to hold it firm.

When it is assembled like this the frame is ready for the paper covering.

Cut out two 10in strips, each being 4ft 2in long. Bend over a 1 in. hem down each long side, and then place a piece of fine strong string under the hem and then glue it down. See Diagram 4.

Put glue on the outside of the long sticks, starting 1 in. from each end and continuing along the stick for 8in. Fold the paper around the sticks, over this glue, and glue down the overlap (about 2in).

When it has dried off, your kite is ready to fly, and all you have to do is to tie on one end of your ball of string at the point marked "X" in Diagram 1.  SOMETHING TO MAKE: THE ARGUS JUNIOR (1947, October 7). The Argus (Melbourne, Vic. : 1848 - 1957), p. 6 (The Argus Super Comic). Retrieved from http://nla.gov.au/nla.news-article22512212

Paint Guidelines

Paint trends come and go just like other home interior trends but they are one of the most inexpensive ways to completely transform your home room by room. Neutrals are really popular in paint colors right now because they allow you to elaborate with more vibrant colours in your home décor and accessories, and they bring a lightness and freshness.

White
You can never go wrong with white - it's fresh, it reflects light into shadowed corners, and even if you have grubby little fingers in residence there are some great brands on the market today which will allow you to easily wipe those little marks off.  White is the perfect way to make any room in your house look fresh, clean, and sharp. Paint everything from your walls to mouldings in a crisp white to give it a more modern appeal.

If your kitchen cabinets are out of date, give them a fresh coat of white paint and replace door and drawer hardware (the handles and knobs) with some new fixtures for a more modern and up-to-date look. All-white rooms can be made fresher by adding a lot of colour for a more eclectic feel or focus on more on neutral tones, or even a range of blues and greens for relaxing seaside appeal.

Grey and Tan
Grey tones, whether light grey or dark slate grey, are popular. Grey paint can bring an element of sophistication to a room without being over the top. There are so many tones and variations of grey available now though, so it can be hard to pick the right choice.  Tan is also a neutral colour that has remained in style and can be adapted to adding splashes of colour with décor.

When picking a colour:
Look in magazines to see what greys catch your eye
Discuss with the Johnson Brothers staff which kind of paint will work best for your home and where you want to use it - kitchen - bathroom etc.
Don’t be afraid to bring home a handful of grey paint swatches
Tape these paint swatches to your wall and step back to get a good look of the colour in different lights. 
Greys and tans tend to pick up different colours in different lighting, so think about the seasons, which room you want to use this tint in, and what furniture or accessories you will add to make that room comfy.


Recently completed white on white example - courtesy our resident DIYer

Pre-Paint Preparation

Prepare the room 
Take down any curtains, blinds, paintings or mirrors, and move as much furniture out of the room as possible. If there are larger or fixed pieces of furniture you can’t move, place a plastic sheet or drop cloth over them.

Fill in the cracks and sand smooth
Most walls in every house have holes for picture hooks, scrapes where a chair was swung wide from a table or cracks from the weather. Fill all of these holes and cracks with a quick-set interior filler. Around windows and other areas where more movement is likely, use a flexible filler. Once this has set ensure you give these a sand with sandpaper over a block of wood to get a flat to the surface finish.

Clean the surface
Even if your walls look clean, they're not - scrub them with sugar soap to remove excess dust or mould you don't want appearing like magic through your new paint job. 

Cover your door knobs and tape edges
It’s a good idea to cover all of your doorknobs and handles. You can use plastic lunch wrap or even aluminium foil for this; these are easy to shape around handles and will keep them protected. There are a few brands of tape on the market nowadays that all professional painters use to seal the edges against where you don't want any paint bleeding through, leaving you with very straight and clean edges.


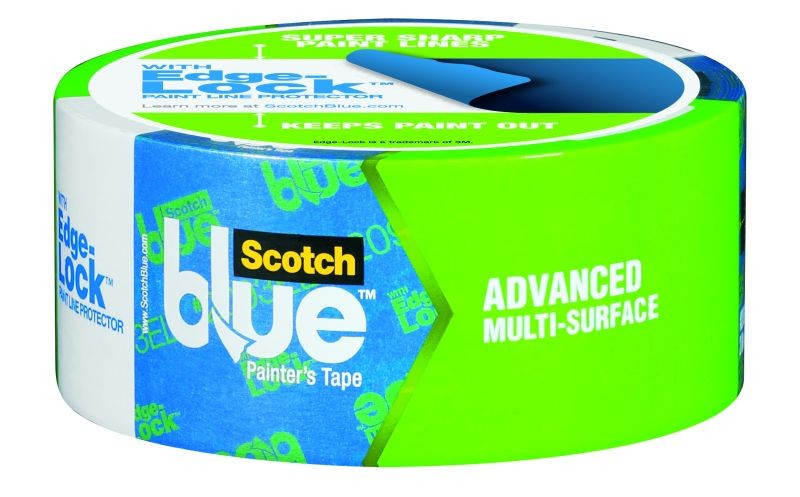
Scotch Blue Painters Masking Tape
50mm x 55m. Removes easily without leaving residue. UV resistant for up to 14 days.

Invest in great brushes and rollers
Don’t skimp on your rollers and brushers and trays – cheap brushes will leave unsightly marks on your walls, or drop bristles all over the place. Also, when looked after well, these will last for the next paint spruce up and the next. Another point to remember is that new rollers are sometimes a little fluffy, and these fly-away pieces of fluff can stick to your walls if you don't remove them. Wash new rollers in soapy water before their first paint job to stop this happening.


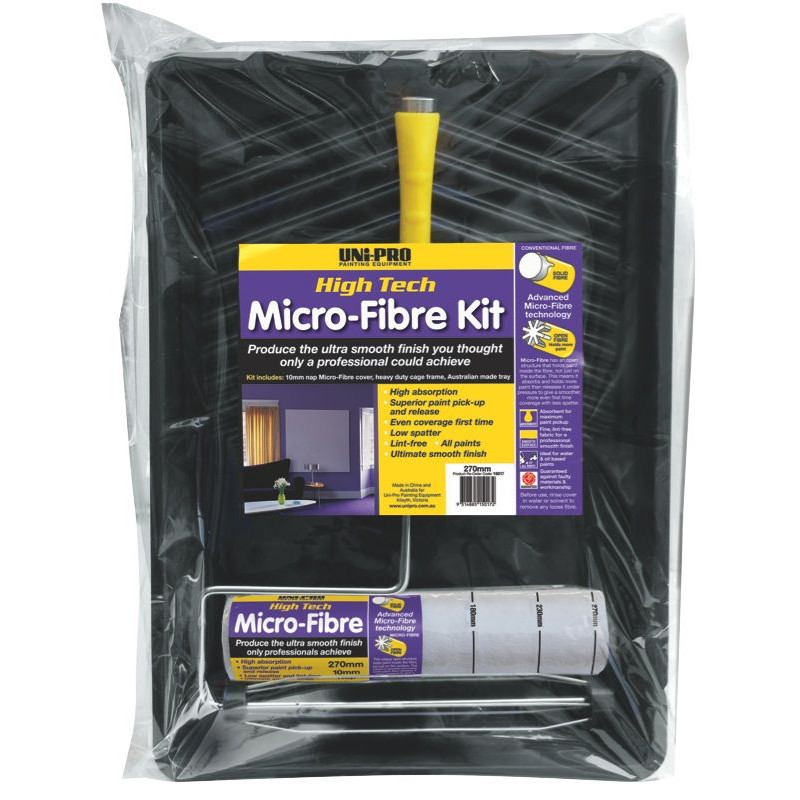
UNI-PRO MICRO-FIBRE ROLLER KIT 270MM

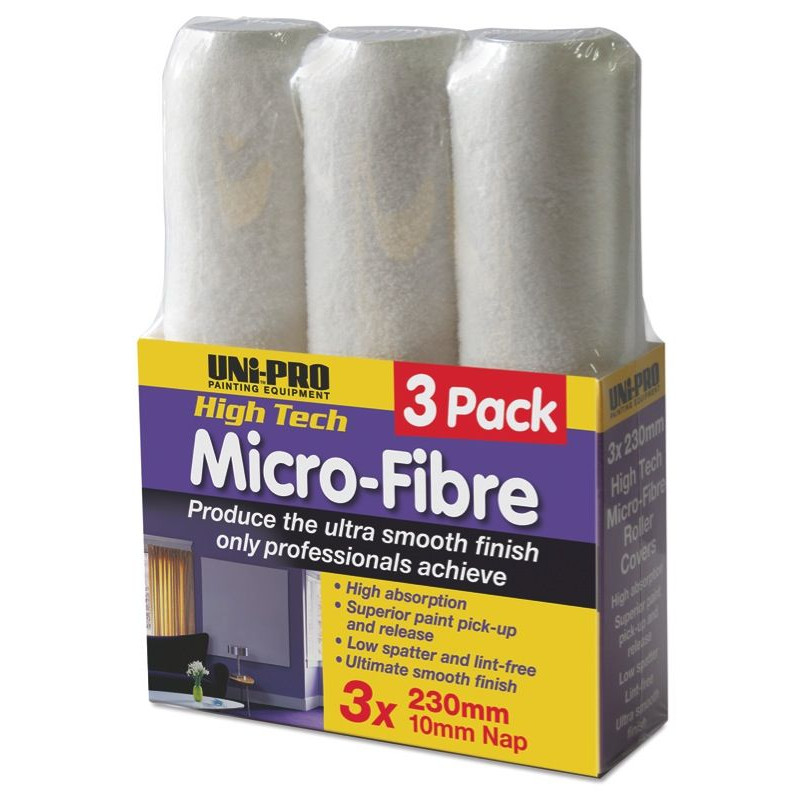
Uni-Pro Micro-Fibre Roller Covers 230mm- 230mm. High absorption. Low spatter. Suitable for all paints Pack of 3.

Avoid the Pro Hart Approach: Use cotton or canvas dropsheets on the floor
If you don't want to be finding little specks and drips of paint ever afterwards, protect your floor from paint splatters. Lay out cotton or canvas drop sheets or even old sheets. These are also safer to use than plastic sheets, which are slippery and tend to move around a lot more when you’re working.

Look after your lungs and skin
Always ensure you are painting in a well ventilated room. Even with this ventilation wear a mask to stop you breathing in paint fumes. Eye protection is also a great idea and taking regular breaks outside in the clean fresh air. Think about what clothing you will wear too - even professional painters get a few drops on their white overalls - if you don't want your favourite pair of jeans or shorts getting drips on them, don't wear them, don something old instead.

Three easy steps to rejuvenate your timber deck
There's no secret to good timber deck maintenance - repair the deck, clean it and protect it. Learning tricks the pros use can make the job go faster and the results last longer. 

Step 1 – check the condition of the timber, and make any repairs.
It is a good idea to inspect a hardwood timber deck at least annually to ensure that it is in good condition. Any loose or damaged boards should be re-secured or replaced, loose nails hammered back in or screws re-fixed. 

Step 2 – clean the surface 
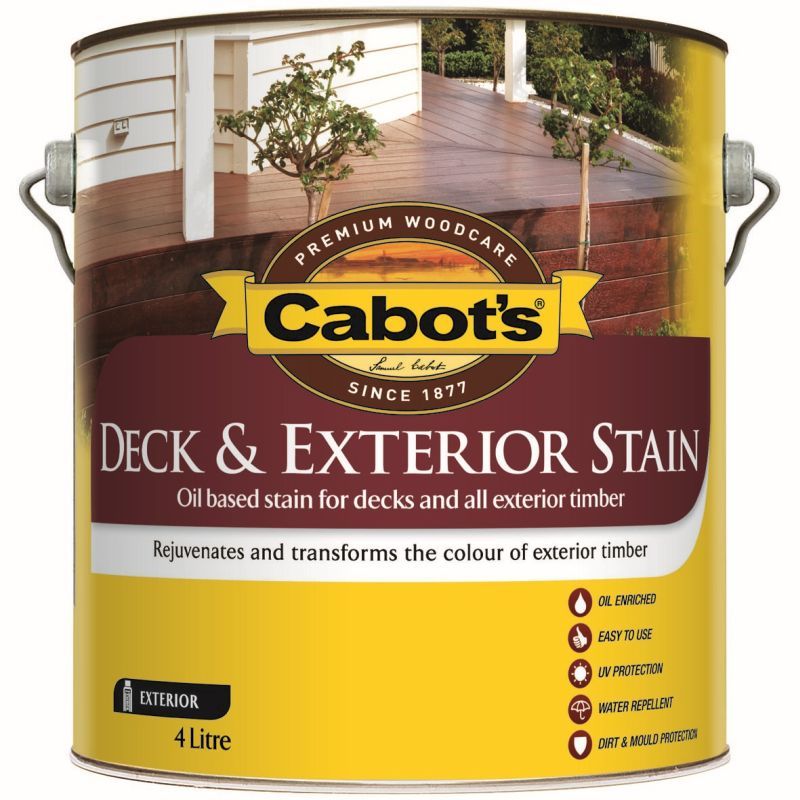
Every deck should be cleaned annually. To clean the deck, sweep off any loose dirt or garden residue and then clean the deck with a specialised deck cleaning product like Cabot’s Deck Wash. Deck Wash is a timber maintenance wash for use in between resealing applications. It is designed to revitalise and help remove dirt, dust, algae and bird droppings. 

For more serious stains in the timber you may need to use a product like Intergrain’s TimberStripper or PowerPrep or Cabot’s Deck Clean.

After the cleaning has been completed you may need to lightly sand sections of the deck to remove any splinters.

Step 3 – applying a new, protective finish
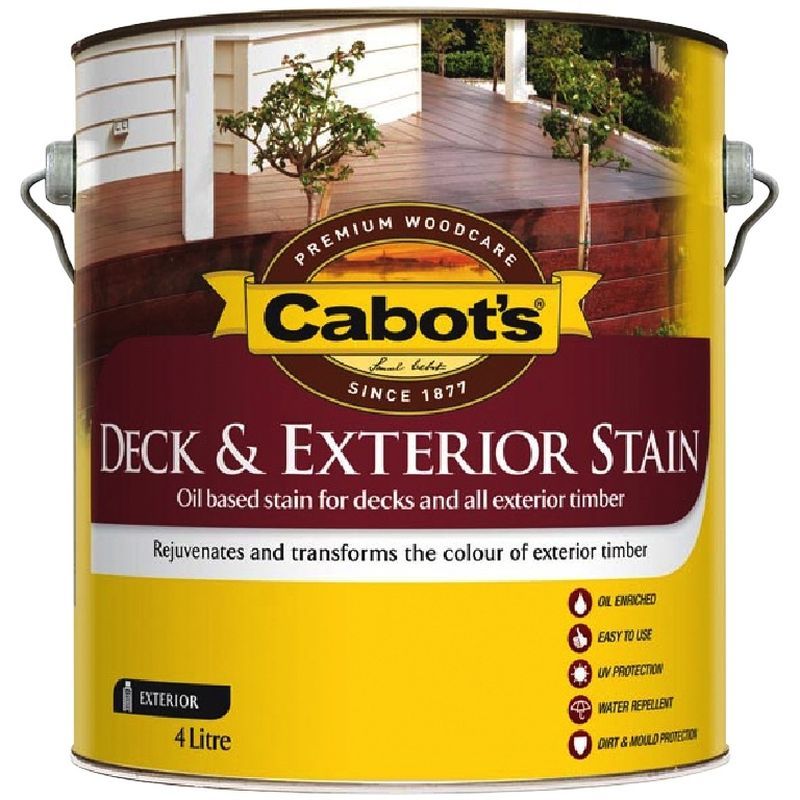
Once cleaned, reseal the deck with a stain, oil, paint or varnish. They are available in many finishes and colours to satisfy your aesthetic preferences. Before the decking finish is applied, cover areas around the deck that need protection such as walls, plants and furniture. Drying times are dependent on the type of finish so check manufacturer's recommendations before walking on a newly finished deck. Apply and re-apply decking finish as per manufacturer's recommendations. They may also recommend that the decking finish needs to be re-applied more than once a year.

Johnson Bros can provide you with an extensive range of specialised finishes and accessories, simply visit one of their stores to check out your options
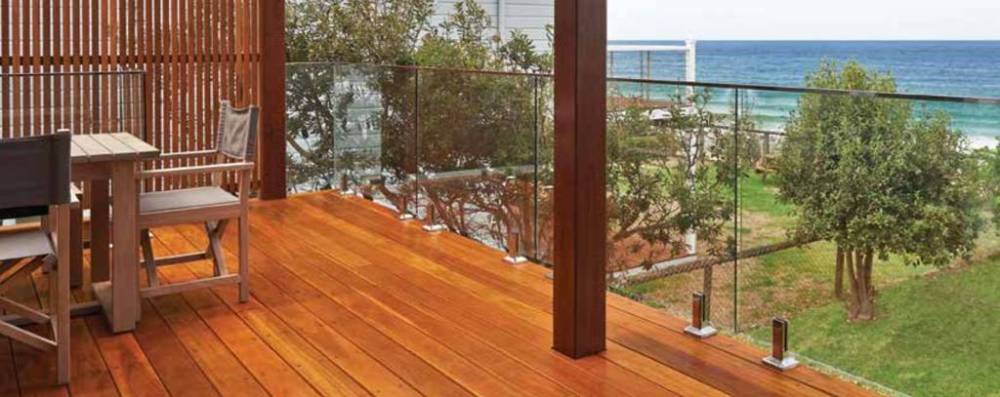
A new hardwood timber deck provides a way to enhance every home and garden. It creates a comfortable, attractive and flexible feature that can be added to any kind of flat, sloping, wet or even waterside site. 

Native Australian hardwoods are an excellent choice for decking because of their high density, toughness, durability and in some species, fire retardancy - perfect for Australian conditions.

• Decking can also be used for vertical design elements such as screens, seating, gates and fences.
• Timber decking is excellent for pool surrounds and as an alternative to concrete and paving materials.
• Timber decking can be used to complement internal flooring and form a natural flow from indoors to outdoors.
• Blackbutt and Spotted Gum have a natural fire resistance. Their fire retarding properties meet Australian Standard AS3959, and so can be used in bush-fire prone areas without any treatment.
• Hardwoods are easy to stain to complement an outdoor colour scheme or can be left raw to create a natural, weathered look.
• Our hardwood decking is seasoned to ensure optimum hardness, stability and long service life.
• A timber deck is built over the natural lie of the land so it will not interfere with drainage.
• Australian species are ideally suited to Australian conditions.
• Durable hardwood timber decking is a natural product and can be refinished to its original state with little fuss.

Johnson Brothers Mitre 10 Hardware can supply you with an extensive range of Australian hardwood timber decking.  The staff at their Mona Vale store in Bassett Street can provide any additional information you may require, or you can call them on 9999 3340.


Blackbutt Decking Example Photo courtesy Boral Building Products

Johnson Brothers Mitre 10 Offers Some Great Tools And Products 


LUFKIN BIG BOSS TAPE MEASURE: $24.00
8m x 30mm. Extra-wide blade for increased durability.


Stanley 8m/26' Tylon Tape Measure: $11.99


STABILA SPECIAL EDITION LEVEL - 4 PACK: $119.00
Non fade. Non leak. Electrostatic stable vials for lasting accuracy. Includes 70mm, 400mm, 600mm & 1200mm Levels.


Cabot's Deck & Exterior Stain New Jarrah 4L: $89.90
Oil Based Deck and Exterior Stain is a durable stain which rejuvenates and transforms the colour of all exterior timber.


Cabots Decking Stain Merbau 4L: $89.90


Makita 1200W Circular Saw: $109.00


Makita 210mm 1800W Circular Saw: $389.00 - Blower function. Bevel adjustment.


Makita 18V 3Pce Combo Kit: $439.00 - Includes Hammer Drill, Impact Driver, 165mm Circular Saw, 3.0Ah battery, charger & tool bag.

Green Life Garden Centre at Johnson Brothers Mona Vale

Johnson Brothers Mitre 10 Trade Centre at Mona Vale - everything you need under one roof.


Johnson Brothers Mitre 10 New Store
73 Bassett Street
Mona Vale - Online Store: Jbhmv.Com.Au

Products advice is available from the trained friendly staff at Narrabeen, Mona Vale and Avalon Johnson Brothers Mitre 10. 

Click on logo to visit Johnson Brothers Mitre 10 website

Johnson Bros Mitre 10 - Avalon            (02) 9918 3315

Johnson Bros Mitre 10 - Mona Vale     (02) 9999 3340

JBH Timber & Building Supplies          (02) 9999 0333

JBH Fencing & Landscape Supplies    (02) 9970 6333

www.johnsonbros.com.au Online store: jbhmv.com.au

Important 
All information and tips in this publication are of a general nature only and neither Johnson Brothers Mitre 10 or Pittwater Online News does not warrant the accuracy or completeness of the information and tips in this publication. This publication is not intended to be a substitute for expert advice. Johnson Brothers Mitre 10 advises you to always consult an experienced and qualified person when undertaking jobs of this kind (including consulting a qualified tradesperson such as an electrician or plumber where relevant expert services are required). 

You should also consider any safety precautions that may be necessary when undertaking the work described in this publication (including wearing any necessary safety equipment such as safety glasses, goggles or ear protectors or hard hats). The information and tips in this publication are provided on the basis that Johnson Brothers Mitre 10 and Pittwater Online News excludes all liability for any loss or damage which is suffered or incurred (including, but not limited to, indirect and consequential loss or damage and whether or not such loss or damage could have been foreseen) for any personal injury or damage to property whatsoever resulting from the use of the information and tips in this publication. 

Pittwater Online News and Johnson Brothers Mitre 10 also advises there may be laws, regulations or by-laws with which you must comply when undertaking the work described in this publication. You should obtain all necessary permissions and permits from council and/or any other relevant statutory body or authority before carrying out any work. Major projects published in this publication always list these and/orlinks to where you may research what your own project requires to meet regulations.

Previous DIY Pages:

Decking Timbers  Caring For Your Deck Decking Finishes  Privacy Screens I Privacy Screens II  Privacy Screening Hardwoods  Autumn Paths and Lawns  Insulation Batts Plasterboard  Ventilation - Edmond's Ecofan Blackboards for Children and Home Spring Lawn Care  Shade Sails & Watering  Basic DIY Tools DIY Tools - Power Drills Recycle Your Trampoline into An Air Bed  How to Build Your Own Backyard Cricket Pitch Christmas Lights Displays around House and Garden Summer Mildew - Refresh, Renew How to Fix Things That Drip and Bump in the Night Time To Plant Winter Vegetables in  a Raised Garden Beds Layout Organsing Your Tool Shed  Make Your Own Weathervane Installing A Garden Watering System  Decking Oils  How To Make Garden Compost  How To Winter proof Your Lawn  How to create Shabby Chic effect on Timber Furniture How to Build Your Own Raised Garden Bed  Growing Your Own Winter Vegies  Winter Heating Guide  Prepare Your Yard For Winter Eradicating Noxious Weeds From Your Yard How to Fix Furniture Finishes Part I  How to Repair Scratches, Dings, and Dents of Furniture Surfaces - Part II Winter Draughts Fix  Classic Wooden Tool Carrier Spring Garden Checklist Part I  Install Your Own Skylight  Retaining Walls for Saving Soil and New Spring Garden Beds  Summer Salad Garden  Native Plant Garden for A Fairy Arbour Renewing Short Flight of Exterior Stairs Deck Maintenance DIY Summer Tasks You Can Do In Time to Get to the Beach  Garden Ponds for Attracting Birdlife, Dragonflies and for the Soothing Sounds of Water  Salt Air: Maintenance and Protection Creating an Outdoor Dining Arbour, Gazebo or Patio - Part I Creating an Outdor Dining Arbour, Gazebo or Patio Part II  Autumn Garden Tasks  Autumn DIY Jobs: Waterproof Your Home Checklist  Dealing With Dampness Inside the Home  Fixing Your Fence  Repairing and Replacing Damaged Decking boards  DIY Toy Box and Snow Globes: School Holidays Fun - Winter 2015  DIY Wooden Toy Cars and Perfect Painted Flowerpots: School Holiday Fun - Winter 2015  Shoring Up an Under House Earth Bank – Installing a Basic Retaining Wall  DIY One Shelf Sideboard  Early Spring 2015 Garden Care Salad Garden For Children  Keeping Your Garden and Home Cool in Hot Weather  Classic Beach Garden and Camping Chairs 3 Portable Versions Anyone Can Make DIY Outdoor Furniture Mark I: Park Benches for Your Garden Make Your Own Scooter or Skateboard: Summer 2016 Fun  How to Install a Solid Core Door and Door Furniture  Summer Garden Jobs: Pruning A Hedge  How to Make A Swing Chair - With A Frame for Garden Setting  Garden Jobs for March to Make A Beautiful and Healthy Spring  Keeping Outdoor Nooks Warm During Cooler Months  Children’s Step Stool with Storage  Stop Winter Rain Lawn Loss and Soil Erosion on Slopes  DIY Garden Shed: Part 1 of 4 - Base  DIY Garden Shed: Part 2 - Framing Walls  DIY Garden Shed: Part 2b - Gable Roof Framing  Garden Shed Part 3: Roof Installation  DIY Garden Shed: Weather- boards - Door And Window Installation And Paint Finish DIY Coffee Table With Chessboard Inlay  Spring Gardening: Feeding Your Soil And Plants - What Works For Each Plant  DIY Sandstone Flagging Parking Area - Platform  DIY Pre-Summer Checklist For A Safe Home   Summer Spruce Up: Interior Paint Tips and Three easy steps to rejuvenate your timber deck The Perfect BBQ Garden Setting DIY Water Wise Garden   DIY Side Gates  DIY Storm Preparation And Home Protection  One To Two Day DIY Weekend Spruce Ups  Vegepods For Autumn Planting + Easy To Make Lego Table Or Student Desk That Can Be Dismantled + Johnson Brothers Mitre 10 Online Store   Johnson Brothers Mitre 10 Great New Mona Vale Store: Still In Bassett Street - number 73  Johnson Brothers Mitre 10 New Mona Vale Store: The Greenlife Garden Centre  Go Outside And Play: Creating Garden Spaces To Connect Children With Nature DIY Plasterboard Repair DIY Dolls House Or Garage Or Boatshed  DIY Child's Waggon - or use as a large planter mover DIY Bathroom Refresh: Zing For Spring  Tips for Growing a Native Garden FireCrunch, Australian Developed Fire-proof, Sustainable, Durable and Reliable Building Board Now Available at Johnson Bros. at Mona Vale and Narrabeen School Holidays DIY Ideas for Children: Little Vegetables Garden, Swing, Windchimes Bushfire Season Preparation 2017: Home and Outdoor Areas  Johnson Brothers Mitre 10 Trade Centre at Mona Vale + Issue No 1 of Mitre 10’s inSITE Magazine for Tradies and Handymen  Preparing Al Fresco Areas for Christmas Get-Togethers and Summer Visitors  Summer De-bug; Mosquitoes, flies, cockroaches and ants - how to keep the outdoors insects where they belong DIY Summer Projects: Install A Fountain Or Water Feature  Late Summer and Early Autumn Projects: A Shed For All Storage Solutions + Garden Tasks + Keeping Our Waterways Clean   Autumn Plantings for Winter Harvests 2018  Paintback Collection Event: Johnson Bros Mitre 10 Mona Vale Saturday, April 7  Reducing Ticks in Your Garden: Garden care, Plants that Repel, What to Wear Outdoors Attracting Insectivore Birds to Your Garden: DIY Natural Tick Control  Mother's Day 2018: DIY Rose Garden Winter Mould & Mildew Inside Your home: How to Keep Air and Surfaces Healthier DIY Traditional Rocking Horse  Johnson Brothers Trade Day 2018 DIY Mushrooms and Vege Kits: School Holidays Fun Winter 2018 for Curious Kids  Woodworking Projects for Beginners: School Holidays Fun Winter 2018 - Simple Storage Box + Wood Tool Box Spring Garden Prep: Soil Care  Spring into Spring + JBH August 2018 Trifecta  DIY Backyard Doggie Paradise  Garden Care for Heavy Rain Days + Non-Toxic Snail and Slug Debug Ideas  Garden Design and Plant Management to Minimise Tick Attacks and Infestations - insights from an essay by Bill Conroy BSc. (Agr) (Syd) + a Tribute to Wilfred Lawrence Conroy CBE by Keith Jackson, PNG and others  Make Your Own BBQ Kitchen Garden: Gifts That Grow Past That Giving Day  Christmas Lights 2018: Light Up the Night  How to Keep Your House Cool During a Heatwave Without Using an Air-Conditioner Mid-Summer Garden Care  2018 Winners Of National Hardware Store Of The Year - Johnson Bros Mitre 10 Mona Vale! + End Of Summer Garden To Do List  DIY Fruits of Your Garden: Growing Figs  Fruits Of Your Garden: Growing Passionfruit - Autumn Is Also The Time To Plant Strawberries For Spring  How To Water Your Plants When Away On Holidays + Some April 2019 School Holidays Fun For Outdoors; A Skateboard Swing Or Indoors; Grow Or Make Pot Plant People Dealing With Autumn Dampness Inside The Home + Mums Day Gifts For 2019 Winter Heating Guide + Get Ready For Winter Specials  Keeping Your Garden Dewful During Times Of Water Restrictions and Drought  Installing Leaf Stopper Gutter Guard + Trade Day 2019  JBH Mitre 10 Trade Day Guests 2019  An Artfull Garden - for Winter School Holidays 2019 DIY Deck Refurbishment: Turning Wood Into Open Tiled Spaces - Groundworks  Father's Day Wish List 2019 + How to Re-stain your Deck timbers and posts for Summer  Installing Posts For Decks and Verandahs With Heavier Loads + Installing Membranes For Tiled Decks National Garden Week's 2019 Focus Is On Children(Oct 13-19): Spring School Holiday 2019 Garden Ideas (to get started on)  Replacing Balustrades Handrails  DIY Tiling Your Verandah: and Choosing Your Simple Or Complex Tile Pattern  Reduce Bushfire Risk To Older Homes + Preparing Your Yard For Bushfires  Time to Put Up those Christmas Lights and Deck your Gum Trees with rows of Jolly!  NSW RFS Bushfire Survival Plan 2020 + Reduce Bushfire Risk To Homes + Johnson Brothers Mitre 10 Great Water Saving Ideas during Level 2 water restrictions + some  'Don't Sweat Summer'  Specials The Inaugural Sydney Edible Garden Trail - Learn how to help your garden survive the heat, drought, and water restrictions  DIY Flyscreens  DIY Privacy Screen In 2 Hours  Family Hardware Store Wins Best In Australia  Autumn DIY Jobs: Exterior Jobs to Keep Everything Dry and Cosy Inside the Home  Autumn Vegepod Garden: Plant Now to Stay Healthy: JBH Response to COVID-19 Restrictions - We're Adapting! 

______________________

John and Bob Johnson - The Johnson Brothers Profile  John William Alfred Johnson - The Eulogies for those who could not attend Mass

Australia's Prime Minister Visits Mackellar - Informal Afternoon Tea with Hon. Malcolm Turnbull October 2016

JBH Win Awards August 2018 Trifecta - 2018 Free Trade Day supporters, Mitre 10 Heritage Advert features JBH Mona Vale Store, Hardware Australia’s 2018 NSW Hardware Store of the Year over 2500sqm.

Front Page Issue 294: 2018 Winners Of National Hardware Store Of The Year - Johnson Bros Mitre 10 Mona Vale !!!

National Garden Week's 2019 Focus Is On Children(Oct 13-19): School Holiday Garden Ideas (to get started on) & Congratulations Award Winning Johnson Brothers Mitre10 At Mona Vale - 2019 NSW Store Of the Year2019 NSW Trade Centre Of the Year and 2019 Village Garden Centre of the Year

Johnson Bros Mitre 10 were awarded as the best Trade Store in the country: February 2020

Family Hardware Store Wins Best In Australia: Johnson Bros Mitre 10 Mona Vale Crowned ‘National Trade Store Of The Year’ - Celebrating 65th Year in 2020