Johnson Brothers Mitre 10 New Store
73 Bassett Street
Mona Vale - Online Store: Jbhmv.Com.Au
DIY Plasterboard Repair
Do you have children who go thump down the walls, or scuff their way around corners? Perhaps you have decided to refurbish or change the colour scheme of the paint on your walls, only there are so many picture hooks, and accompanying holes, that a little prep work will be needed first.
Or perhaps you have a larger problem: a doorstop has come loose, a doorhandle has gone through plasterboard and the resulting hole has then cracked the gyprock.
This week a few tips on DIY plasterboard and picture hole repairs to stop those icy winter draughts. Products shown to help with the work, or specials shown, were fond on the JBH Online Store (link above) and on the landing page of Mitre 10.
Fix a hole in the wall: Small Holes
- Place self-adhesive mesh patch over the hole.
- Use a plaster knife to cover the patch with lightweight joint compound in a crisscross pattern, feathering the edges so it blends with the wall.
- Let the patch dry and apply a second coat of compound if needed.
- Sand smooth, ready for a paint finish. Tip: wrap your sandpaper around a flat piece of wood to ensure you have a flat to wall surface. This will prevent gouging a dip in the newly applied plaster.
Fix a hole in the wall: Large Holes
- Cut a piece of plasterboard panel slightly larger than the hole. Hold the cut plasterboard panel against the wall and trace around, then remove and mark diagonal lines from the corners towards the hole.
- Taking care not to puncture plumbing or electrical wiring, use a plasterboard saw or trimming knife to cut all the way through the diagonal lines. Then firmly run the trimming knife along the straight outline, and push the piece of plasterboard into the opening – this will ‘snap’ the piece off. Use a trimming knife to cut through the backing paper then discard the piece. Continue with each part.
- Cut your second piece of plasterboard into two backing blocks. Backing blocks should be at least 40mm wide, and the height of the hole plus 40mm to allow room for adhesion.
- Using a small amount of Rapid Patch, stick the two blocks of plasterboard to the inside of the wall. Ensure that the cut edges and all adhesive surfaces are clean.
- Leave to dry for at least 1 hour.
- Apply Rapid Patch to the front face of the backing blocks and gently push the new plasterboard panel into place, ensuring the face is level with the existing wall.
- Leave to dry for at least 1 hour.
- Apply Easy Tape to cover the joins between plasterboard panel and wall (sand any painted surfaces first).
- Apply 2 coats of Rapid Patch, leaving 20 minutes drying time and sanding between coats.
Gyprock Rapid Patch is a fast setting dry powder based compound used for repairing holes, nicks and cracks in plasterboard, fibre cement, timber and masonry.
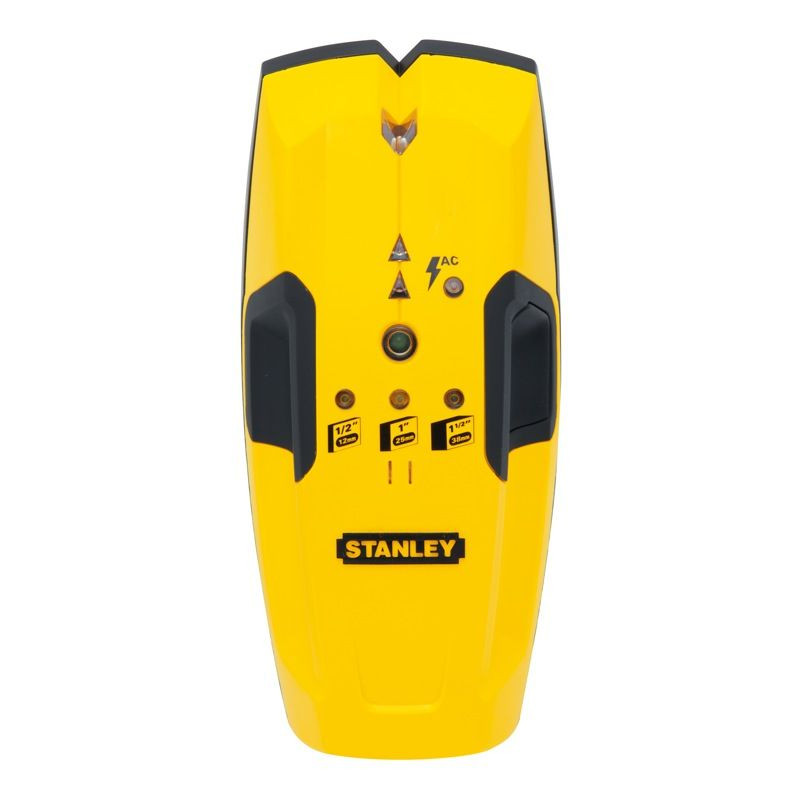
Stanley Stud Finder 150: $24.95
3 stage LED detection. Detects wood/ metal studs up to 38mm.
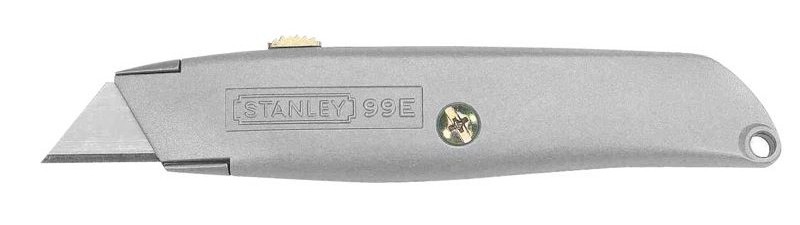
Stanley Retractable Knife: $10.95
Multi position blade slide. Blade storage in handle. Includes 3 blades.
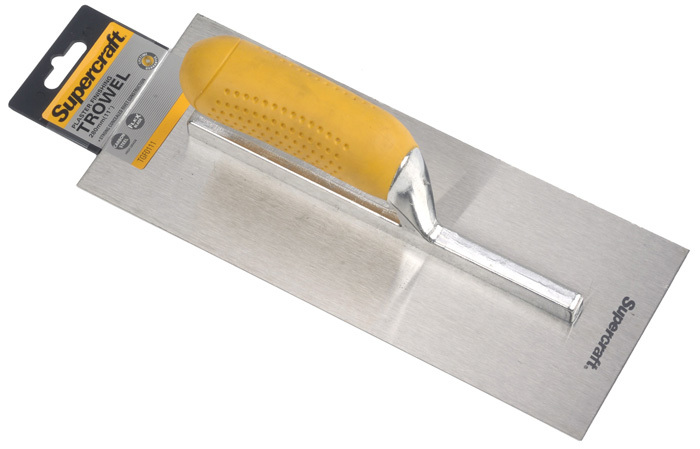
TROWEL PLASTER 280MM S/CRAFT
CYCLONE TOOLS P/ L - HAND TOOL: $18.99
Used to spread and smooth plaster
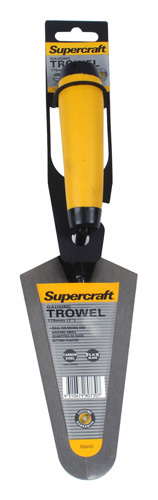
TROWEL GAUGING 175MM S/CRAFT
CYCLONE TOOLS P/ L - HAND TOOL: $12.99
Used for mixing and gauging small quantities of quick setting plaster. Ideal for general cement and masonry work
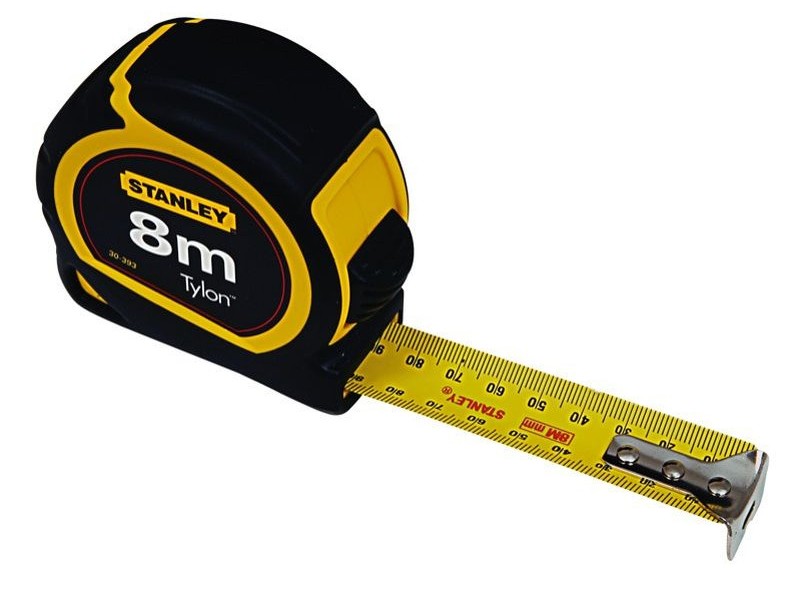
Stanley Tape Measure: $9.95
8m x 25mm. Available in metric or metric/ imperial.
Repairing a External Corner
- If you cannot make the edge sharp again, cut out the piece of Gyprock that has become damaged. Position each cut about two inches away from the corner and make both of them long enough to encompass any hairline cracks visible above or below the point of impact. With the repair area outlined, use the hammer and cold chisel to chip off the old joint compound and expose the metal corner bead beneath. Cut out the damaged section with a utility knife or hacksaw to cut through the corner angle; remove a section at least 15 centimetres long around the damage. If the angle is screwed in place, remove the screws and pull it out with pliers. If it's nailed, gently pry it off without crushing surrounding surfaces. If you can't pry out the nails without further damaging the wall, use the snips to cut the bead from around the nailheads. Then pull off the damaged section and tap the nails below the surface with the hammer.
- Measure and cut a New Metal Angle Section
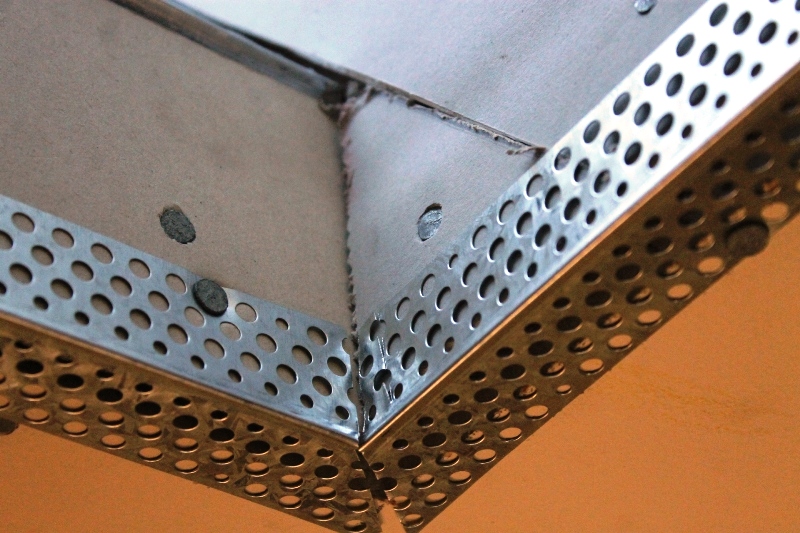
Corner angles

Setting plaster with topcoat and then basecoat
Sand smooth ready for paint finish
3. Use the snips to cut a new piece of corner angle to fit into the space where the old section was removed. A tight fit is important, so measure carefully to make sure the new piece doesn't overlap the existing one.
4. Attach the new Corner Angle Section. Use standard plaster cleats; these lie flatter and are easier to spackle over, though hammering them in can crack the old joint compound. Screws hold better, but their thicker heads are a little harder to conceal.
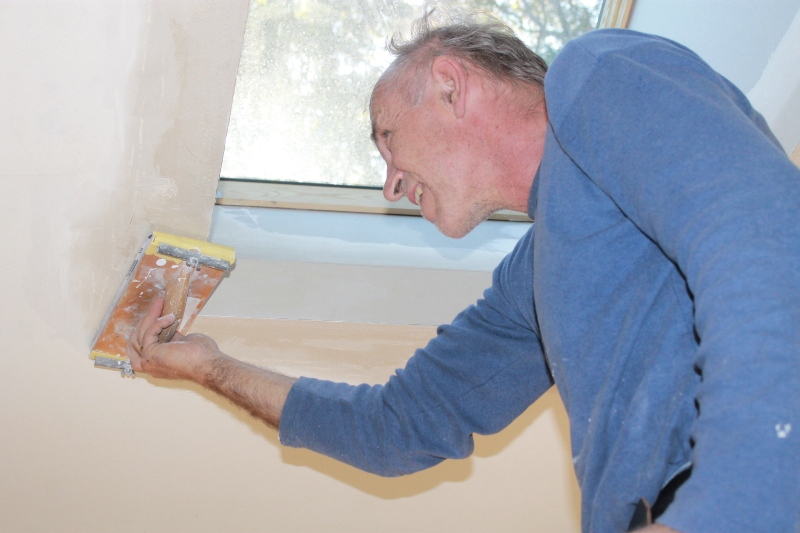
5. Apply a Thick Coat of Joint Compound/Basecoat. Once the new section of corner bead is securely fastened, the next step is to cover it up with joint compound. Thoroughly stir the material until it's smooth and lump-free. Then use the four-inch drywall knife to spread compound over both sides of the corner (photo 4). Don't fuss over this first, thick coat of compound—it will shrink, and you'll need to apply at least two more thinner coats. Just lay it on and wipe it smooth.
6. Add More Compound and Paint Over It. Wait for the first coat to dry (10 to 12 hours). Then, use a sanding block and 80-grit sandpaper to sand smooth. Apply a second coat. After the second coat dries lightly sand it with 120-grit sandpaper. If needed, apply a thin skim coat of compound to fill airholes, scratches, and other flaws. Wait two more hours or so, then wipe down the repair with a damp sponge and apply two coats of paint.
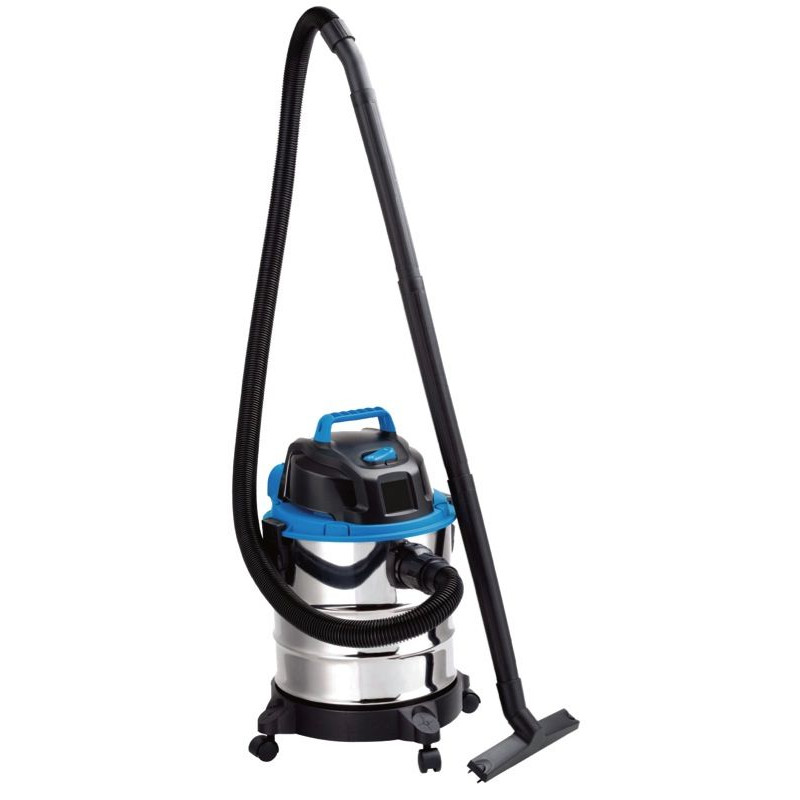
Vacmaster Wet/Dry Workshop Vacuum: $89.00
20L stainless steel tank. 1.5m hose.
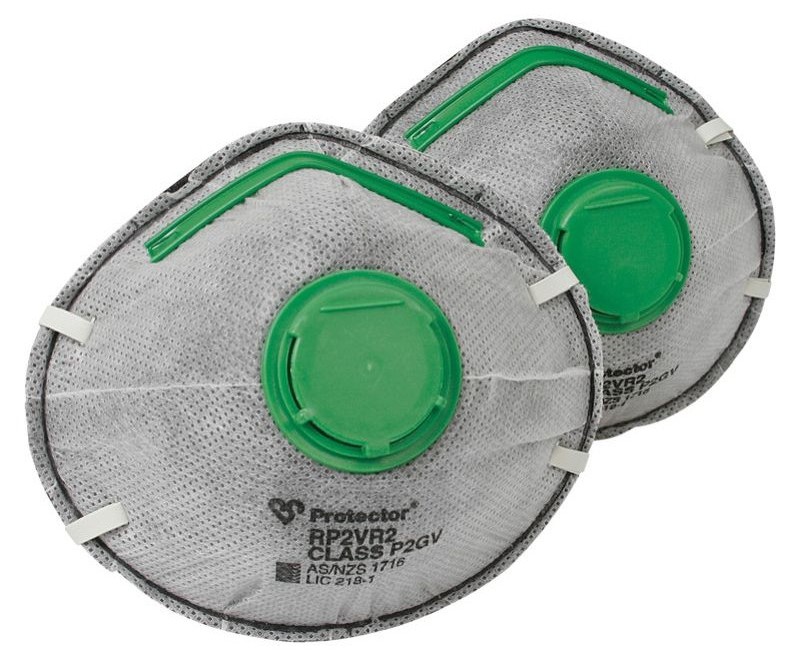
Protector Multi Mate Respirators: $9.00
P2 rating for protection against dust, mists and fumes. Pack of 2.
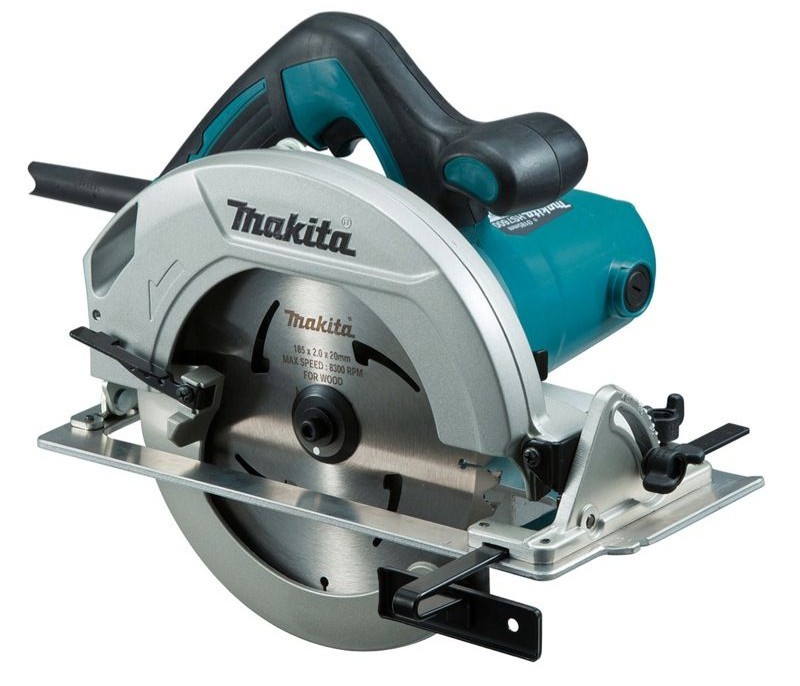
Makita 1200W Circular Saw: $98.00
185mm. No load speed 5,200RPM. Carbide-tipped saw blade. Aluminium plate base.
Plastering Internal Corners
- Fill the gaps in the internal plaster corner. Mix some plaster base coat in a bucket until it has the consistency of toothpaste. Then use your scraper to fill the corner gap between the plaster walls. Make sure you scrape off any excess. Once the base coat is dry, use the scraper blade to take off any small ridges on the base coat.
- Reinforce the internal plaster corner with paper tape. Cut a piece of paper tape to the height of your wall. There will be a crease running down the centre of the tape. Use this to fold the tape in half. Now apply a thin coat of plaster base coat to both sides of the internal corner and press the tape over the top. Once the tape is in place, use your scraper to flatten it onto the wall, squeezing out any excess base coat. Then leave the plaster to dry.
- Apply a top coat to the internal plaster corner Use a paint scraper to apply a top coat of plaster on both corner faces. Run an internal corner plaster tool over the top coat to give it a smooth finish. Leave the top coat to dry. Sand smooth ready for a paint finish.

Click on logo to visit Johnson Brothers Mitre 10 website
Johnson Bros Mitre 10 - Avalon (02) 9918 3315
Johnson Bros Mitre 10 - Mona Vale (02) 9999 3340
JBH Timber & Building Supplies (02) 9999 0333
JBH Fencing & Landscape Supplies (02) 9970 6333
www.johnsonbros.com.au Online store: jbhmv.com.au