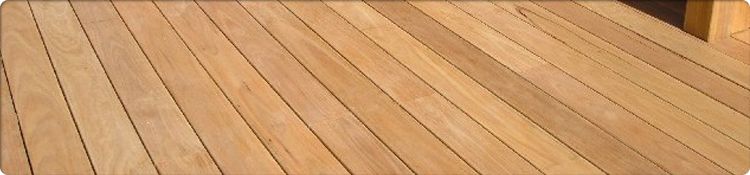
Repairing Damaged Decking Boards
Cold weather is a great time to attend to all those repair jobs around the home that will save you big bucks long term. Many a small deck repair can turn into a big deck repair or even replacing the whole verandah or deck itself if left too long. Woods exposed to exterior conditions, and especially those on damp sides of hills or close to the water, will rot if not maintained properly and even those that are will deteriorate over time and need replacing. Some area of your deck will be subject to more wear and tear than others, and replacing these boards before they get worse, or cause those on either side, in taking up the slack, to get to a point where they too need replacing.
When you do lift a board up, ensure the battens and piers beneath are still fine too, there’s no point fixing the surface if what you will refix new decking to has rotted.
When choosing the timber try to match it to existing and be aware you will need to re-stain the boards around the new so you have a uniform finish. If you’re unsure what timber you have, cut out one of the to be replaced sections and take it with you. There are many woods treated especially for exterior use available which can be used to suit your particular conditions. Blackbutt and Spotted Gum have a natural fire resistance for example, while many of the Treated H3 Decking in pine means this plantation timber is termite and fungal resistant.
As you will be cutting random-length replacement boards, buy the longest boards you can carry back home; this will cut back on waste. Buy galvanized or stainless steel nails or screws long enough to penetrate the joists by at least 3.5cm. The length of the fasteners depends on the thickness of your decking.
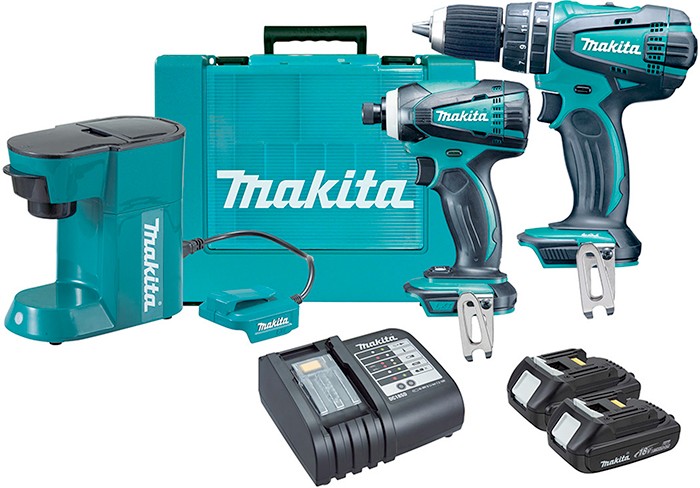
Makita 3pce 18V Li-Ion Combo: , $469.00, • Includes cordless hammer drill driver, impact driver, mobile coffee maker, 2 x 1.5Ah batteries, charger and moulded case.
To begin, determine which planks you'll need to completely remove and which have damaged segments that mean you only need to replace that section. Mark those sections clearly using chalk and/or a carpenter’s pencil.
Make sure you are wearing protective goggles and a dust mask prior to beginning to cut any boards.
Cut the section of bad board free from the joists at both ends with a jigsaw. Cut alongside the joist using a circular saw of a circular set the exact depth thickness of the wood. Angle the saw blade a few degrees so the new board will butt the top edge of the old board tightly. Chisel out the centre of the cut out, working toward the edges. Then square off the edge at the cutting line ends using a sharp, wide chisel.
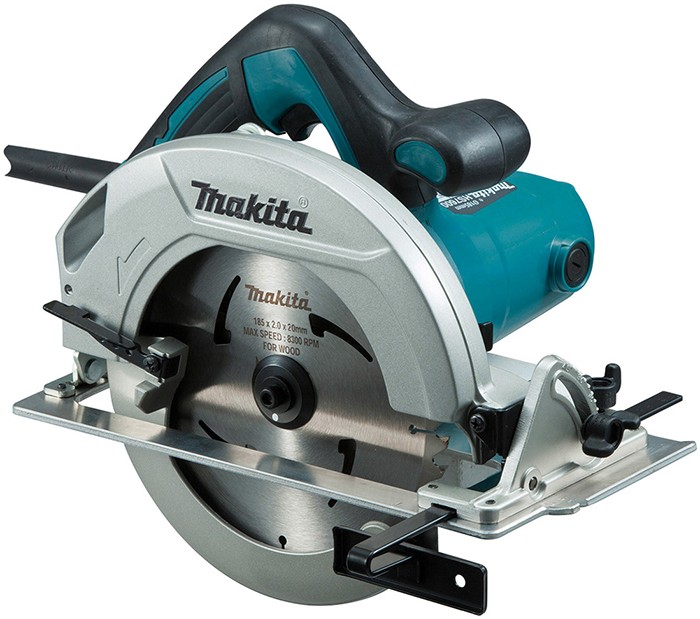
Makita 1200W Circular Saw: $99.00, • 185mm, • 5200RPM., • Carbide-tipped saw blade, • Aluminium plate base, • One-finger trigger switch, • Rear dust exhaust port
Carpenters recommend that you cut out pieces that span at least two joist spaces. This keeps the new boards from splitting as they age. When replacing the new boards place them so the growth rings face down. This will stop the grain from splitting open or collecting water as readily.
To ready your new boards for installing, measure thrice and cut once! For a really clean cut, identify the top side of the board, flip it over, and make the cut. The bottom of the board gets a cleaner cut because circular saw teeth cut from the bottom up. When you cut a board, don't leave a knot at the end.
To get a tight joint between old and new boards, angle the jigsaw slightly when cutting out the bad board so the bevel on the remaining deck board is longer at the top.
When fixing the new board Drill pilot holes, and make sure you’re then nailing the new fasteners into the joists or battens.
Sand, stain and finish the boards as required to protect them and to blend the new into the surrounding area.