August 10 - 16, 2014: Issue 175
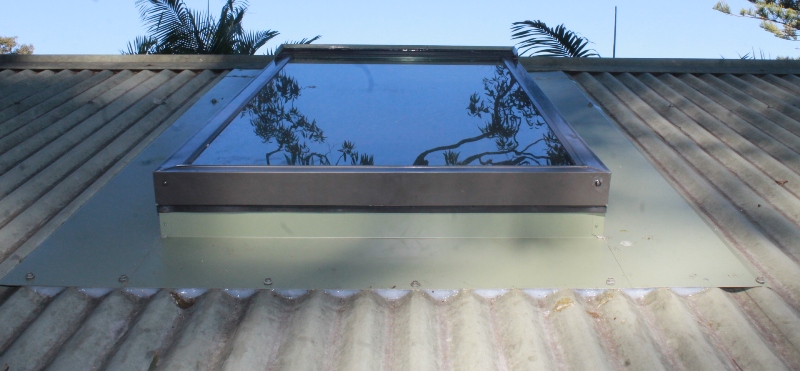
If you have a corner of your home that needs more light without running up the power bills, we suggest you install a skylight - not only does this give a great view of outdoors, but brings welcome sunlight into those shaded corners.
Johnson Brothers Mitre 10 are a suppliers of Velux Skylights, flashing, the plaster you will need, tapes and associated trowels for plastering it into place and making sharp edges and have great paint specials on all this month – we took a series of photos to show you the ‘How to' for this project as well as provide overview of the steps taken.
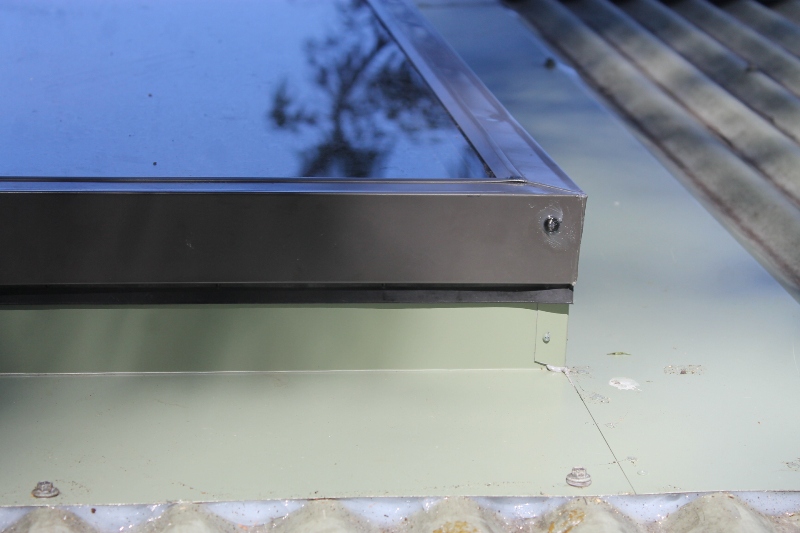
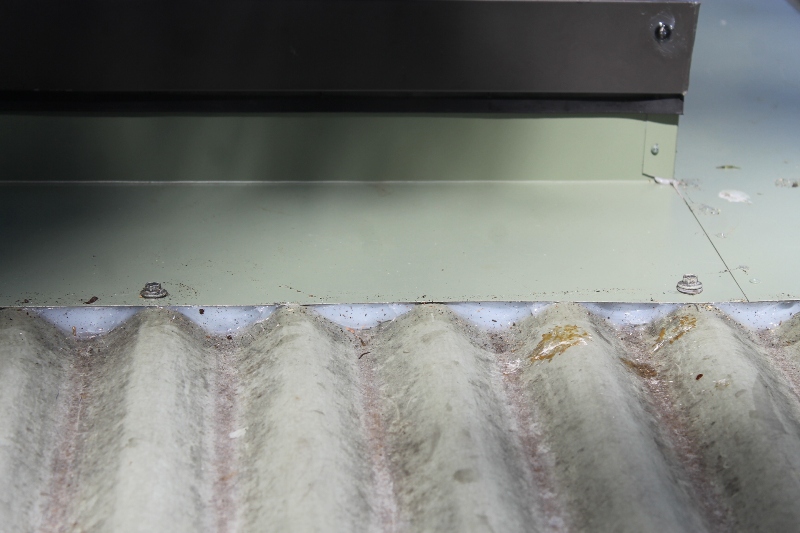
Because we have a metal roof in the part of the house we wanted to install this in we had flashing made up to suit. Many of these kits do come with the flashing though for tiles or tin rooves. See: www.velux.com.au
TOOL AND MATERIAL CHECKLIST
Skylight and Flashing
1x2 cleats
2 x sheets of 24x12 Gyprock
Level
Utility Knife
Keyhole Saw
Chalk Line
Nails
Circular Saw
Ladder
T-Bevel
Roof Sealer for over holes on roof (silicone)
Framing for Curb, Roof and Ceiling Headers
2x4s for Light Shaft
Steel Tape Measure
Pry Bar
Hammer
Carpenter's Square
Plumb Bob
Tin Snips
Reciprocating Saw
Try Square
CUT THE OPENING
 Wear work gloves. Place the skylight unit on the roof at the desired location. Align the grooves on the skylight fins with the grooves on the corrugated roofing. Prepare the rough opening to match the size of the skylight frame. Check for level. Mark an outline along the outer edges of the fins with a felt-tip marker. Set the skylight unit aside.
Deduct the width of the fins on each side of the skylight and mark another outline on the roof to define the area to be cut out. Disregard the larger outline and proceed to the next step.
From below, drive a deck screw up through the roof at each corner of the rough opening. On the roof, strip the shingles about 7 inches beyond those points, and snap a chalk line between each pair of screws. Use a circular saw to plunge-cut through the sheathing along the chalk lines on three sides. Stay off the cutout.
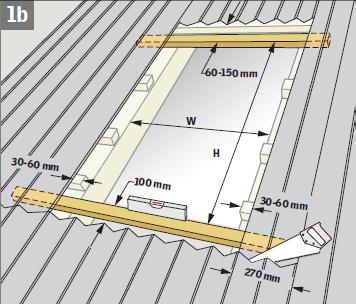
Install installation battens at top and bottom as shown and add support battens at the sides as necessary to support the flashing minimum 2-3 places. Keep 100 mm distance from edge of roofing material to top edge of installation batten.
For tiles, ensure that the bottom of skylight frame is fitted above a complete course of tiles.
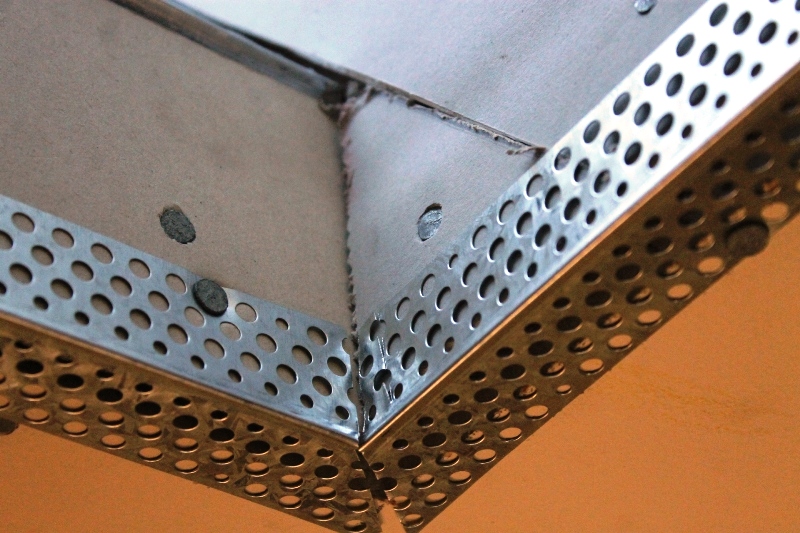
Have a helper inside carefully lower the cutout as you cut the fourth side. Nail the roof flashing down around the perimeter of the opening. Cut the metal sheets as shown, taking care to maintain the correct distance to the rough opening. Finish the rough opening to match the size of the skylight frame.
Important: Install the EDW head flashing section before installing the skylight. Check for level.
BUILDING THE CEILING OPENING AND LIGHT SHAFT
How you frame the opening depends on the size and position of your skylight. If the skylight will fit between two existing rafters without cutting, simply cut two headers to fit between the rafters (they should be the same material as the rafters, typically 2x6s) and nail them in place with 16d common nails, flush with the cut edges of the sheathing. Many skylights come in sizes to fit between rafters so always ask when selecting which one will suit your home best.
If you have to cut a rafter, framing is a little more complex. First, nail two 2x4s across the rafters to provide temporary support. The 2x4s should be long enough to reach at least two rafters on each side of the one that will be cut.
Then use a reciprocating saw to cut the rafter out of the opening 3" back from the edge of the sheathing on each side. Cut four headers to span the distance between the uncut rafters on each side of the opening. Nail the first pair flush against the two ends of the cut rafter. Use three 16d common nails through the existing rafters into the headers on each end and three more nails through the header into the end of the cut rafter.
Then nail the second pair of headers in place. Use 16d nails to nail through the existing rafters into the ends of the header and a pair of 8d nails every 16" to nail the two headers together.
FINISHING THE CAVITY
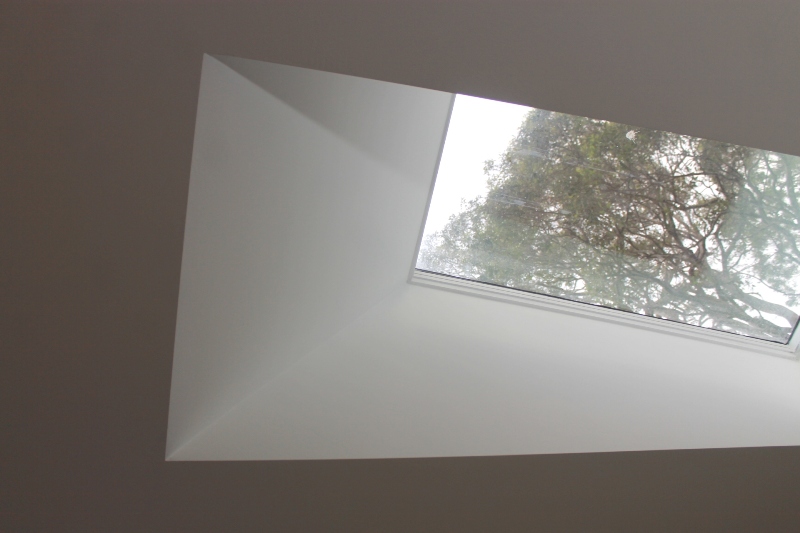
With our skylight installed, we still had a hole in the ceiling that opened into the roof cavity. The next step was to build a frame that would allow us to gyprock that cavity, creating a path for sunlight from the new skylight to enter the room.
To begin we installed some wood pieces into a frame to which to attach the gyprock. At the narrow ends of the skylight, we nailed to the rafters 2 x 4 wood backers that travel vertically (flush with the edge of the ceiling gyprock up to the corner of the skylight where the new gyprock will slide into a groove on the skylight). We also put in 2 x 4s to fit horizontally between them just above the gyprock ceiling, too, so that every cut edge of gyprock in the light well would have wood to which we could attach it.
We repeated this process with the large sides of the frame, making sure to have backers in all corners, as well as every 16 inches so there would be wood into which to screw the larger pieces of gyprock.
To fill the area behind the frame we just built, we used insulation batts that we had. To gyprock the cavity, we needed two 2 x sheets of 24x12 gyprock and clout/screws and a cordless drill gun to screw them into your wood frame.
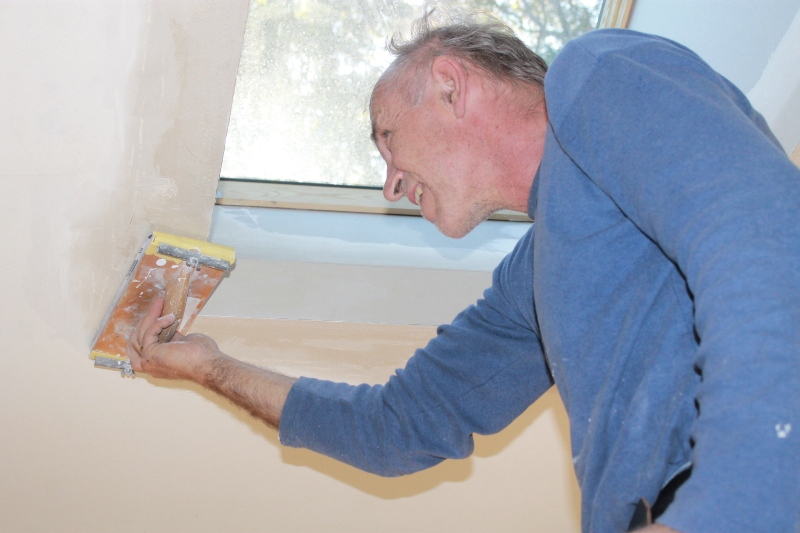
SETTING THE GYPROCK
Once you have installed your gyprock to suit your cavity you need to set it with corner angles for strength and aesthetics, plaster it with topcoat, then basecoat and sand smooth ready for a paint finish.

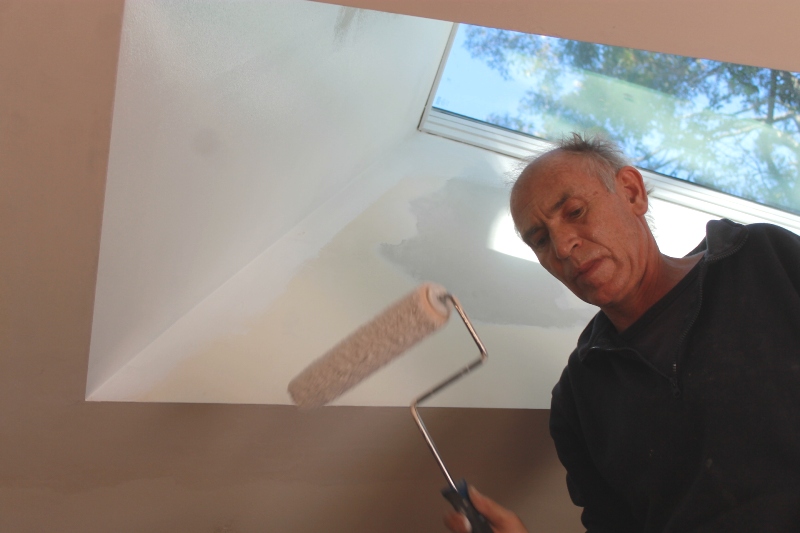
PAINTING
Always wear a mask when painting so you don’t get ill from the fumes. When painting the cavity and ceiling, make sure you cut-in first around edges. We used a basic ceiling white to keep it light and bright! Two days work = years of enjoyment.
SAFETY PRECAUTIONS
Always follow standard safety procedures for working on the roof and using power equipment. When working on the roof, always wear loose, comfortable clothing and rubber-soled shoes. Set your ladder so the base is away from the building 1/4 the height of the ladder plus the width of the soffit. Always wear eye protection when using power equipment.

Products advice is available from the trained friendly staff at Mona Vale and Avalon Johnson Brothers Mitre 10.

Previous DIY Pages:
Decking Timbers Caring For Your Deck Decking Finishes Privacy Screens I Privacy Screens II Privacy Screening Hardwoods Autumn Paths and Lawns Insulation Batts Plasterboard Ventilation - Edmond's Ecofan Blackboards for Children and Home Spring Lawn Care Shade Sails & Watering Basic DIY Tools DIY Tools - Power Drills Recycle Your Trampoline into An Air Bed How to Build Your Own Backyard Cricket Pitch Christmas Lights Displays around House and Garden Summer Mildew - Refresh, Renew How to Fix Things That Drip and Bump in the Night Time To Plant Winter Vegetables – Raised Garden Beds Layout Orgainsing Your Tool Shed Make Your Own Weathervane Installing A Garden Watering System Decking Oils How To Make Garden Compost How To Winter proof Your Lawn How to create Shabby Chic effect on Timber Furniture How to Build Your Own Raised Garden Bed Growing Your Own Winter Vegetables Winter Heating Guide Prepare Your Yard For Winter Eradicating Noxious Weeds From Your Yard How to Fix Furniture Finishes Part I How to Repair Scratches, Dings, and Dents of Furniture Surfaces - Part II Winter Draughts Fix
Copyright JBH Mitre 10, 2013. All Rights Reserved .