With more and more trees being removed from the Pittwater canopy, and soaked birds turning up at our windows, residents are asking for plans on how to build and install bird houses and dreys for possums.
Those who have had furry visitors to their rooves due to a lack of habitat outside have found that installing two of these in nearby areas, and encouraging the possums to visit them by putting in some food for a week, solves the roof tenancy.
Local wildlife rescue and care organisations do provide plans on ‘how to’ along with having volunteer members who can make these for you or work with men’s sheds to build them and supply them to humans. However, as there can be a wait list, this requested DIY help and plans runs this Issue on how to be part of the solution, perfect for those looking for something positive they can do in their own neighbourhood this Autumn school holidays.
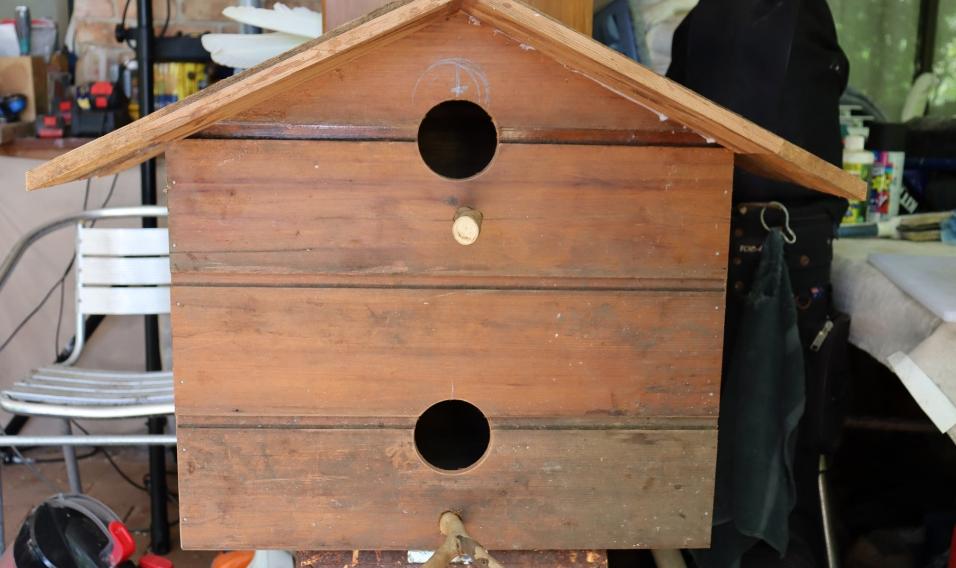
As you can see form the photo above, our resident Builder has already been trying out a few of his own models and modifications to be part of the solution here.
.JPG?timestamp=1769332094592)
soaked Rainbow lorikeets, January 17-18 2026, Careel Bay
To start, WIRES provides and easy quick Home for Ringtail possums.
Making a drey using hanging baskets
It is important that possum homes are strong and waterproof. An artificial drey should resemble as closely as possible in comfort and size the natural drey. Hanging baskets conform perfectly to these specifications.
Materials:
- 2 x hanging basket (approx. 30cm diameter each)
- Cable ties OR jute twine
- Scissors
- Bolt cutters (for cutting one piece out of the wire frame to ensure the door entrance will be big enough)
- Tin snips (the coconut fibre of hanging baskets can be tricky to cut with scissors and is far easier to cut with tin snips)
- Tarp (optional)
How to make the drey
- Bottom - put the bottom liner inside the wire basket and stick in place
- Top - remove the chain and place the fibre liner on top of the wire basket
- Spread the wire apart on the top basket to make an opening. Cut a tennis ball size hole in the top liner to form an entrance, and stitch in place.
- Wire the two sections together together in at least four places
- Soft leaf litter or coconut fibre can be placed in the bottom of the drey for added comfort for the animal, and a few layers of paperbark tied on top of the drey gives it extra protection from inclement weather and also looks ‘natural’.
- If adding a tarp layer, use scissors to spear holes in the corners of the tarp (not too close to its edges or it will pull apart when anchoring it to the drey) and then use cable ties or jute twine to anchor the tarp edges to the wire frame of the baskets. Then use scissors to trim excess cable tie or jute twine.
- Take one of the basket chains and use it to attach each of its hooks to the horizontal rims of the baskets (where the two baskets join). Take care to get both rims into each hook.
- Your drey is ready for installation. Think about positioning. Ideally it will be in a tree where there is camouflage against predators, and easy steps in and out on the branches. The foliage would also provide sun protection. Use something sturdy to attach your drey, such as cable ties or rope that is thin enough to thread through the wires but thick enough to last a long time. Cable ties are often not long enough to make it all the way around thick branches. Also try to anchor it from its base to stop it from swinging about when the possum is climbing in or out of the drey. Ideally do not face the entrance hole west or east or it will cop full sun at some stage in the day.
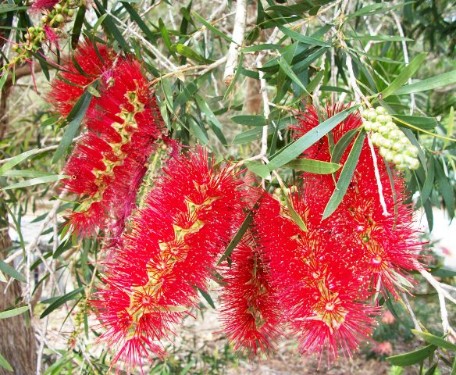
- Think about how to attract attention to your drey. Possums have incredible sense of smell. A good idea is to pop some flowers in there to attract your possum’s attention. They’ll smell the flowers and come for a nibble and then realise there’s a great dwelling for them to move into. IMPORTANT – do not just put any flowers in the drey, as some are of no interest to possums, may encourage insects that will bite, or may be toxic if eaten. Suitable flowers include bottlebrush and grevillea.


How to install your Drey
Dreys are nests made by possums and artificial dreys are designed to be strong and waterproof. An artificial drey should resemble as closely as possible in comfort and size of the natural drey. Hanging baskets conform perfectly to these specifications and are often used when trying to replicate a drey in the wild.
When placing your drey it is important to be aware of the following considerations:
- When placing the drey in a tree, ensure it is not in an exposed location. Ringtail Possums build their dreys in the canopy and limbs of trees to hide from predators.
- Do not place the drey in an isolated tree as this will force the possum to come to the ground to move around.
- The drey should be placed in a tree out of direct sunlight, with shade, cover and somewhere the possum can remain in the trees to get around. Do not place the opening of your drey facing into direct northern or western summer sun.
- Try to position the drey with the entrance facing away from the direction of the prevailing rain and wind.
- Try to place your drey at least 5m off the ground (the higher the better), and securely wedged above a branch, out of the way of predators. This way, the possum can walk out directly onto the branch and also use it to access the entrance.
- It is preferable to place your drey in a native, and non-deciduous tree to ensure that come winter the site is not bare of leaves. If possible, place the drey in a gum tree surrounded by other eucalyptus trees, as their leaves are the possum’s primary food source. If there are native flowering or fruiting plants in the area, that would also help provide additional natural food resources.
- The drey should ideally be firmly wedged or attached to the tree with ‘occy’ straps or wire so that it will not become easily dislodged.
Brushtail-Ringtail- Sugar Glider Possum Box
By Wildlife Rescue South Coast, sourced from: www.wildlife-rescue.org.au/build-a-possum-box
Possums in your garden - not in your roof!
You can buy ready-made boxes online, but here are some basic instructions for those who prefer to make their own. There are boxes for various types of possums. This design suits brushtails, ringtails and sugar gliders. For others we recommend the 'Nest Box Book' published by the Gould League of Victoria.
What you need
Use a building materials that are hardy and provide a level of insulation from the heat and cold.
Timber: You can use any timber you like, except chipboard (which disintegrates rapidly outdoors) or treated pine (which is toxic if gnawed on by the possum).
12mm plywood or untreated pine is excellent. These are reasonably hardy, and not too expensive (ask your local timber yard or cover sheets or seconds). The wood needs to be at least 10mm to provide insulation.
Fastenings: Use screws and glue to hold the construction together. They will last much longer and hold greater weight than nails.
Something to seal the top edge of the box: Sheet metal, piece of aluminium, a rubber flap or piece of old inner tube will work.
- Drill
- Saw
- Wire or chain and a piece of old hose pipe to cover it
- Heavy gauge flat head nails for fastening
- Flexible metal strip
Optional extras
- Small, sturdy branch
- Sealant and/or UV resistant paint: Choose a colour like dark brown or green that blends in with the surrounding bush.
- Nesting materials: A few handfuls of dead leaves can provide comfort and insulation.
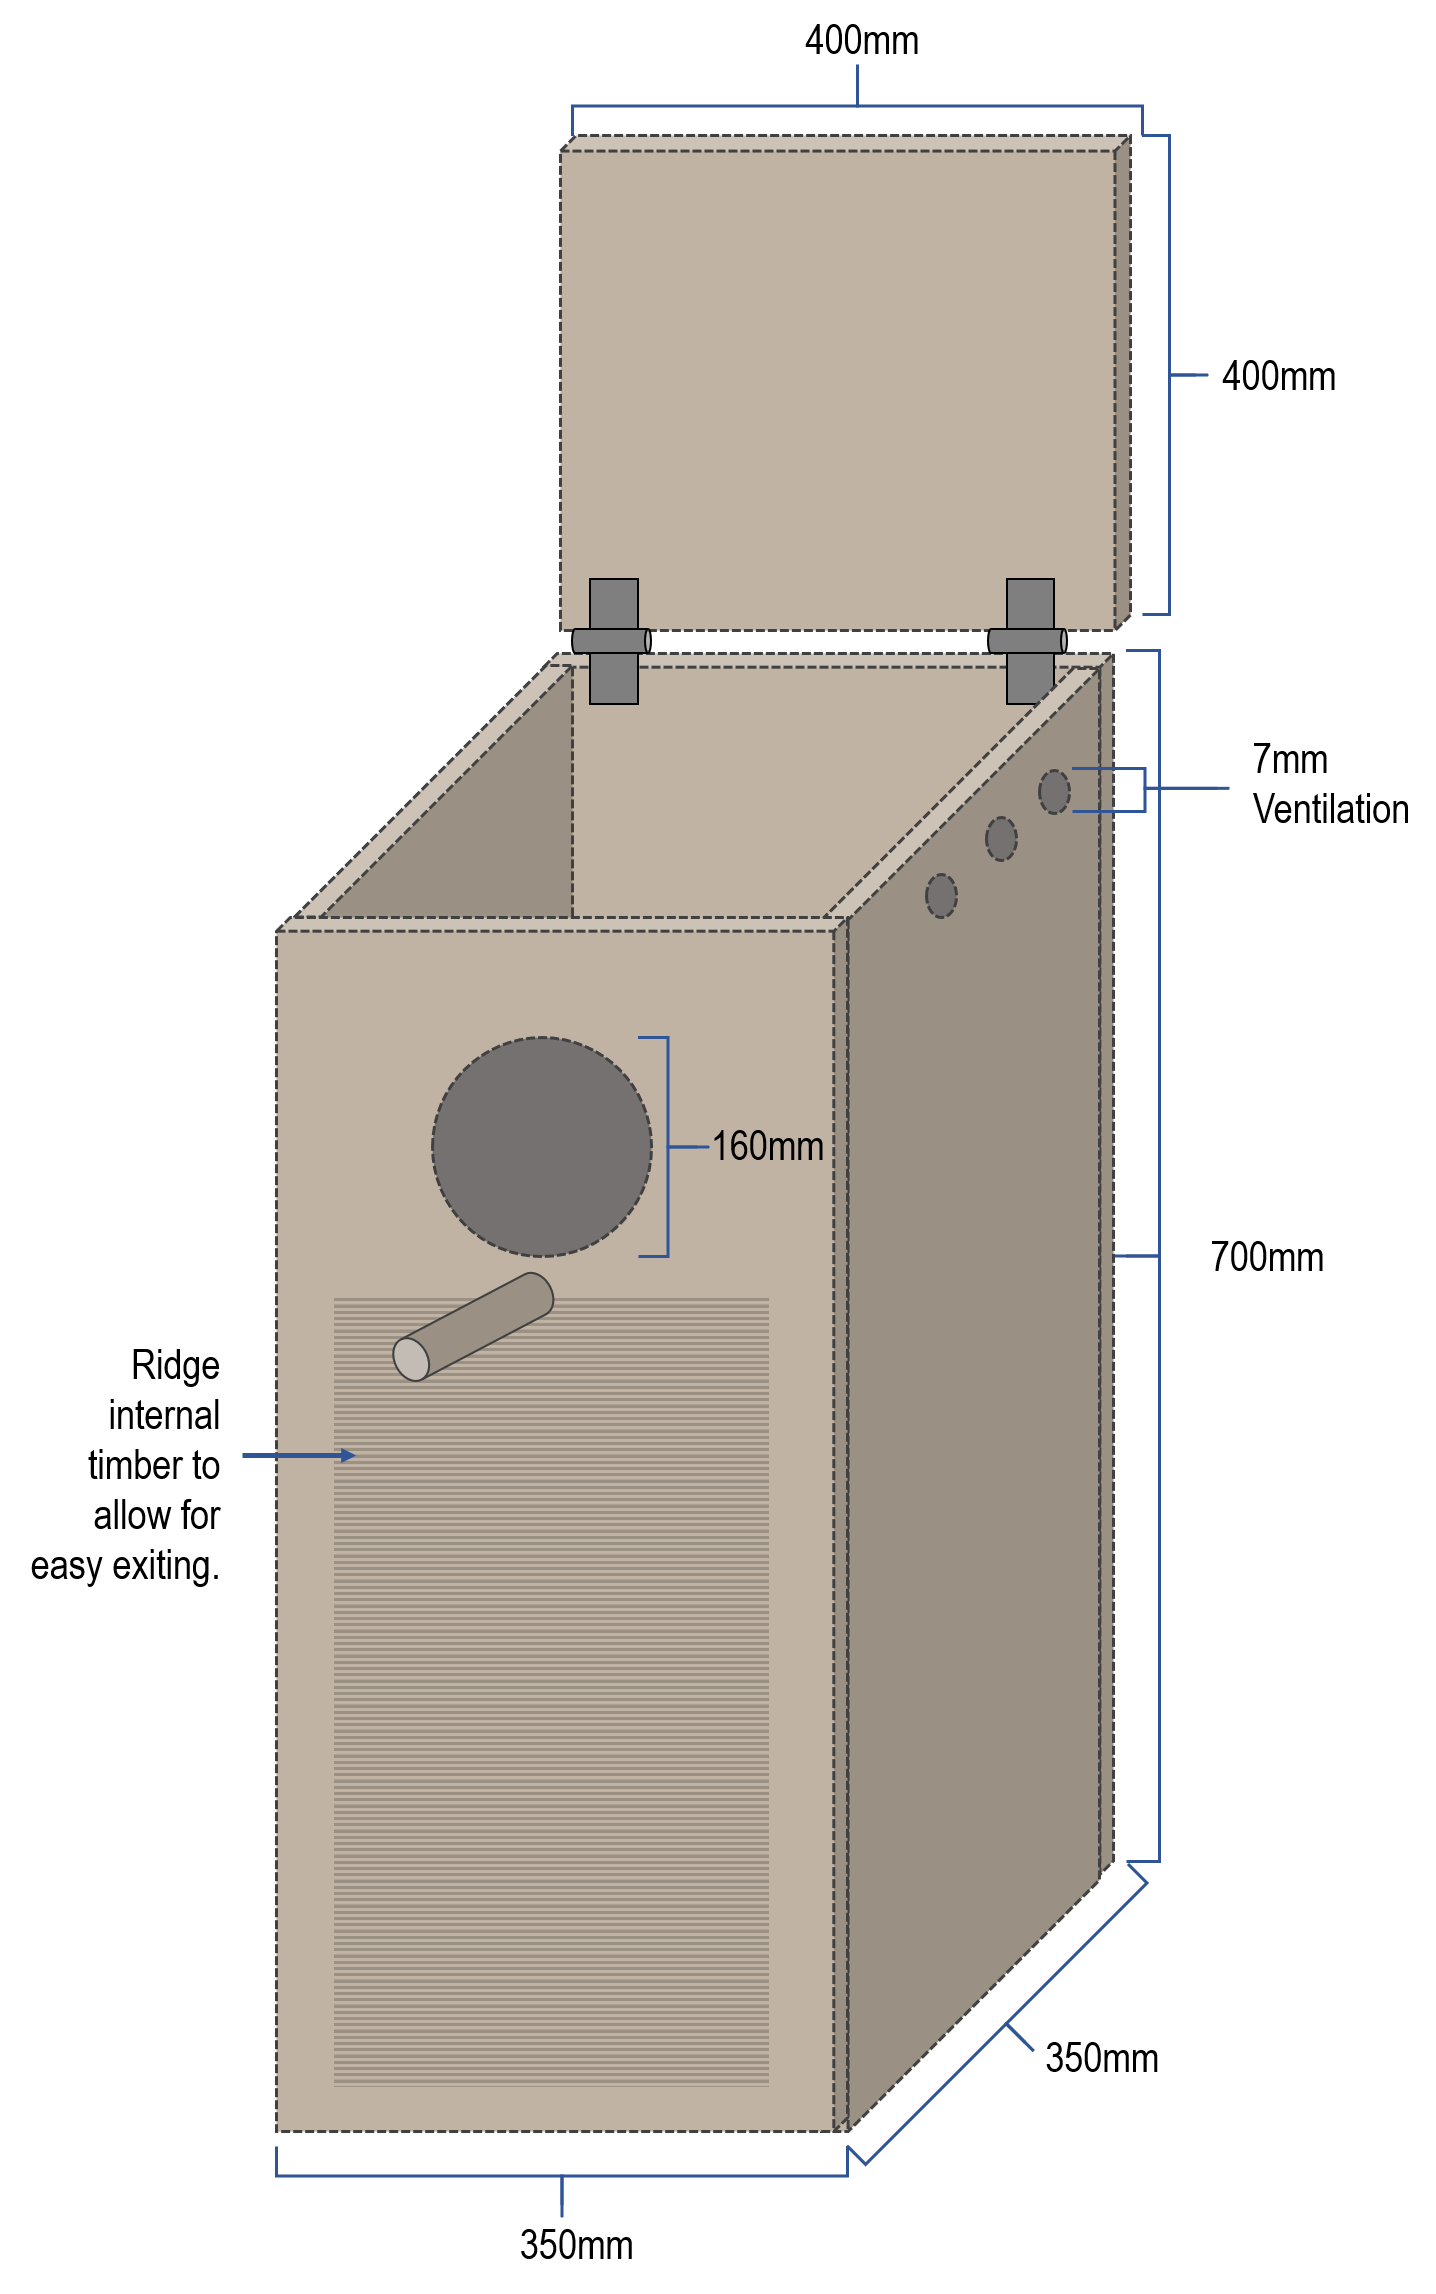
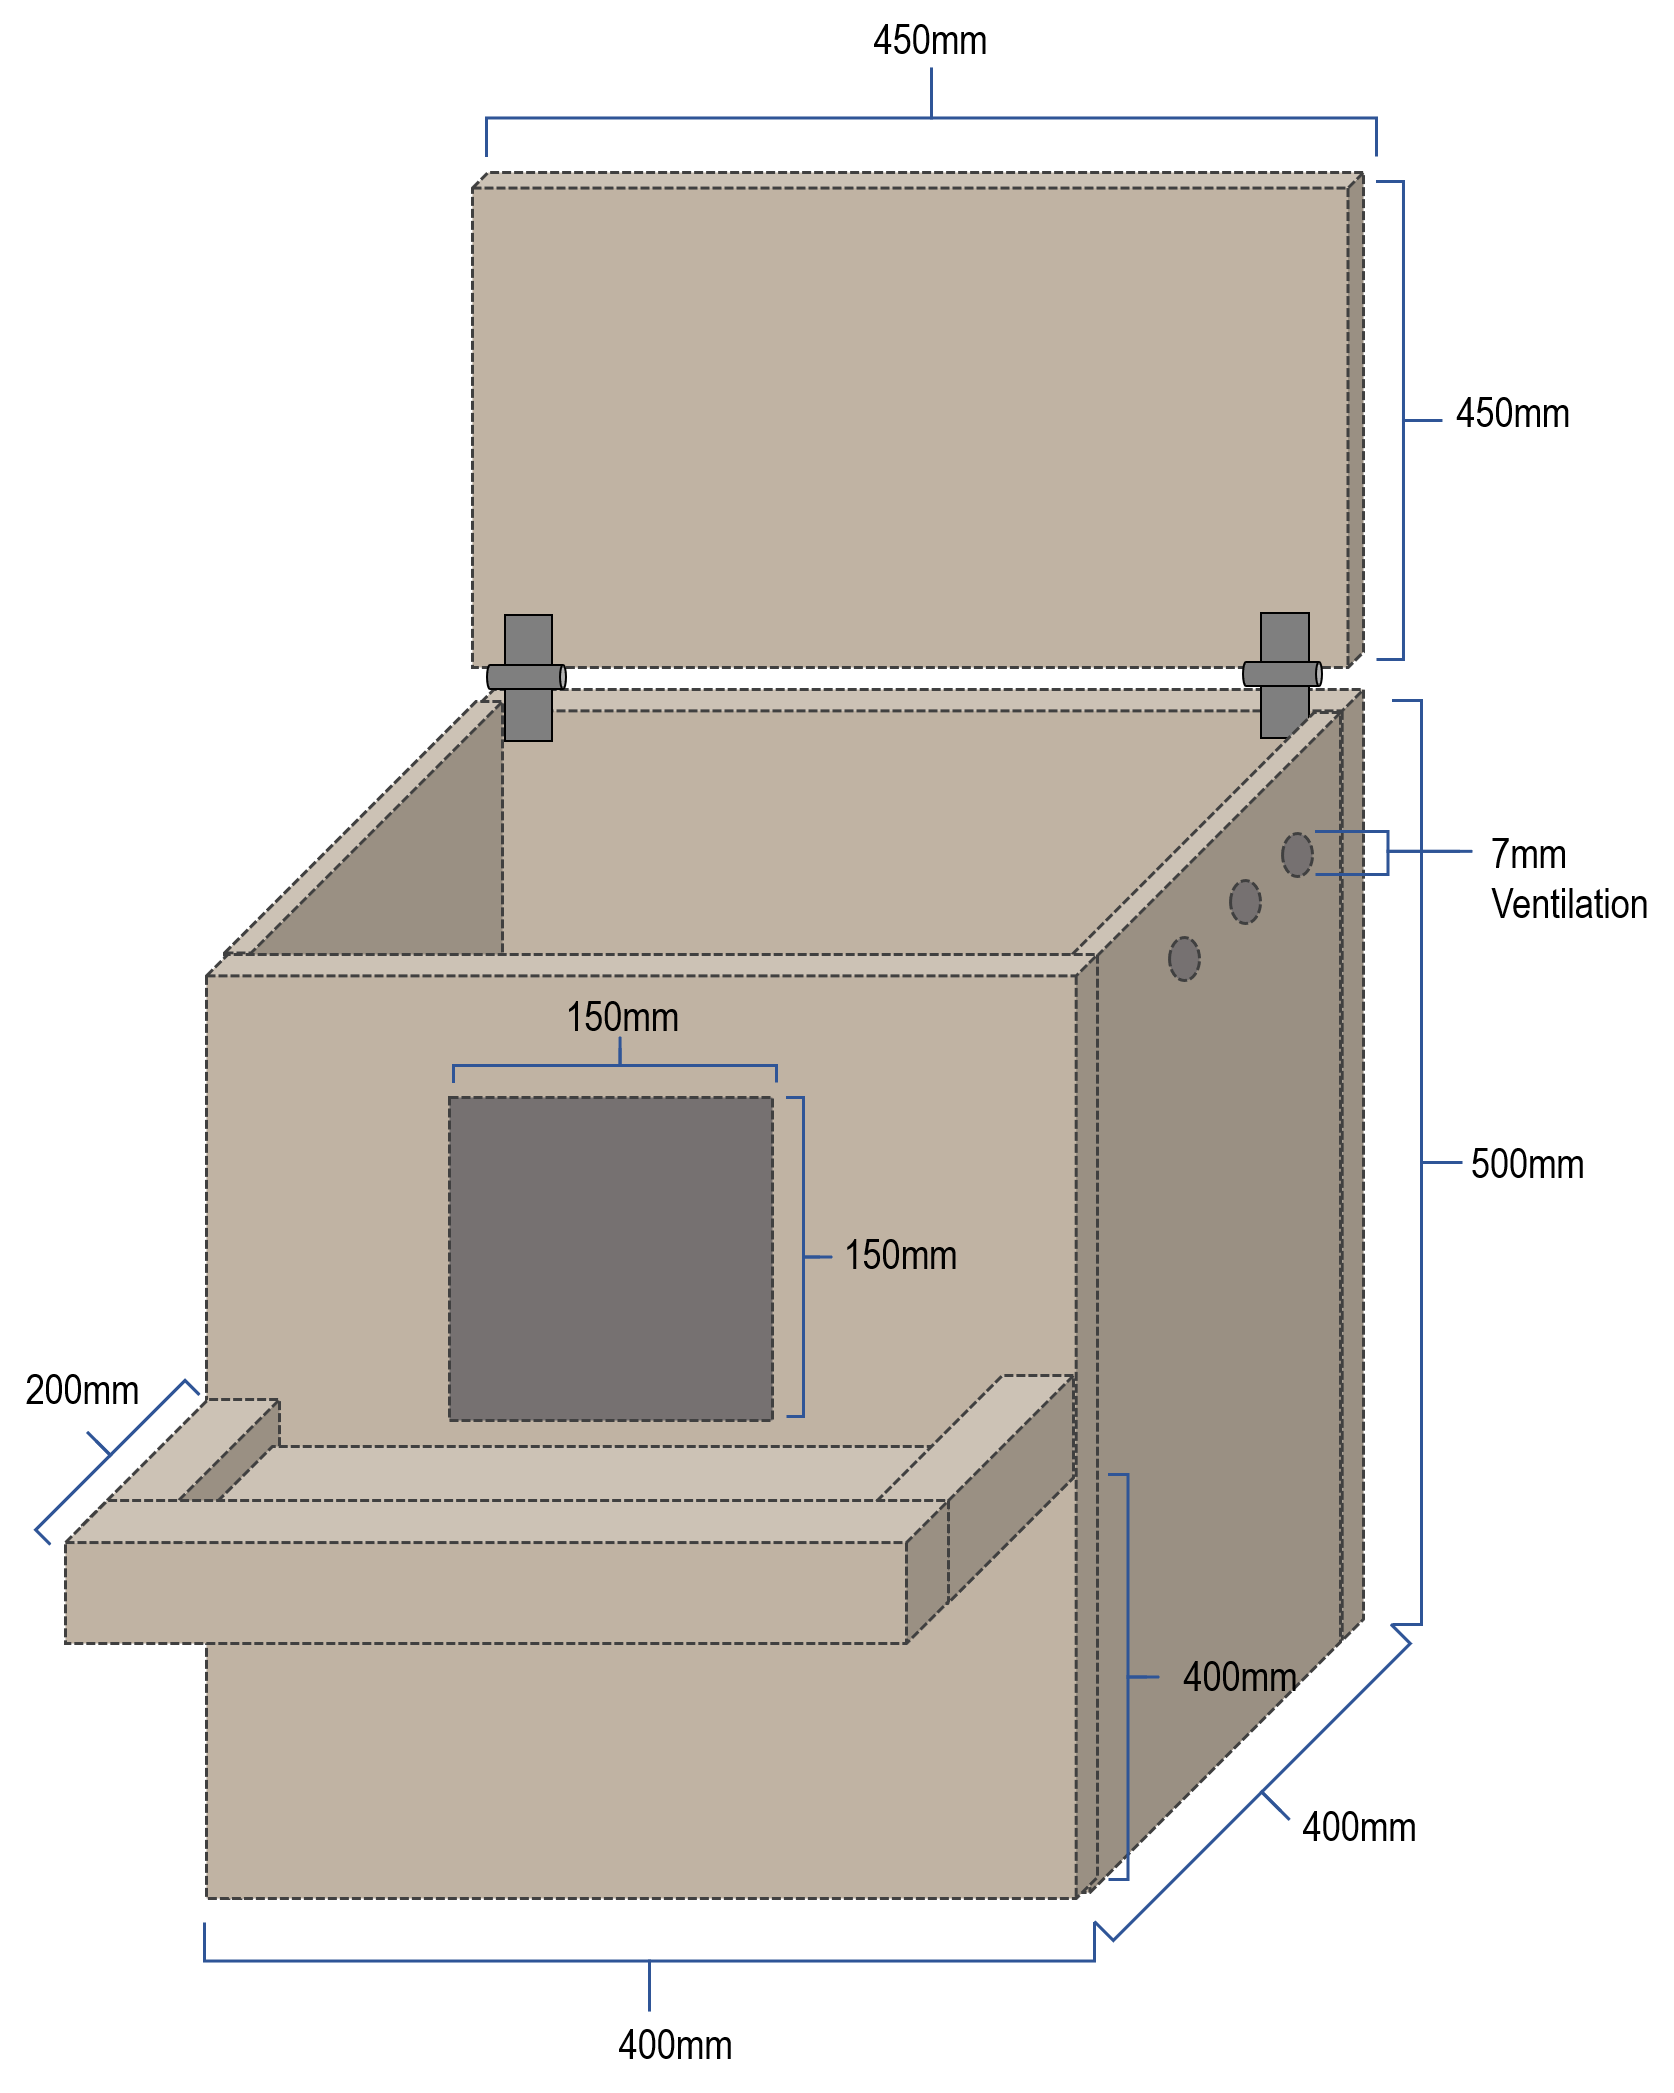
The Brushtail Possum Box
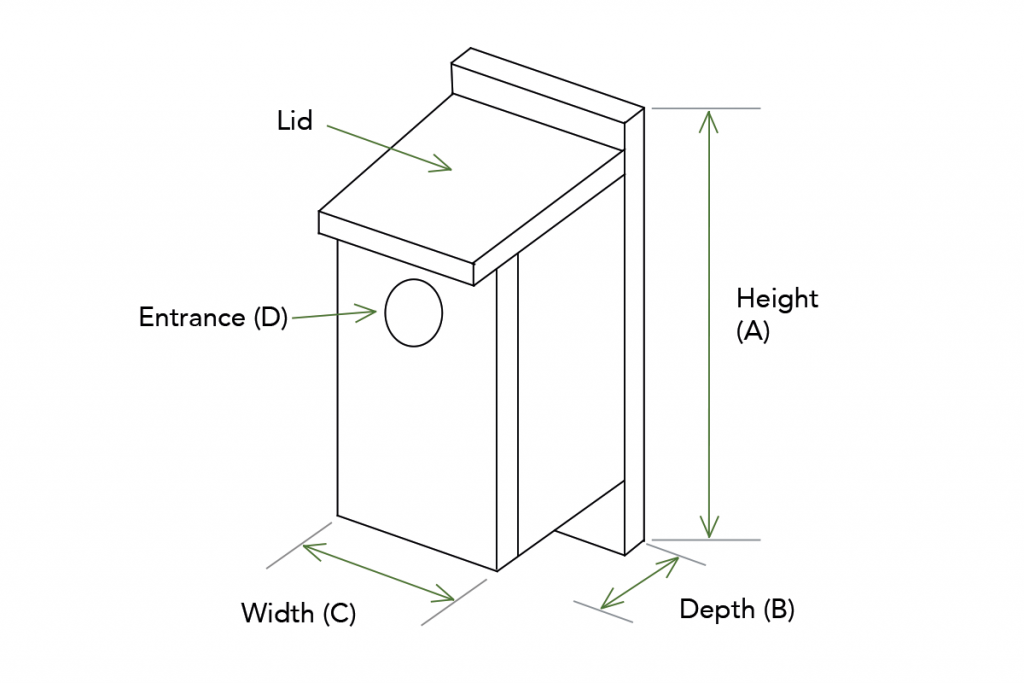
 The top edge of the roof should be weather sealed with a folded strip of sheet metal, aluminium angle or a rubber flap. To stop rain getting in the lid should overhang by around 120mm. The entry hole should be located directly under the eaves and be between 110mm to 120mm wide.
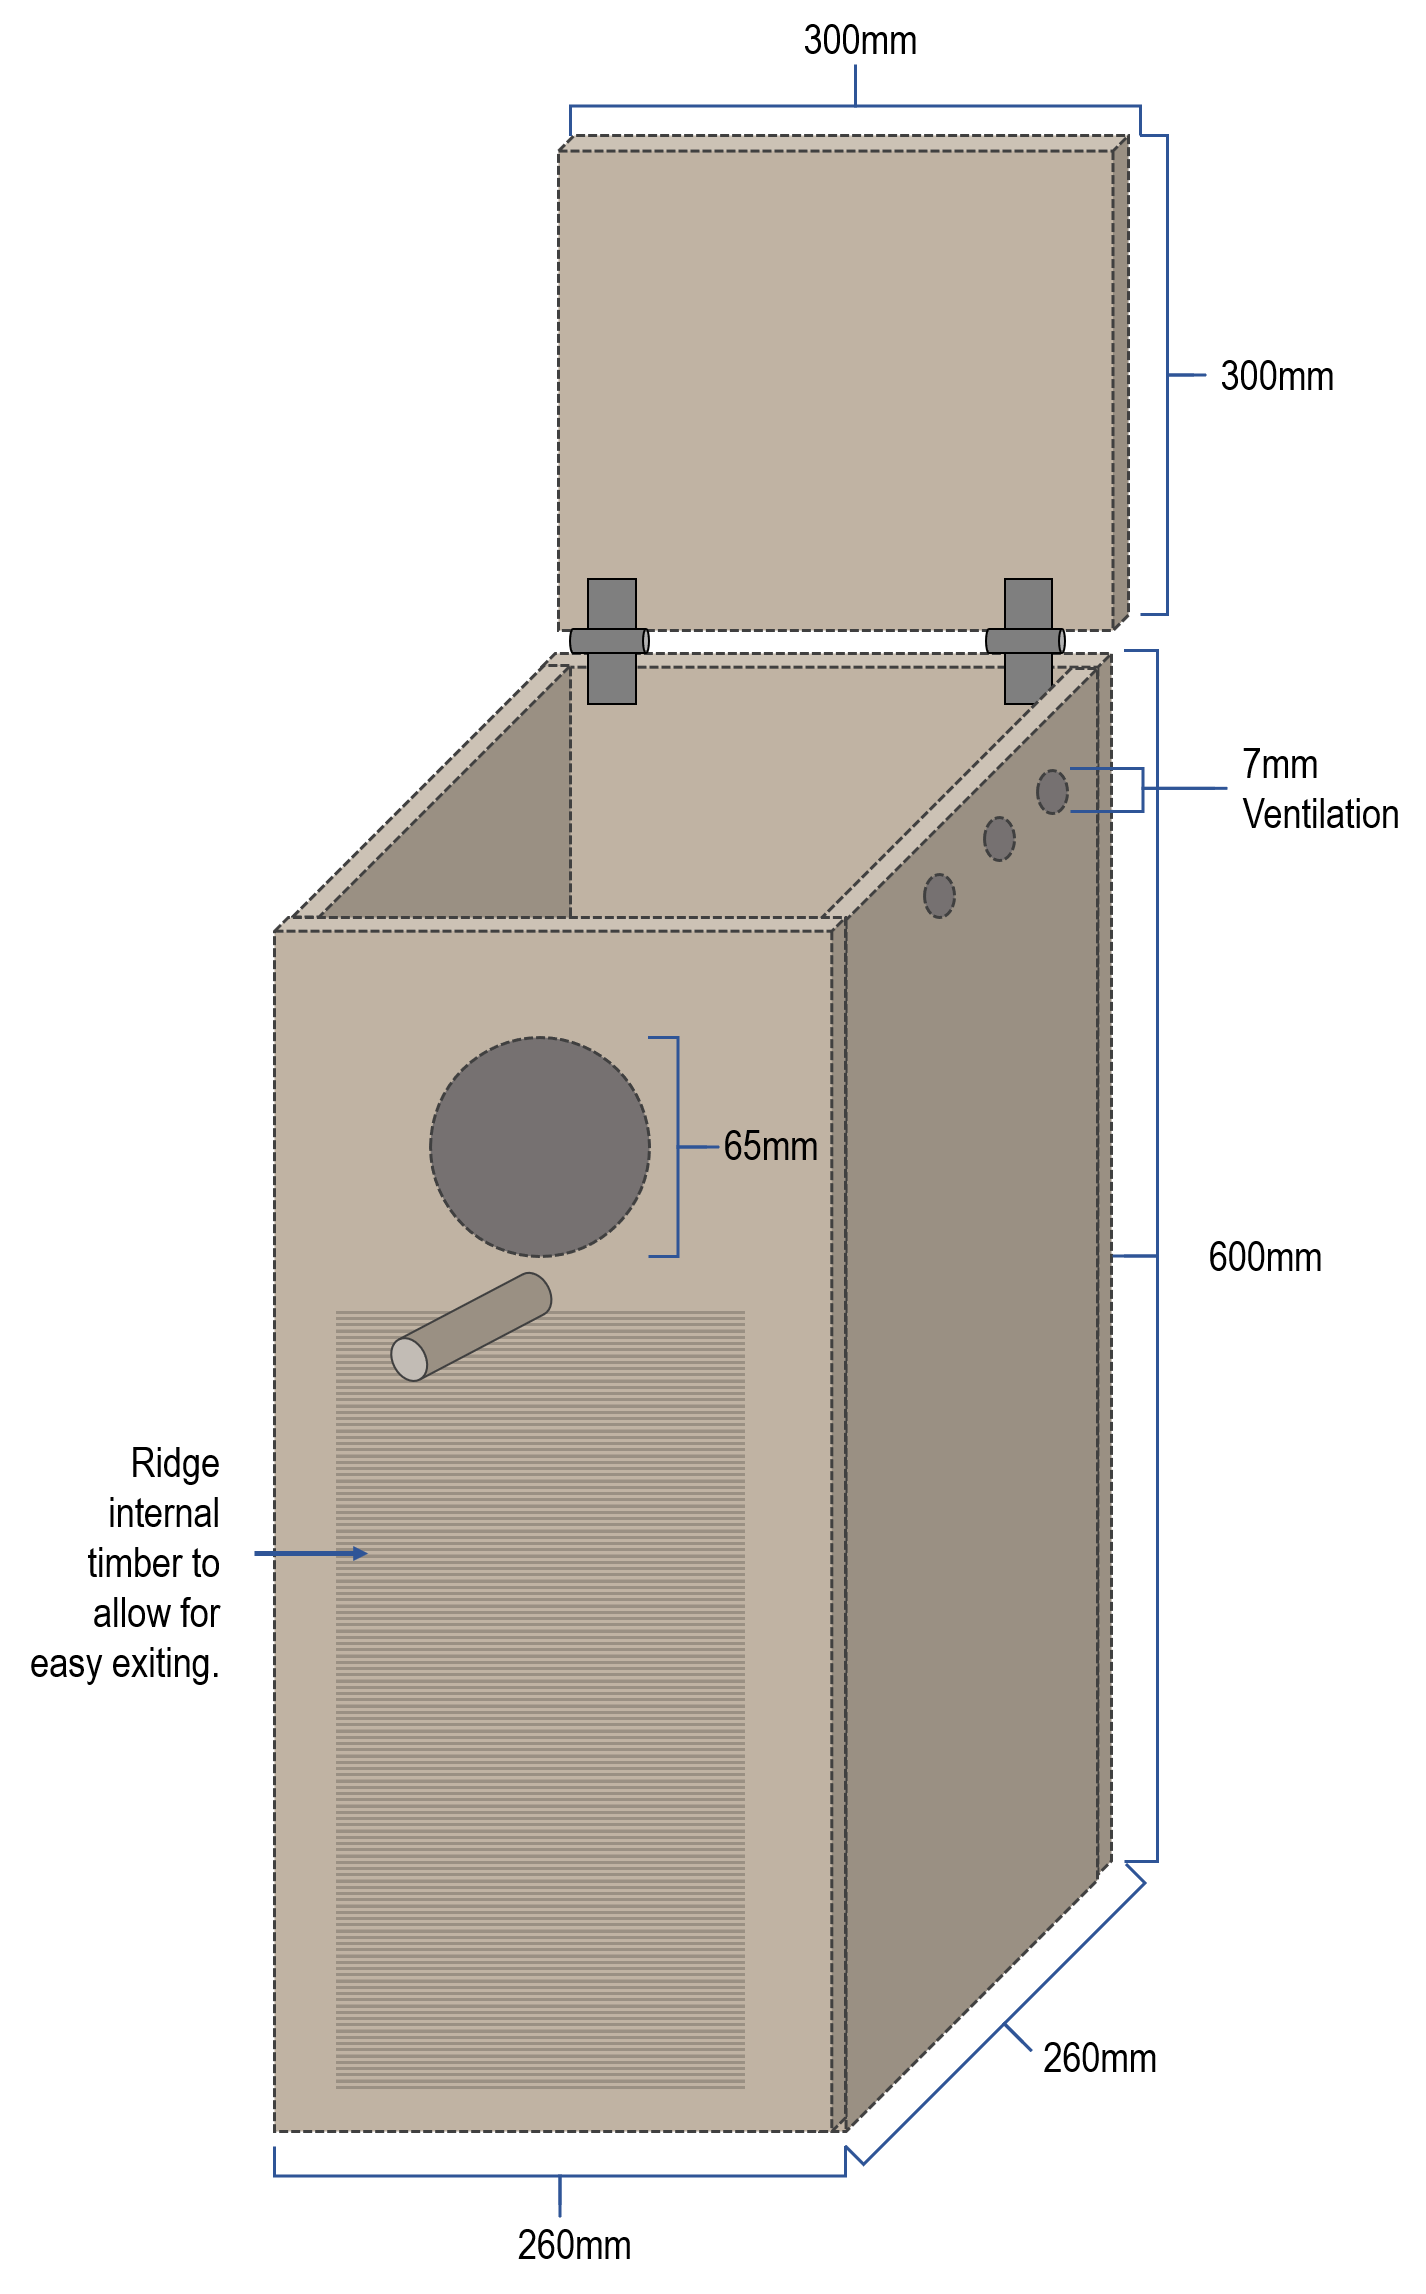
Ringtail Possum Box
Is basically the same design as the Brushtail possum box. It is slightly narrower and the entrance hole is 70mm to 80mm wide.
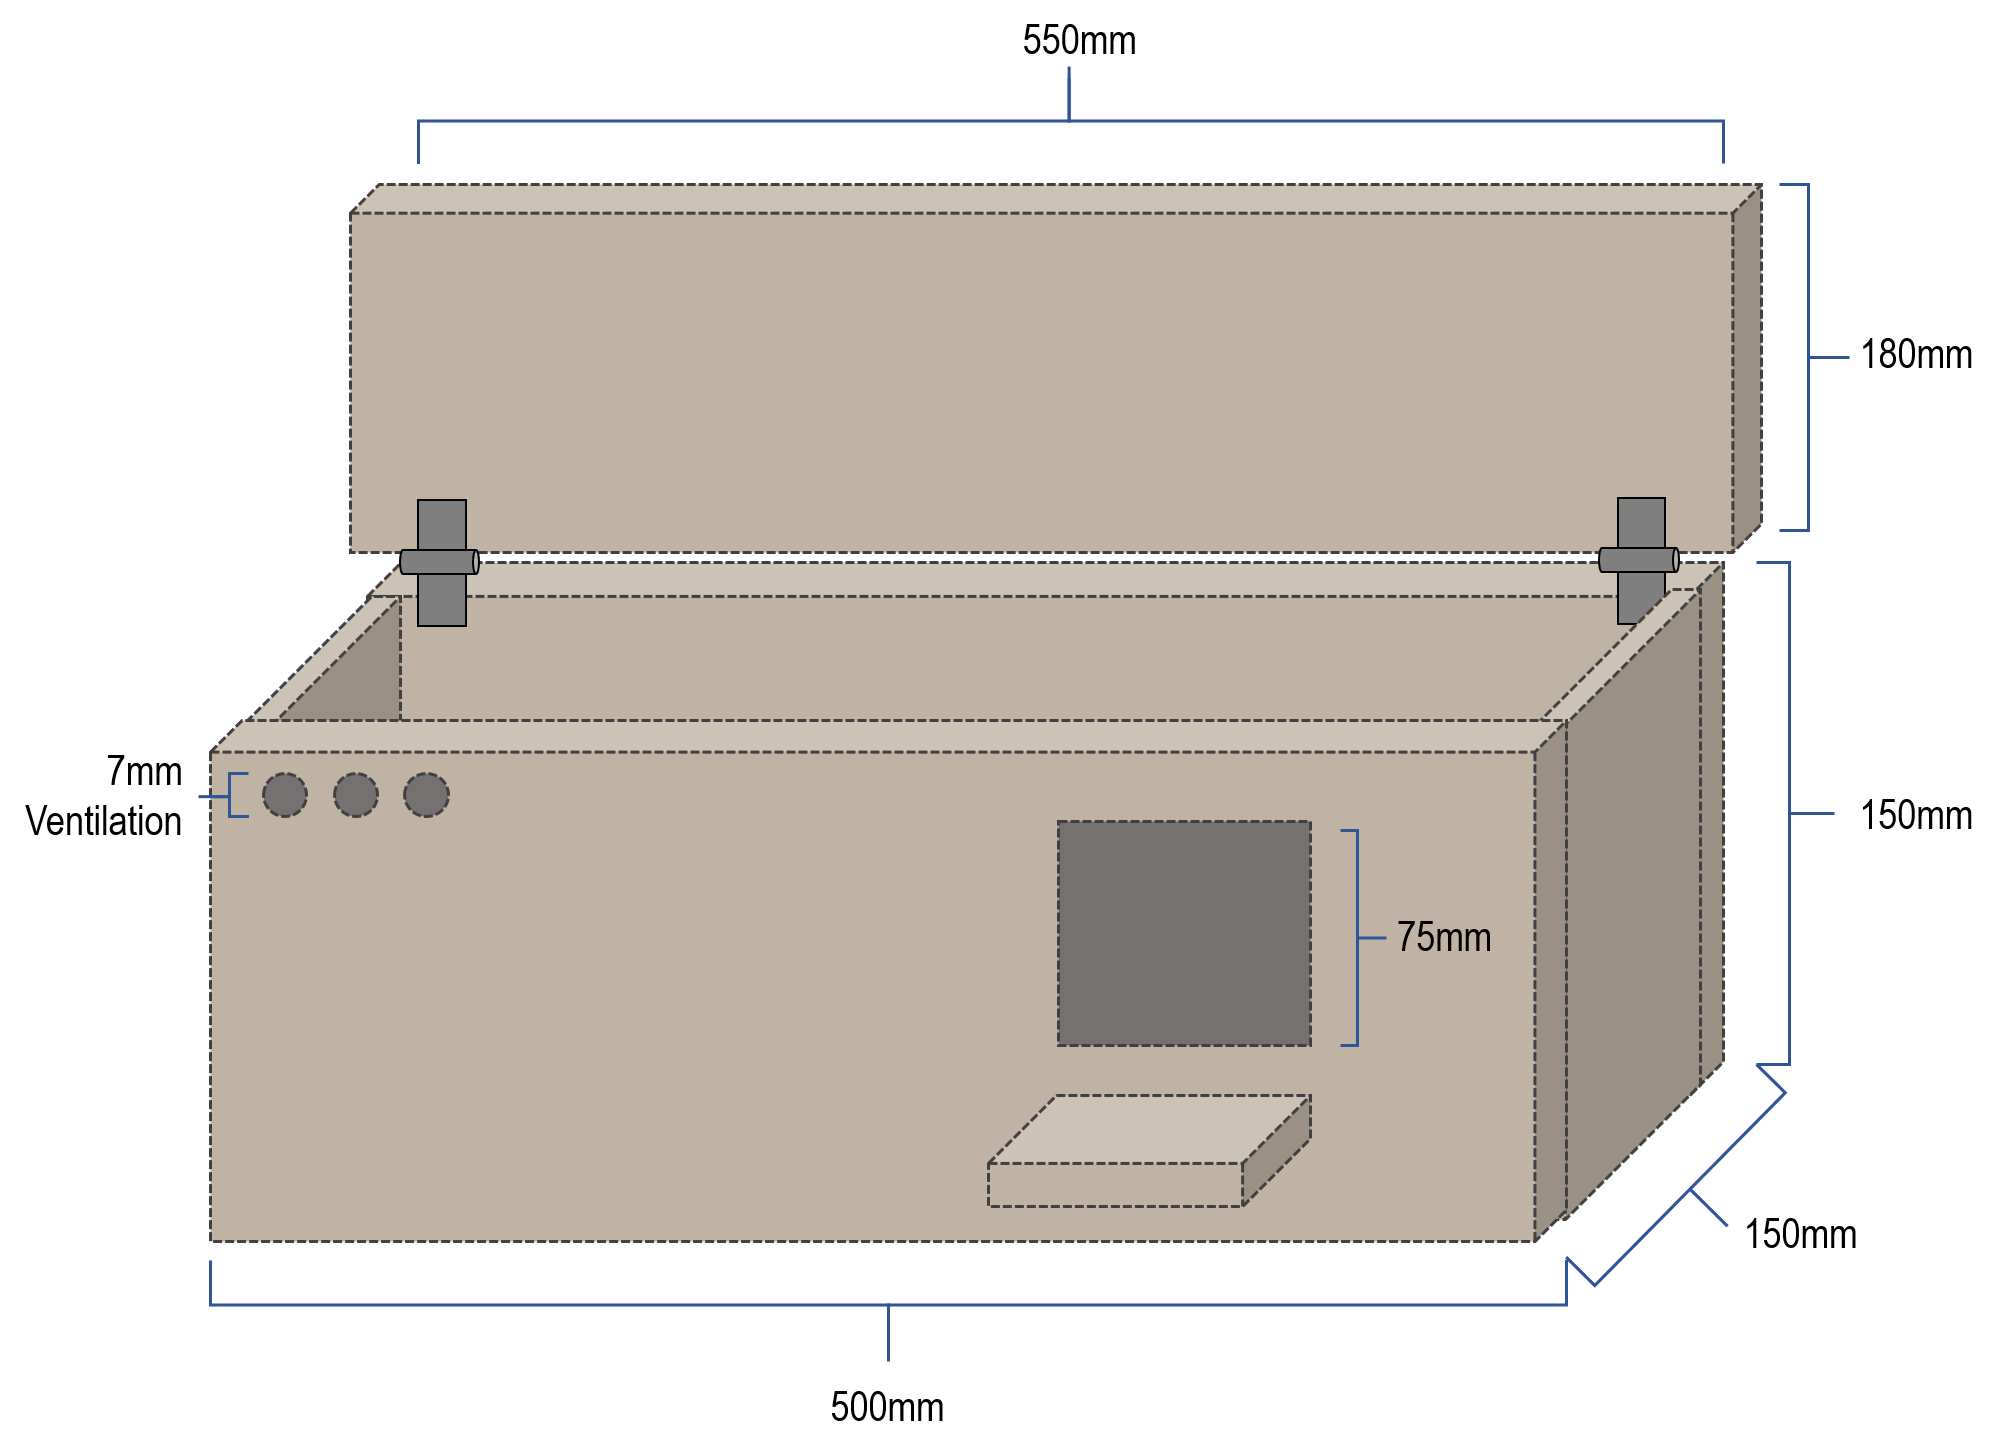
Sugar Glider Box
Although the Sugar Glider is one of the smaller possums, its nest box is quite large. However the entry hole (which would probably be a little higher up than this diagram illustrates) is only 40 mm wide.
Sugar Glider Box
How to build your possum nest box
Box top
While it is not essential, it is best if you can arrange the top so it can be opened for inspection, but latched closed for protection. Fasten the back of the lid to the back with an old inner tube, which provides 'hinge' and a weatherproof seal.
To stop rain getting in, the top should overhang by 110-120mm. The entry hole should be located directly under it.
Box bottom
The bottom of the box should fit inside the four sides and be screwed in from the side. This gives greater strength than if flush with the walls and screwed in from the bottom. Drill at least four x 5mm to 7mm holes near the corners for drainage.
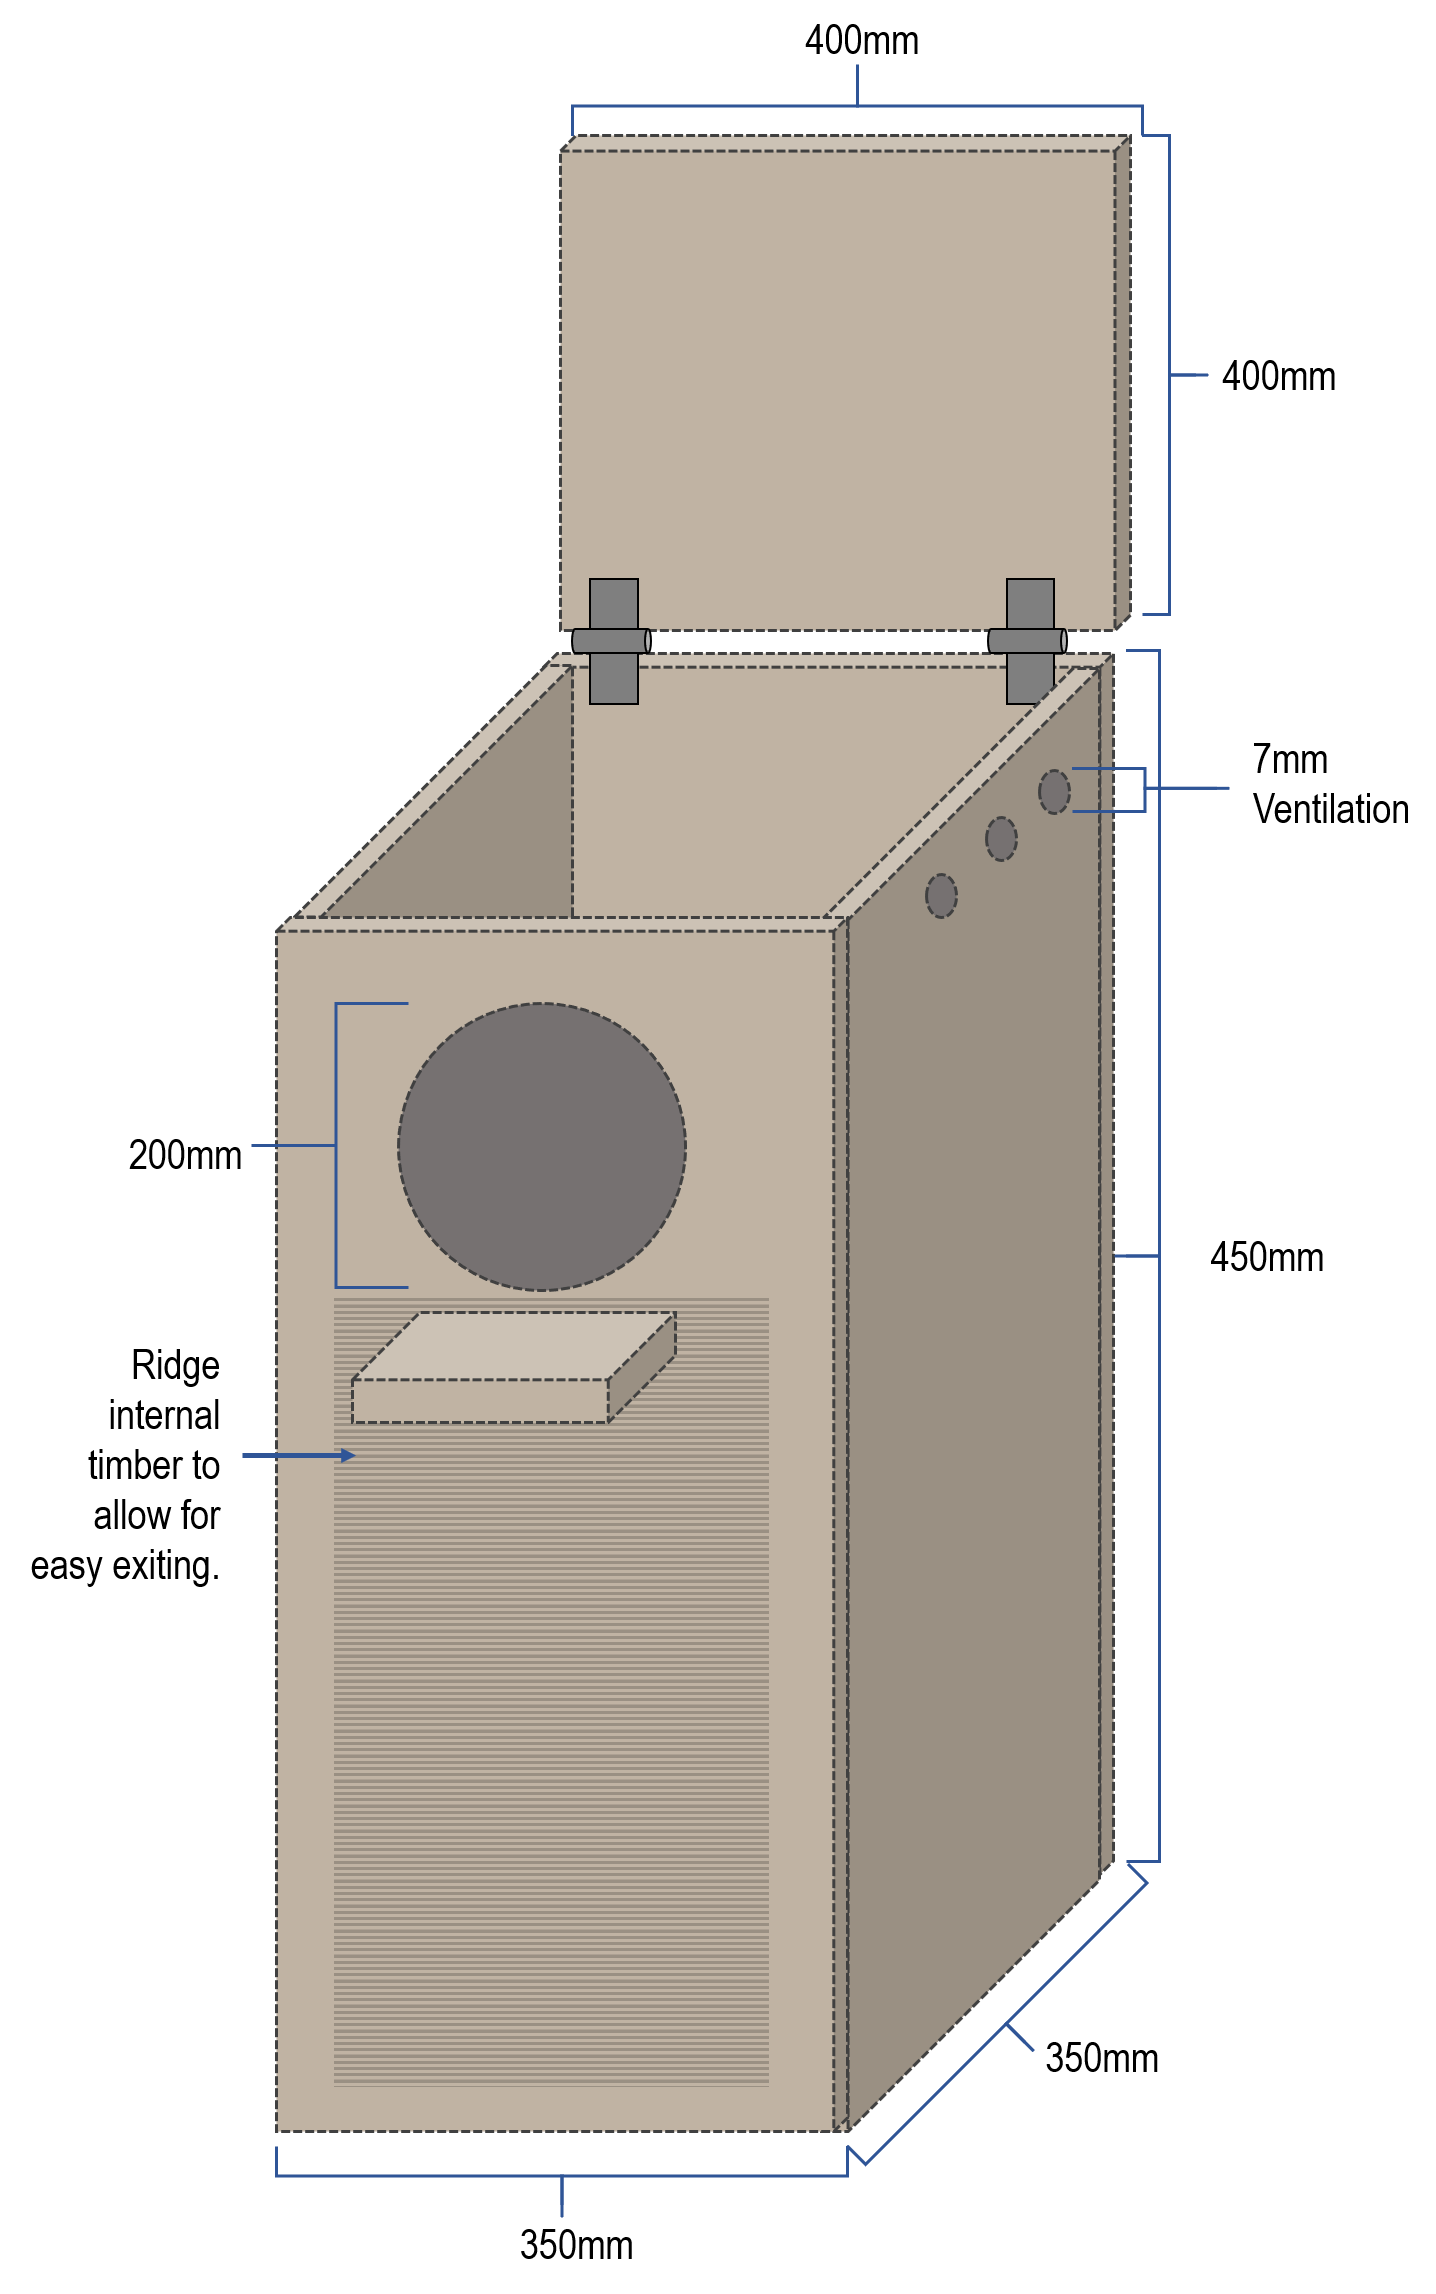
Baffle
The baffle is a screen that hides the entrance hole from view. It stops direct sunlight entering the box and reduces the effect of wind and rain. The baffle also stops Mynas and Starlings from occupying the box, as they will only choose hollows where they can fly directly into the hole.
The baffle is simply a piece of wood, the same width as the front of the possum nest box, with 'arms' to fix it to the box or lid. The baffle can be made of any thickness, as its main purpose is to provide screening and it should be large enough to cover at least 90% of the entrance hole. There are various ways baffles can be attached. As possums may decide to hang on to these and have to brush past them every time they enter and exit, make sure they are securely fastened.
The distance of the baffle from the front of the box (a to b in the diagram above) should be at least equal to the diameter of the entry hole. As the possum needs to climb under the baffle, the clearance has to be big enough to let him through.
Finish
The wood does not have to be smooth as possums are used to roughing it. However, a good coat of sealant and/or UV resistant paint on the exterior will help the box last years longer. Be sure to seal the edges, as that is where the water gets in and damages the box.
Ladders
A small branch fastened firmly inside and outside under the entrance hole will give the possum something to grab onto while entering and exiting his home.
Placement and installation
The box should be at least 4-5 meters from the ground, to provide protection from pests and a bit of privacy.
The box should face away from prevailing winds and should not face towards the afternoon sun. If it is not possible to avoid both the winds and direct sunshine, having a baffle attached will help.
Hang your nest box using sturdy wire or chain secured to the back of the box. Sheath the wire in old hose pipe to prevent damage to the tree.
Attach the bottom using a flexible metal strip approximately 30 mm from the bottom of the box, and nailed to the tree with a couple of heavy gauge flat head nails. Don't drive these nails in all the way, allow for the growth of the tree and the possibility of relocating the possum box in the future.
Moving the possum into his new home
Don't let the possum near his new home until the paint smell has disappeared. If you already have a possum in captivity, let him get used to the box before transferring to the tree. If you are trying to attract a possum, you can put some fruit in the box, but remember to take it out before it goes off. Few good homes won't remain empty for long if there are possums in the area.
Download Wildlife Rescue South Coast (Batemans Bay)‘Build a possum nest box’ brochure (275kb PDF) https://www.wildlife-rescue.org.au/uploads/1/8/3/0/18305629/building_a_possum_nest_box_brochure.pdf
Nest Box Tips
Courtesy of Backyard Buddies
- Use untreated wood. Animals may chew it and chemicals can harm them
- Arrange timber so that growth rings radiate away from the centre of the box. Subsequent “warping” will force the box together rather than apart
- The box should have drainage holes in the bottom and ventilation holes toward the top but not in the roof, or water will leak in
- Place the entrance hole near the top so that the bottom remains dark
- Add “toe holds” inside the box so young can climb out
- The lid of your box must slope from the back of the box to the entrance with an overhang of at least 25 mm. Use hinges so you can clean it out after breeding season
- Choose your position carefully. The best place for your box is in a sheltered location, so think about which side of your house takes the brunt of cold wind and driving rain. Position your box at least 3 m above the ground
- If you attach your nest box to a tree, use wire that is covered with a piece of garden hose to protect the tree from damage
- Choose a spot with a branch on the opposite side of the tree to rest the wire on
- Cover the bottom of the box with wood shavings or shredded bark
- Keep an eye on your nest box and make sure that pest species such as Common Mynas haven’t moved in. If you find that is the case, empty the box and close the entrance hole for a while
- Put your new nest box up in late winter or early spring. This is the time that early breeders like rosellas are looking for a place to raise their young
Different Buddies like Different Nest Boxes
The size of the animal matters when it comes to finding the right real estate. The entrance hole should be just big enough for the residents to get in. You can also add a stick under the entrance hole to help buddies on their way in and out of the box, if you like.
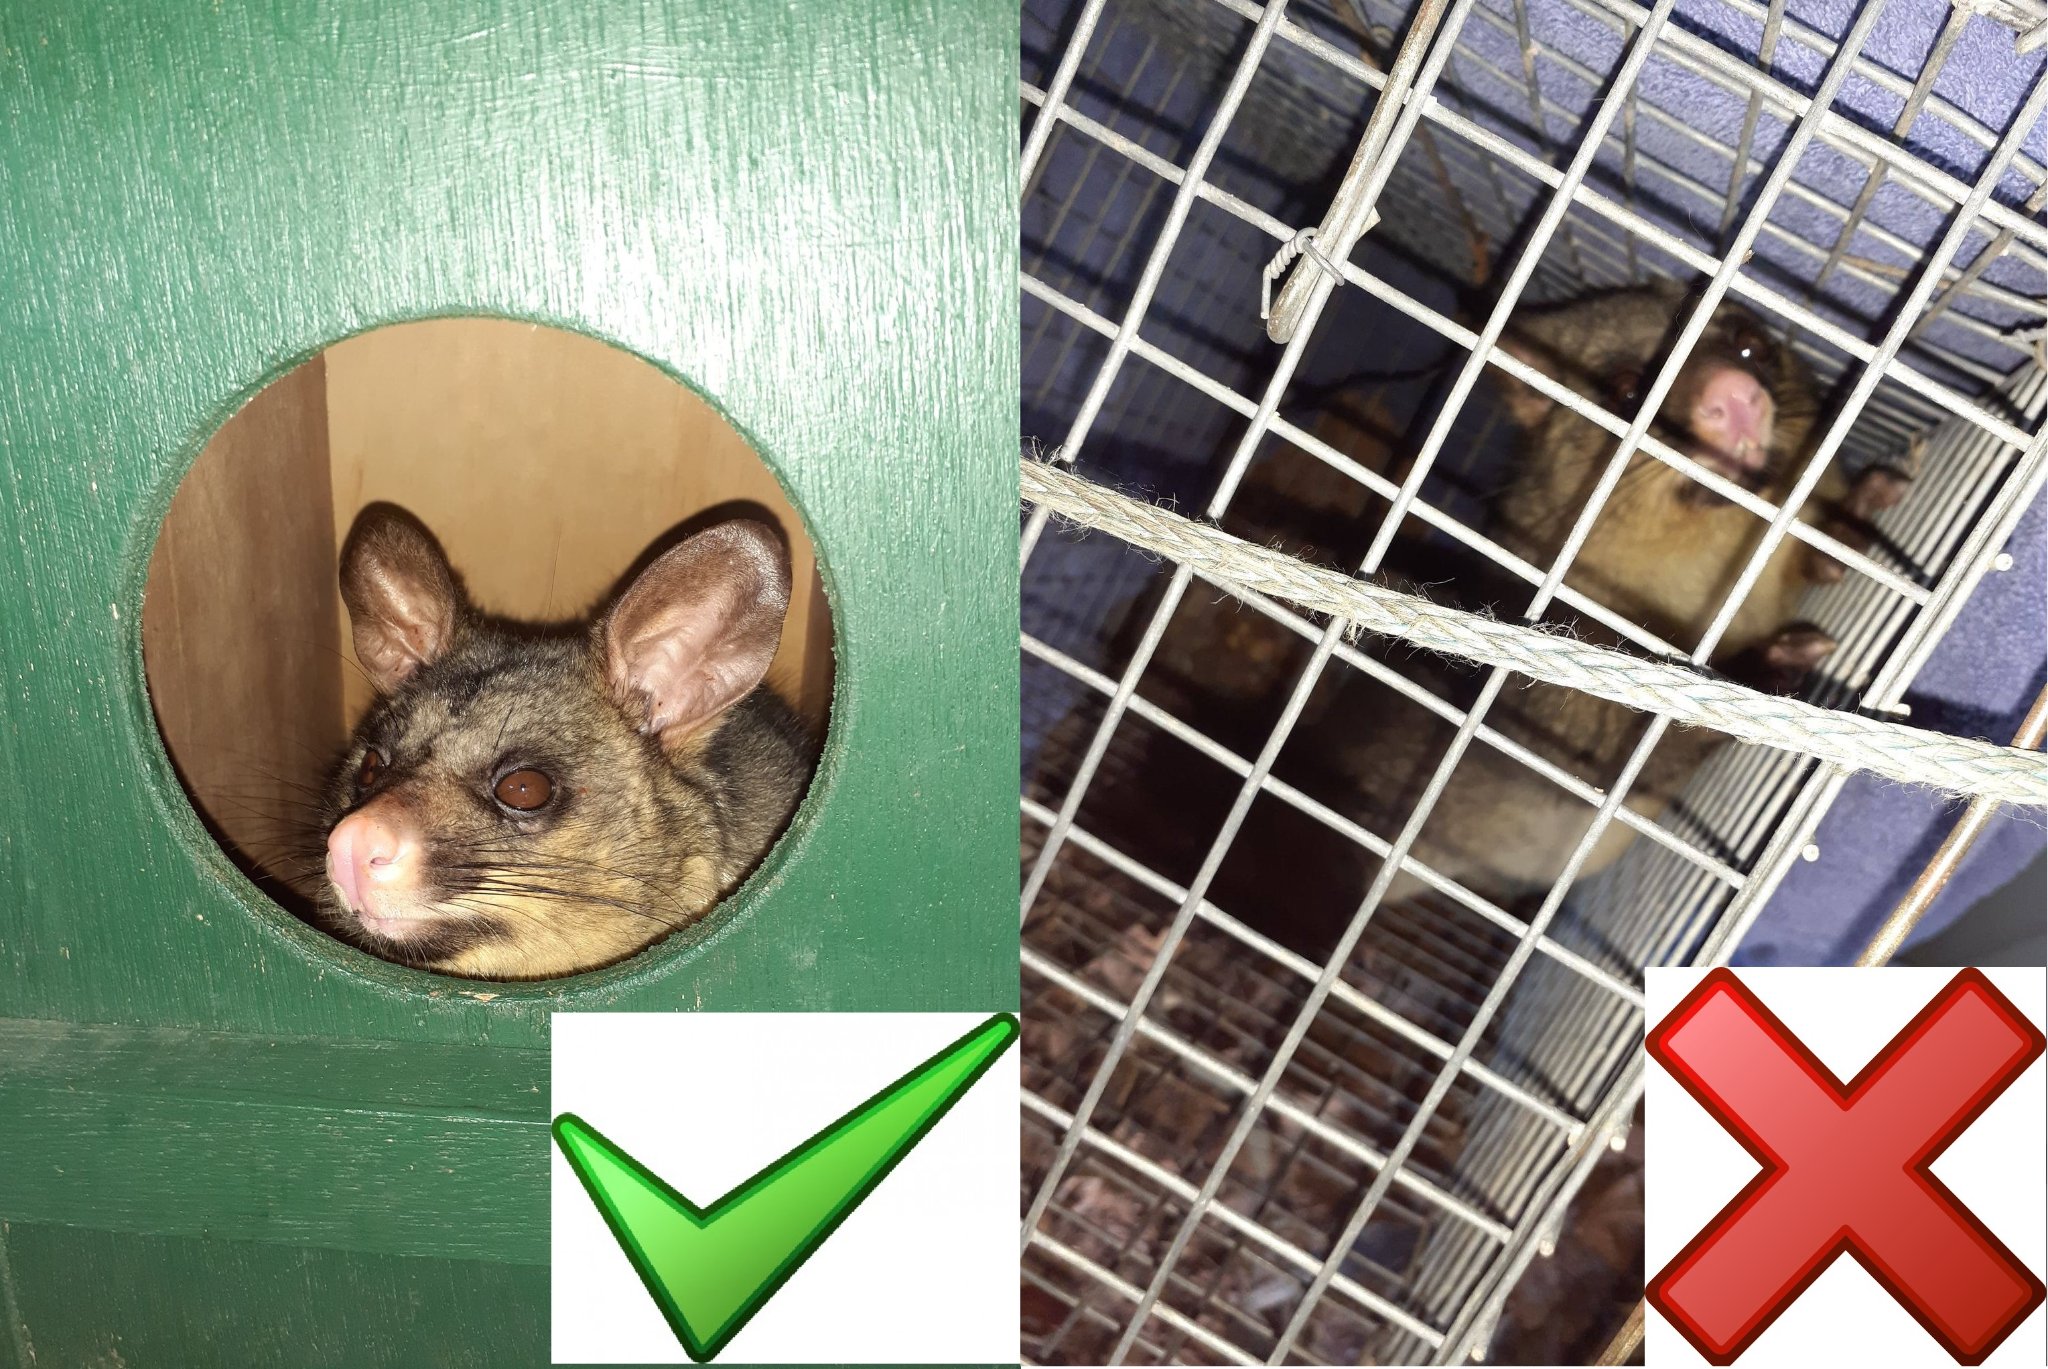
A nest box may be part of the solution if you have a resident Brushtail Possum in your roof. At night, when your possum is out, place a bright light in the roof to discourage it from coming back and seal all access holes to your roof. Place the new nest box nearby so your possum can find shelter when it finds your roof locked up.
The measurements below are in millimetres and are the minimum guidelines for the dimensions of the boxes.
- Ringtail Possum Nest Box: A 400, B 240, C 200, D 70
- Brushtail Possum Nest Box: A 500, B 250, C 290, D 100-120
- Rosella Nest Box: A 400, B 240, C 200, D 70
- Treecreeper Nest Box: A 400, B 190, C 170, D 45-50
- Sugar Glider Nest Box: A 400, B 240, C 200, D 32-35
It’s easy. All you have to do is care… and take a few simple steps. Backyard Buddies are the native plants and animals that share our urban areas, waterways, backyards and parks. Backyard Buddies are also the people who value native wildlife and want to protect it.
Building the $2 Birdhouse
By cheapchuckinOutside, CC - NB: measurements used are in inches, simply adjust those we haven't converted to use same in millimetres/centimetres.
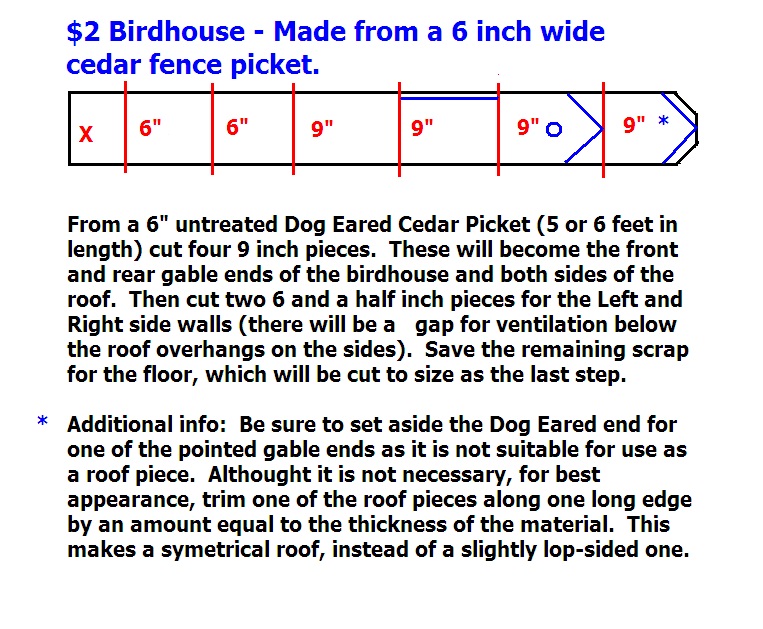
I have built many of these $2 birdhouses as gifts. The basis of the $2 birdhouse is a 6" wide Dog Eared Cedar Picket, which comes in 5 and 6 foot lengths. The cheaper 5 foot picket will be enough to build one birdhouse and typically sells for less than $2. Please make sure your picket has not been stained or treated, just the natural Cedar. Also, keep in mind that any 1"x6" stock will work; I have transformed quite a bit of scrap wood into birdhouses. I have been told to avoid pallet wood as some has been treated with arsenic, but do not know this to be a fact in all cases, just be aware of the possibility.
Step 1: Materials Needed... Tools Needed..
Materials
- Some good 4x2 stock, at least 5 feet/1.5metres per house. If using Pickets, try to find some that are not badly warped and have a uniform thickness. Remember to look for wood that you can recycle but make sure it hasn't been treated as the poisons will poison your birds!
- Indoor/Outdoor wood glue
- 1&1/4 inch cleats, if you plan to use a nail gun, similar sized 16-18 gauge will work very nicely.
- Perch is a twig or other interesting device, such as a Golf Tee, basically anything a small bird would be comfortable perching on.
Tools
- As basic as a miter box and saw, all the way to a chop saw and table saw if you have them.
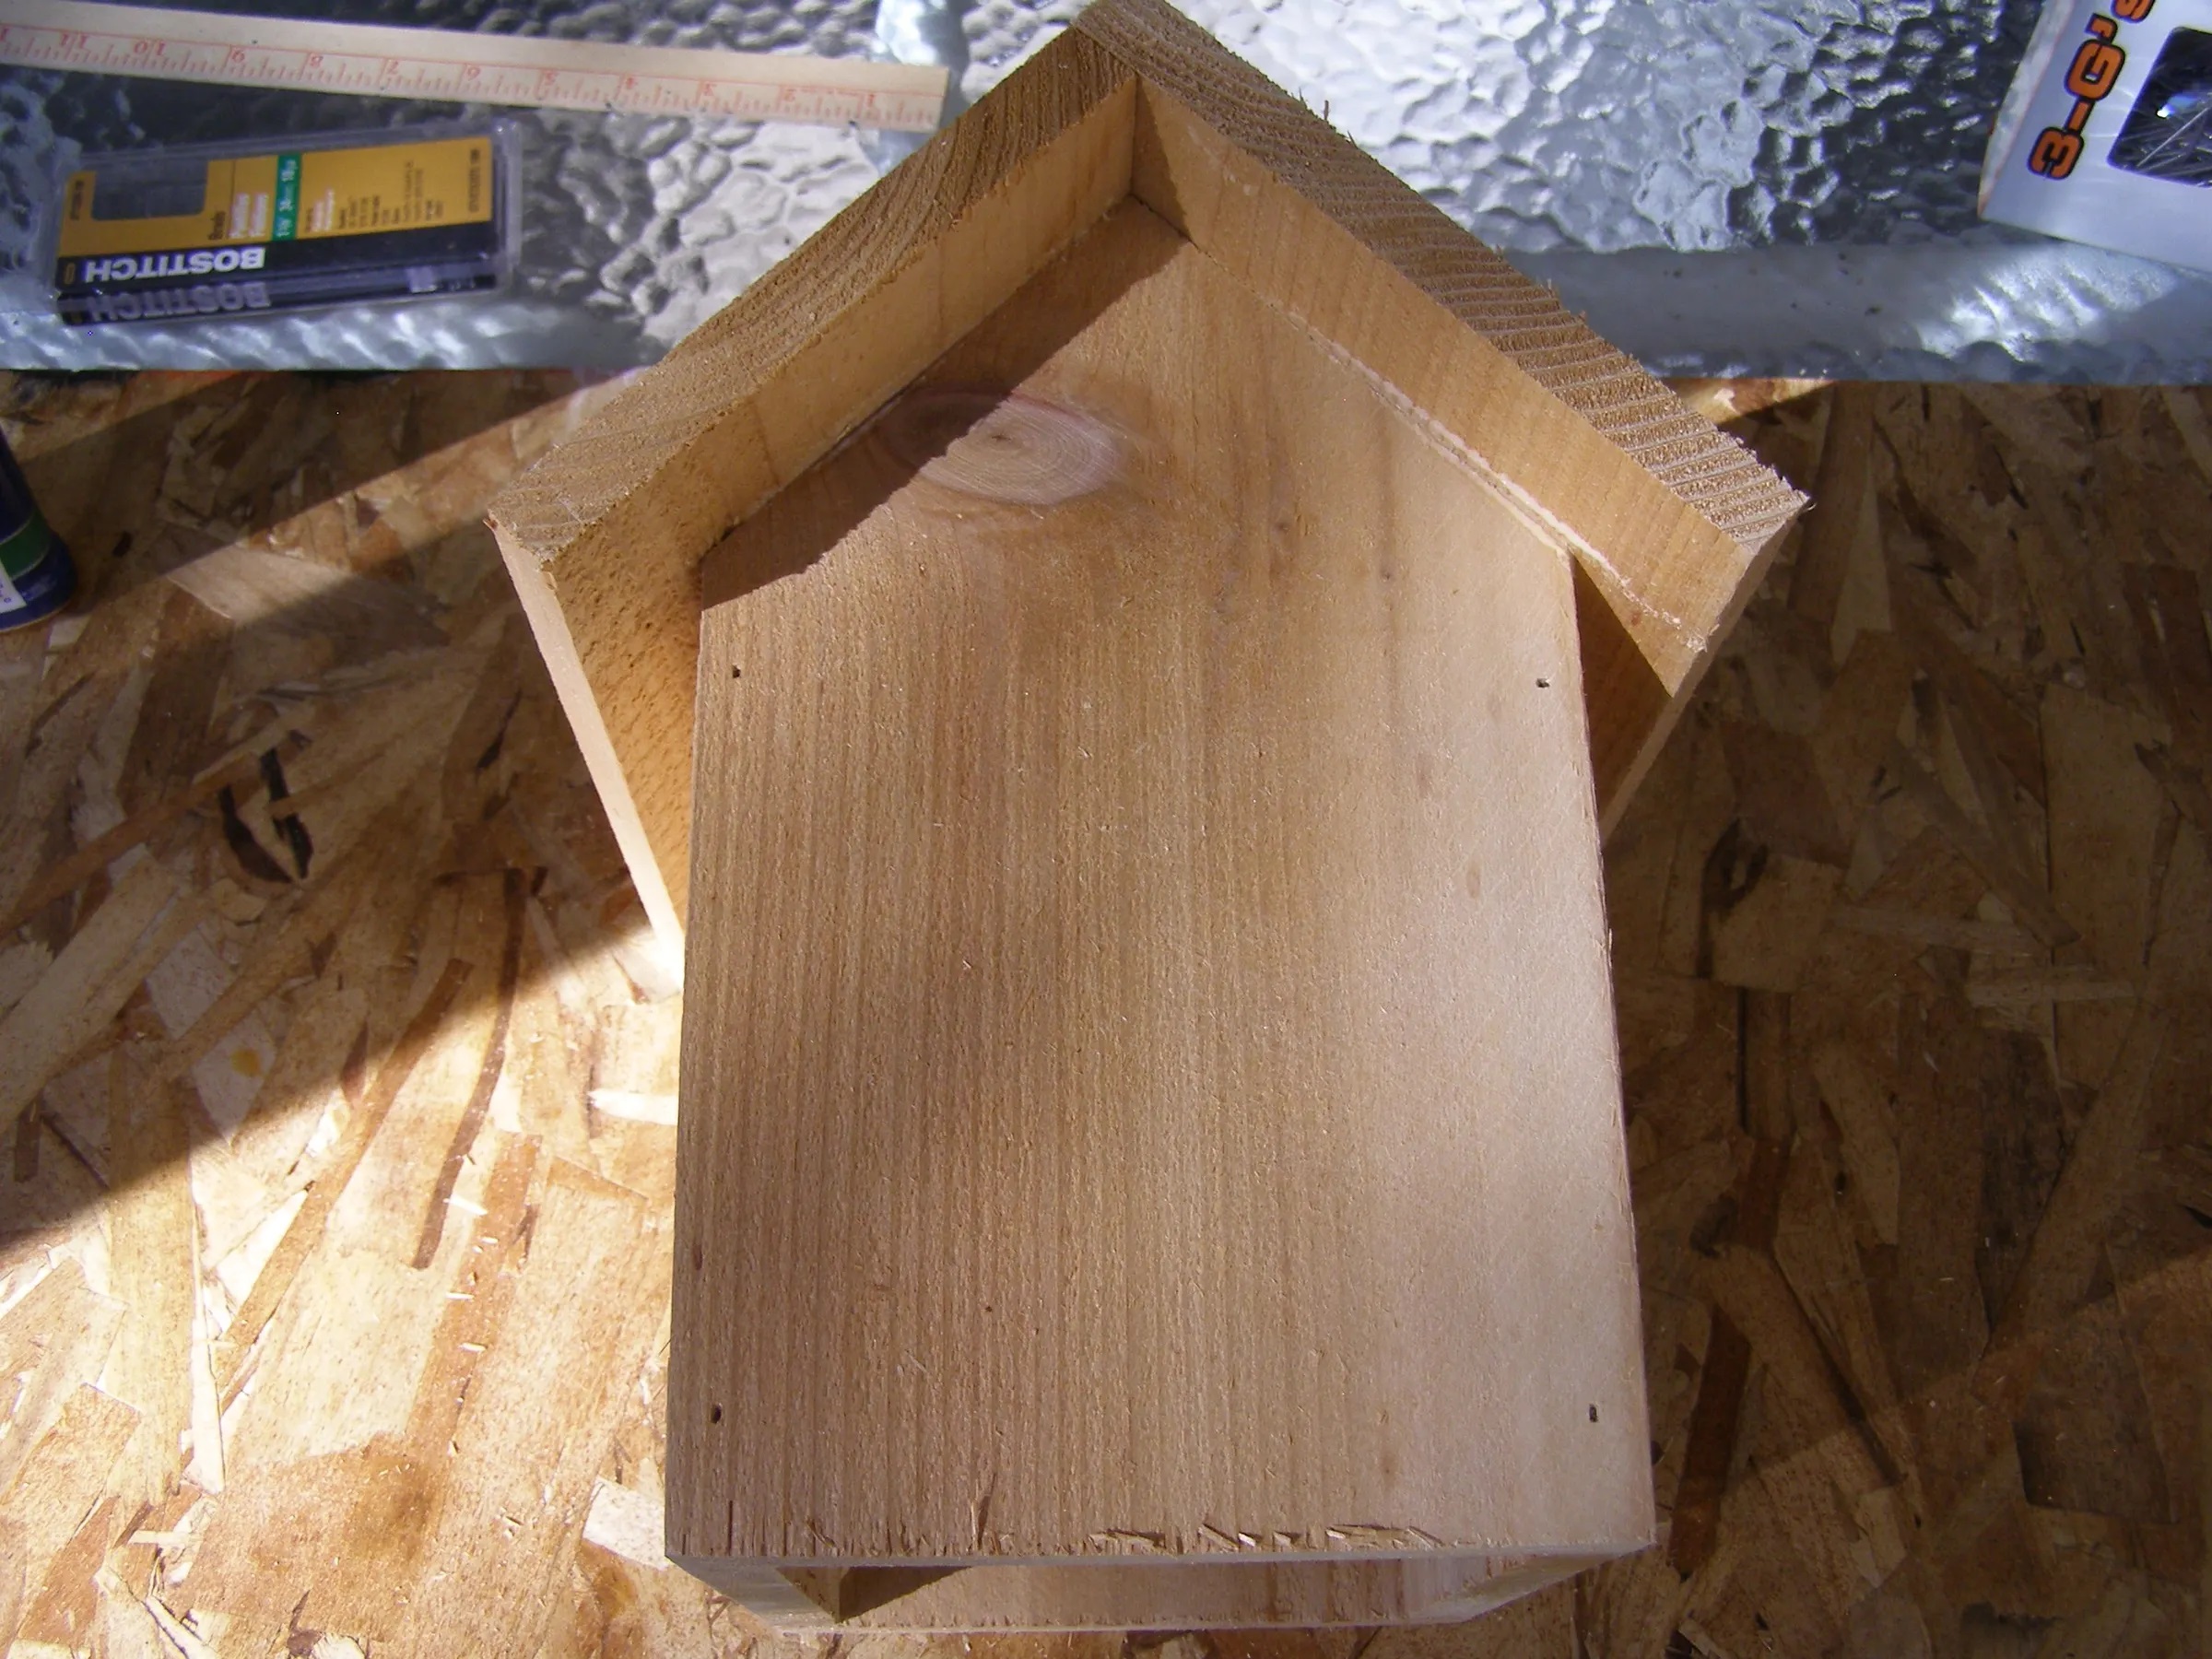
Step 2: Some Plans... (I Use the Term Loosely)
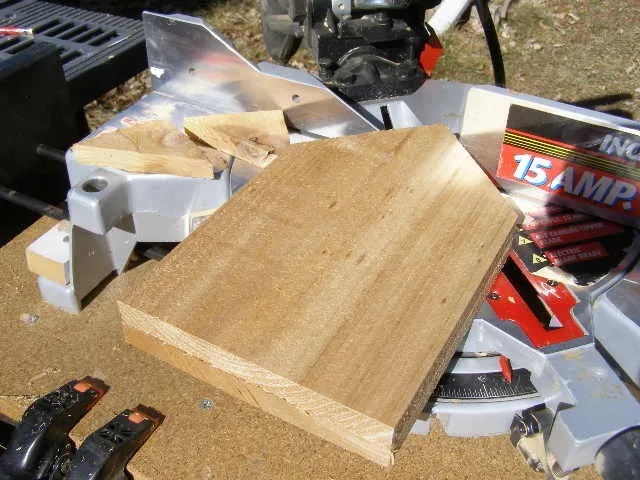
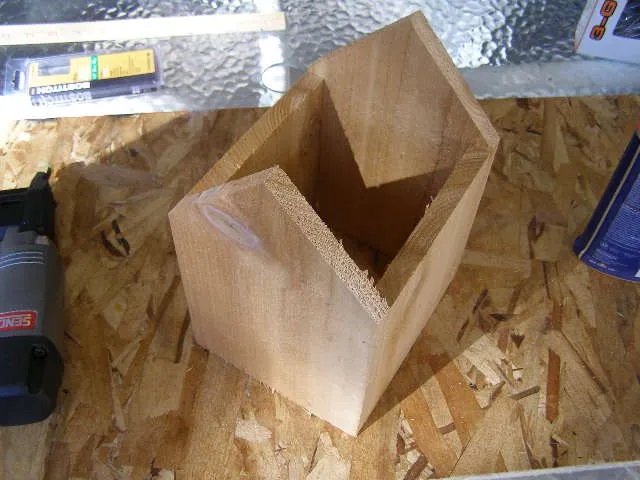
Step 3: Getting Started; Saw Work...
Before getting started, consider where you want to put the birdhouse. Choose the hanging or flush mount Instructable. This Instructable is for the hanging birdhouse is the basis for the flush mount birdhouse, so you will benefit from reading on.
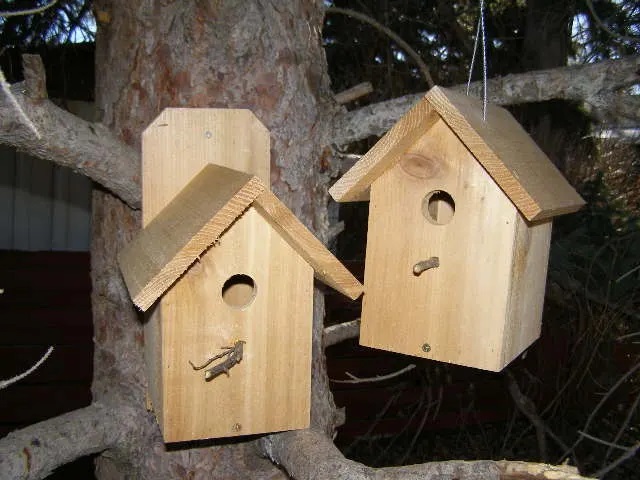
Left: flush bird house. Right: hanging bird house
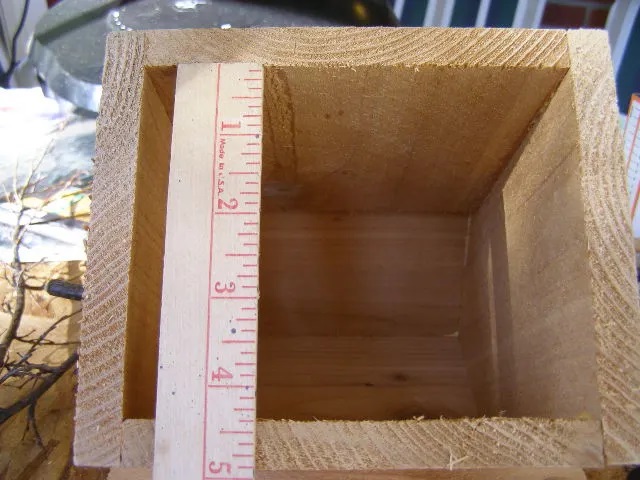
Saw Work: Cut four 9" pieces for the gable ends and roof pieces. Cut two 6" side pieces. Save the scrap for the floor. If you started with a 6' picket, you will have enough scrap to build a tool box.
Optional saw work, trim one edge of one roof piece the width of the material. This will result in a symmetrical roof, but the birds won't notice!
PICTURES ARE INSTRUCTIONS, SO VIEW ALL OF THEM.

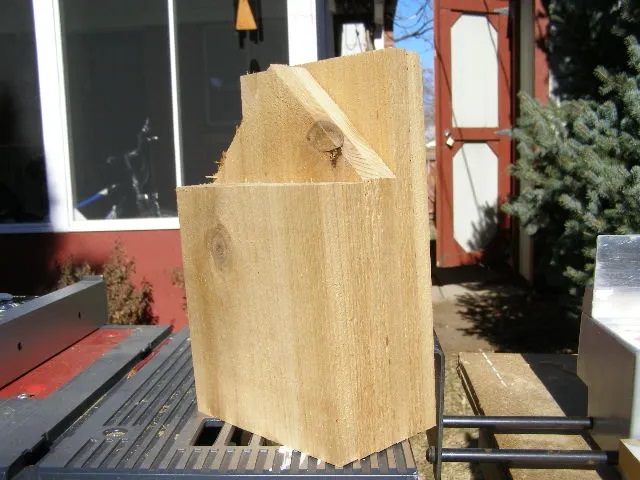
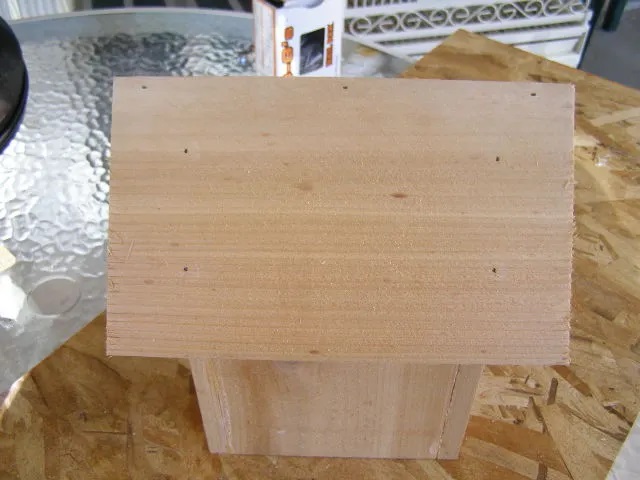
Step 4: Optional Saw Work - Trimming the Roof...
For a perfectly symmetrical roof, you will need to drag out the table saw and trim off one edge of one roof by an amount equal to the thickness of the board. The Picture will explain why...
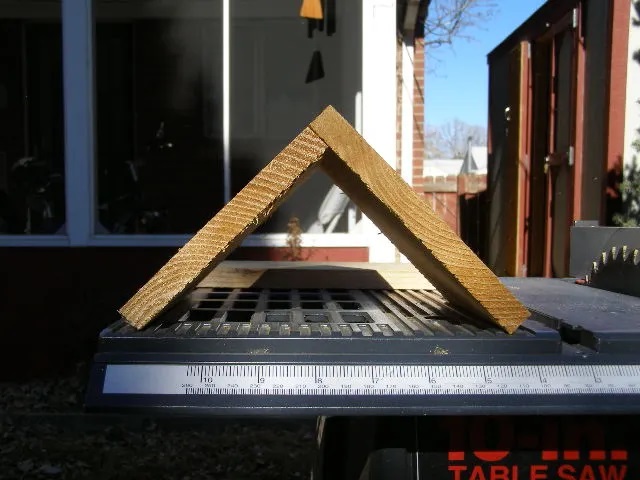
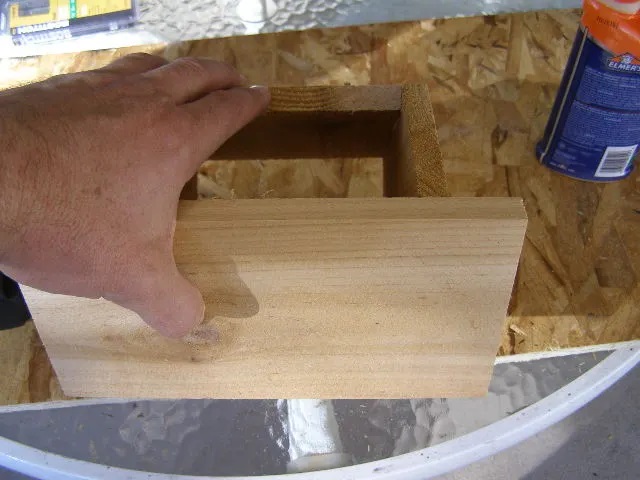
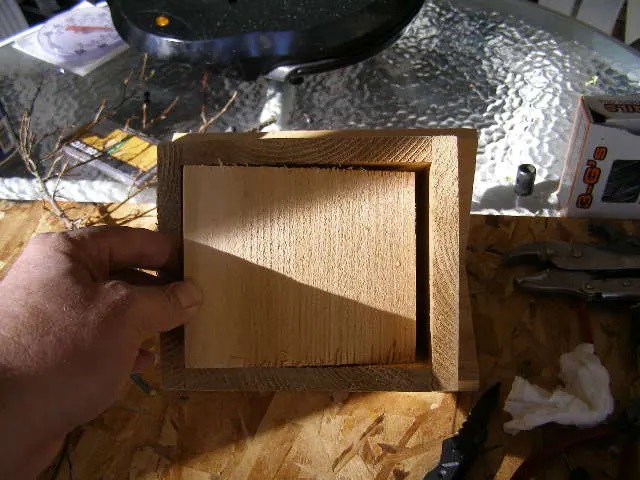
Step 5: Assembly - the Fun Part!
All points of attachment are glued with an indoor/outdoor Wood Glue, or equivalent, then nailed into place.
The pictures are the instructions, so view them all...


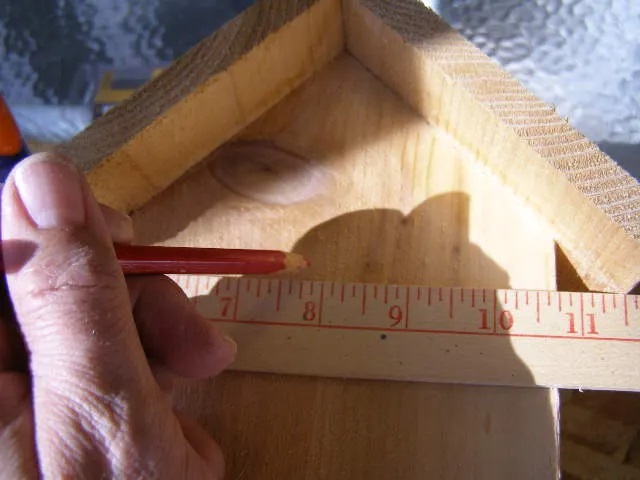
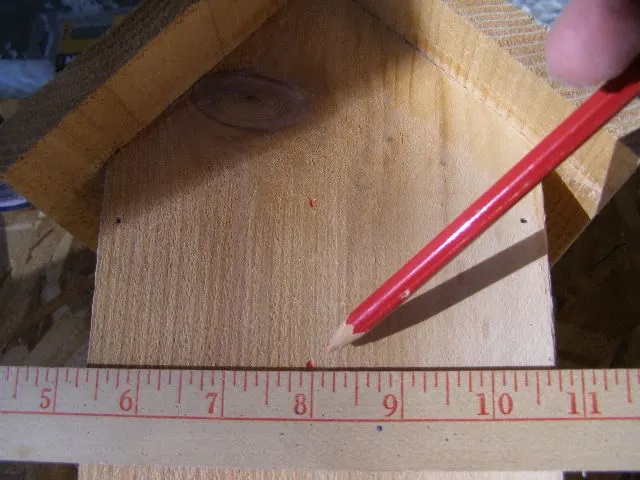
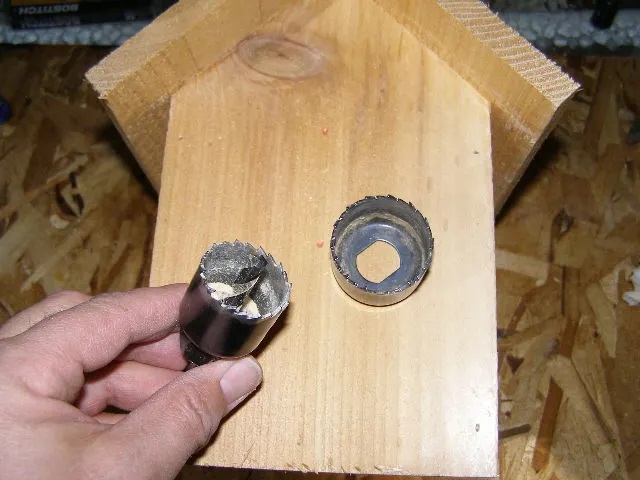
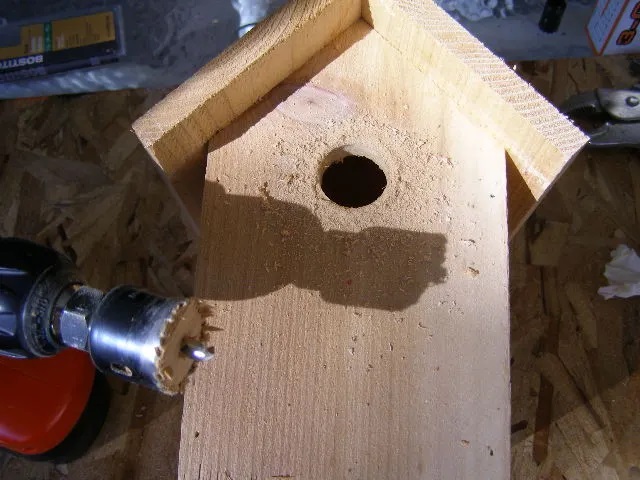
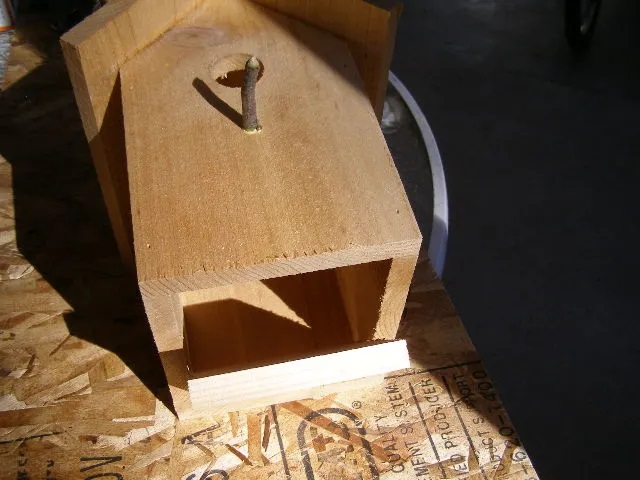
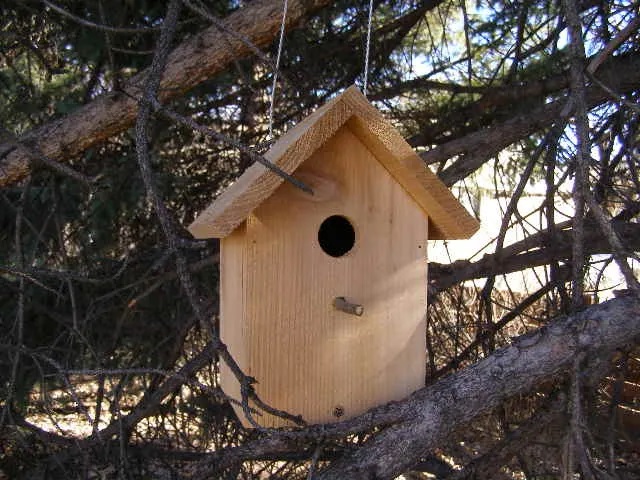
Step 6: A Front Door and a Perch...
For most urban birdhouses, an entrance of 3.5cm will be good, small birds will be the most likely tenants. If you are lucky enough to have larger birds you'll need to increase the hole size - details on scale for Australian birds run below. A hole saw makes a nice smooth hole, but check for splinters inside the home - alternatively, install the entranceway in that piece of wood prior to assembling and sand smooth.
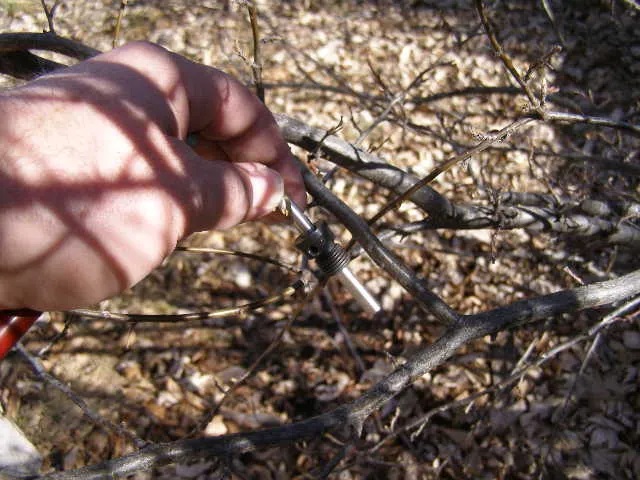
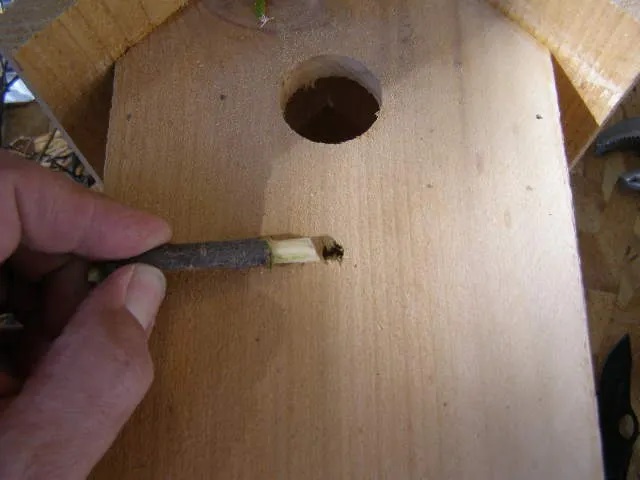
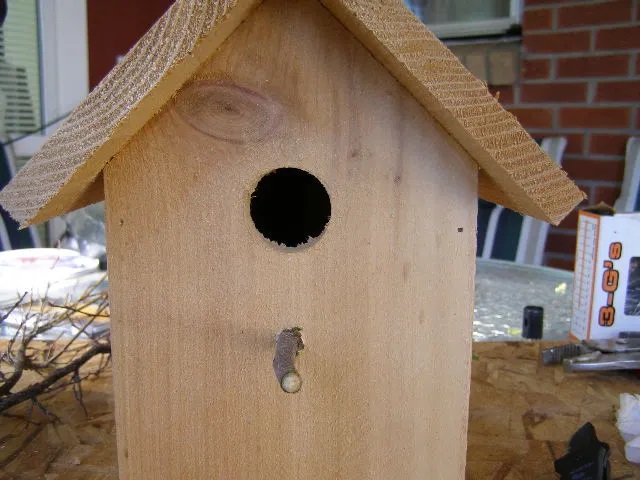
A twig, slightly larger than the hole works great. Strip the bark off with a knife and glue in place. Usually, the perch is placed 2 inches/5 centimetres below the centreline of the entrance.
The pictures are the instructions, so view them all...
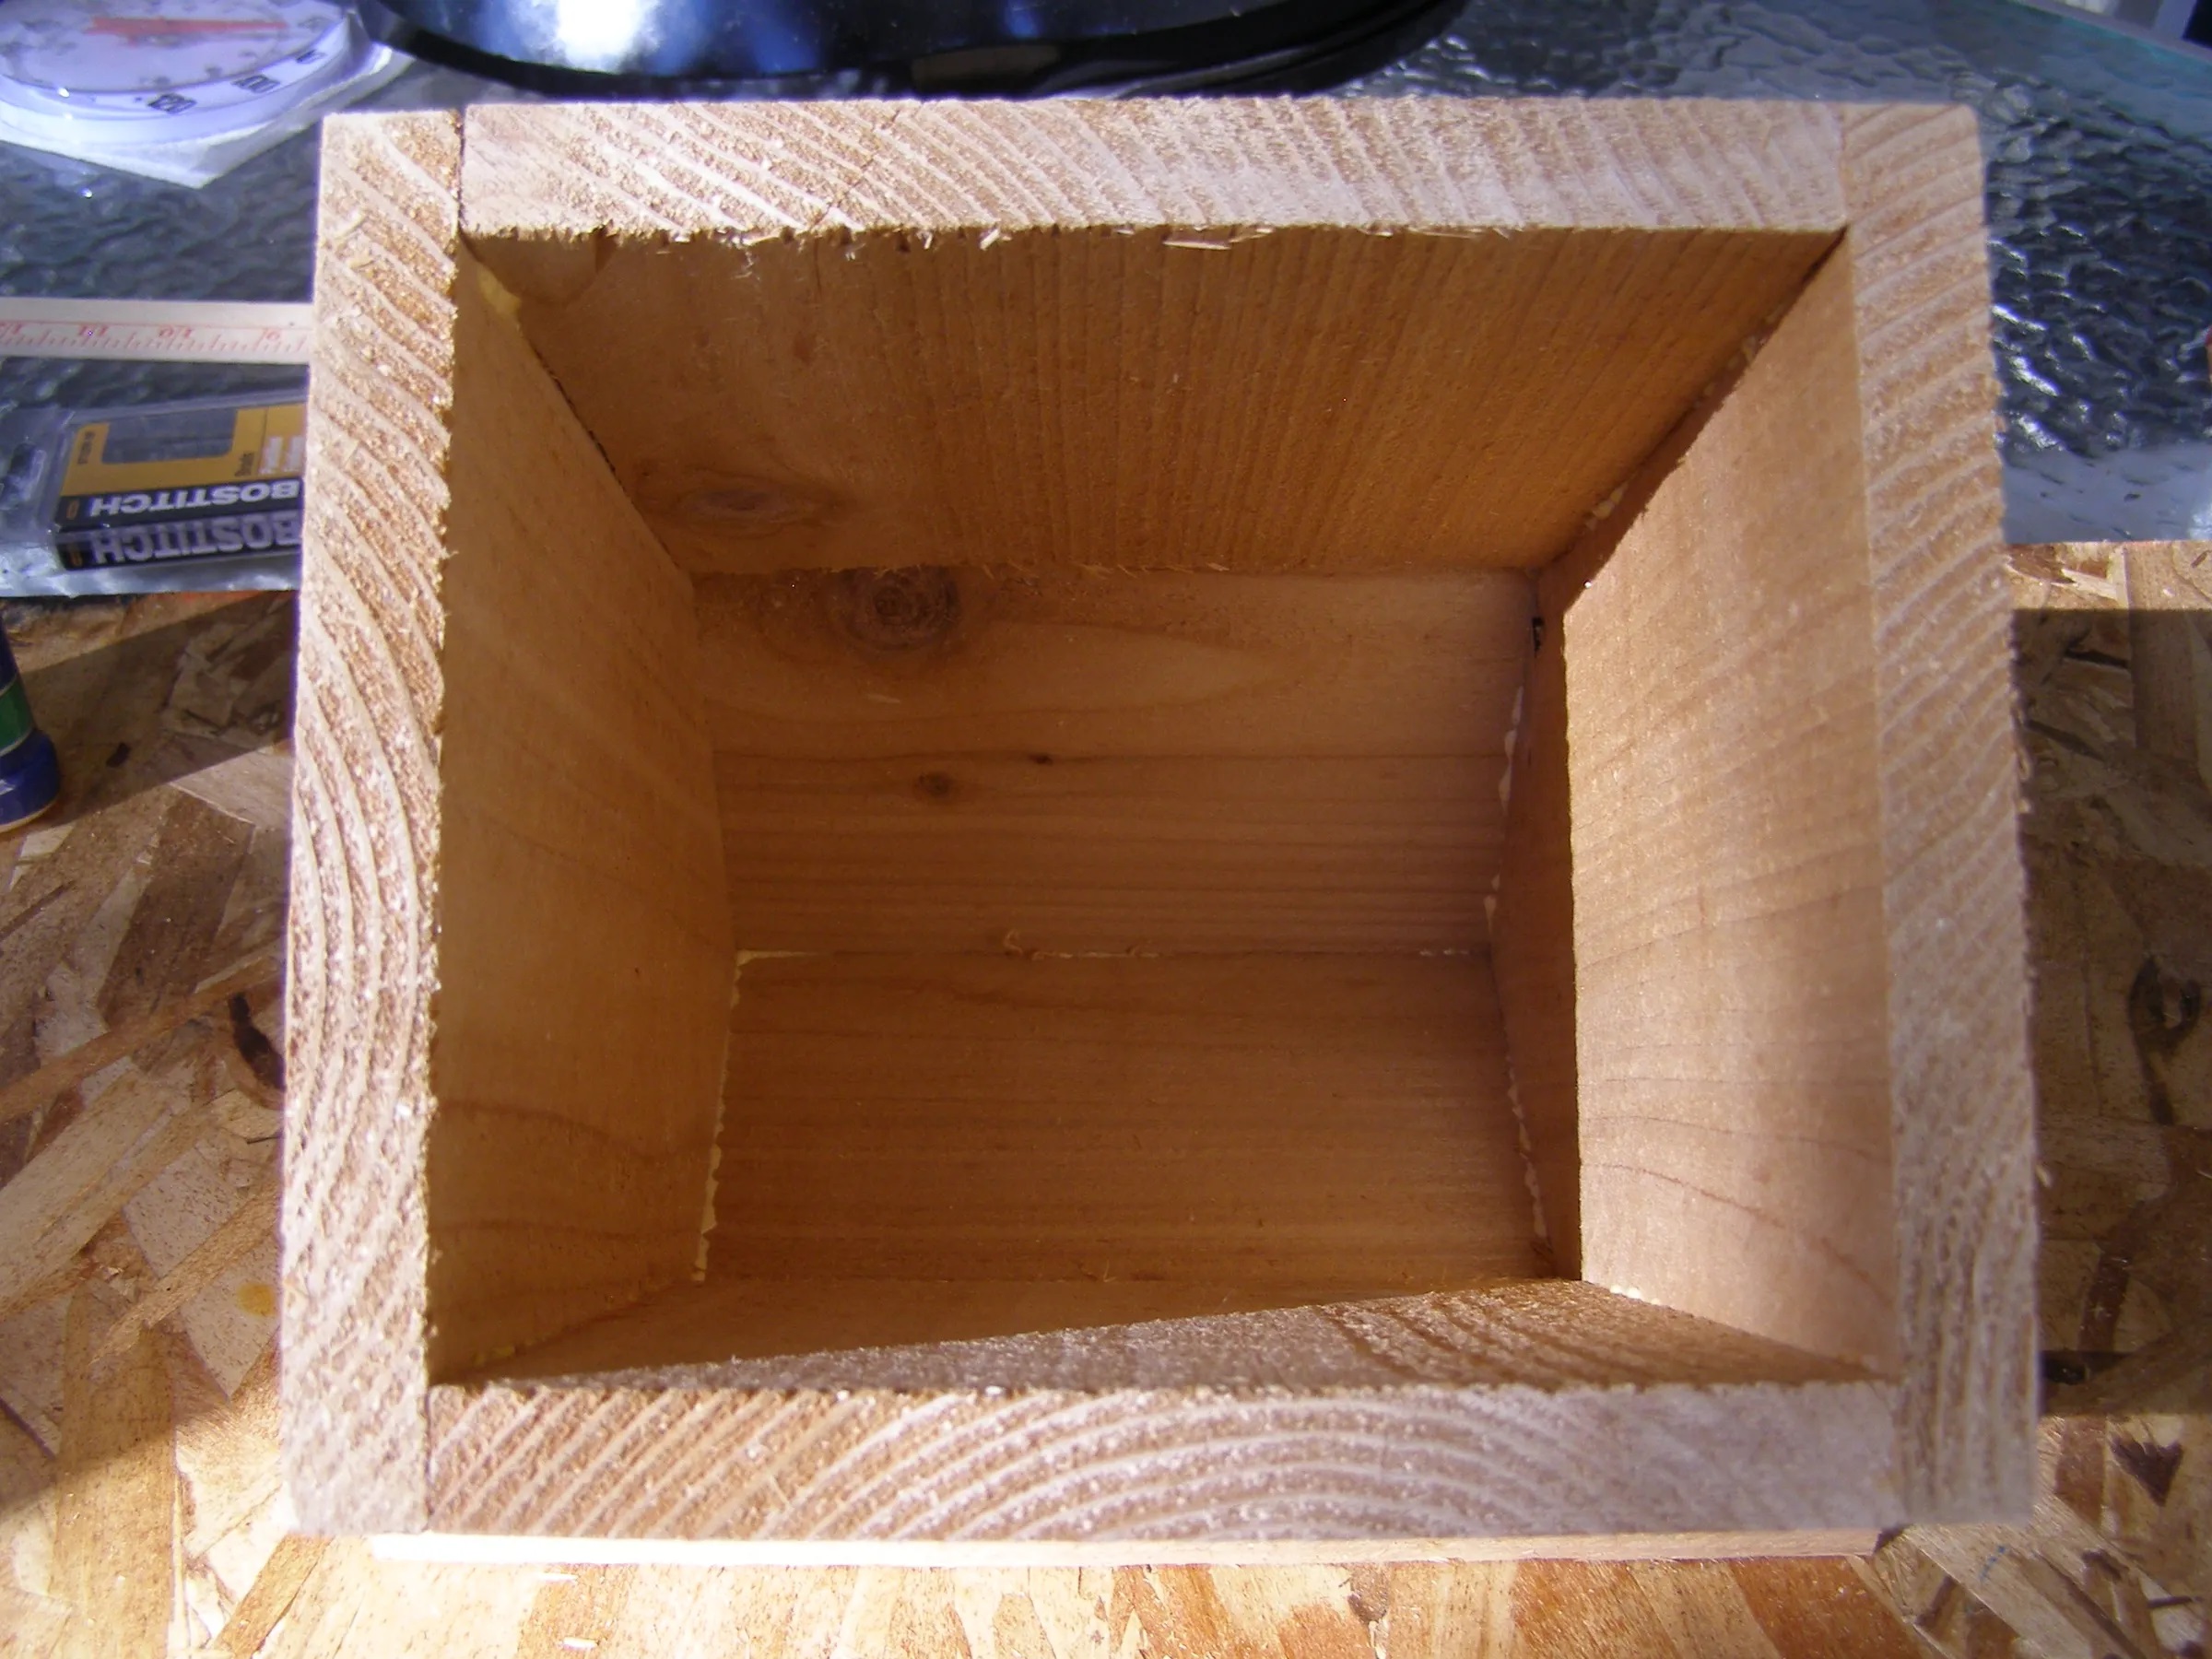
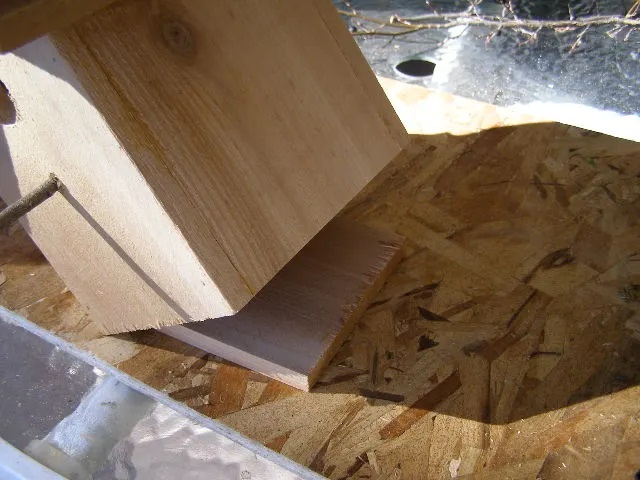
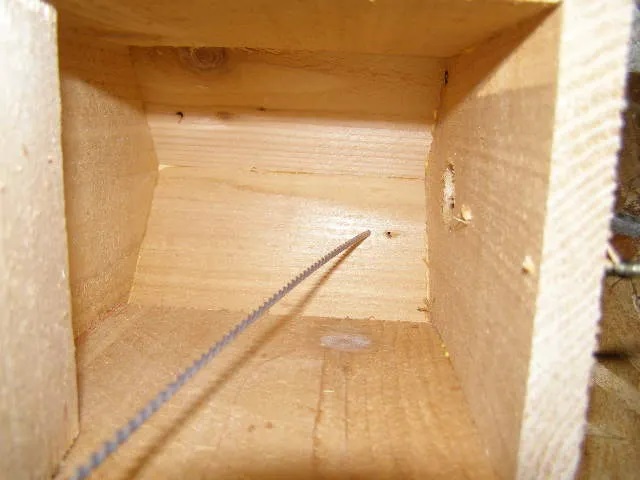
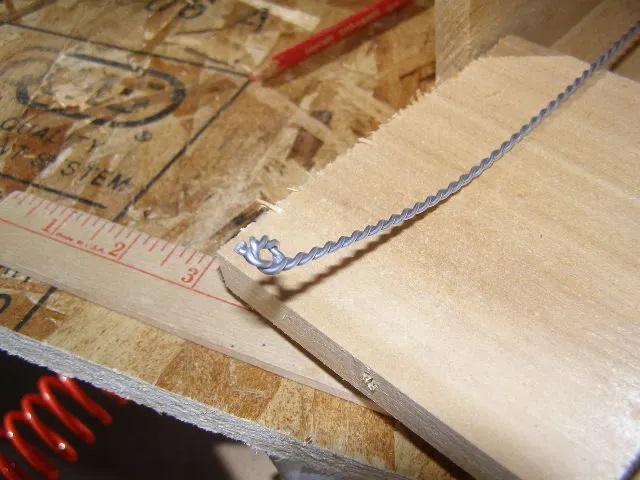
Step 7: A Floor (Clean Out Hatch) and a Wire for Hanging..
Although it is not completely necessary a clean out hatch is a good idea. Many birds will clean out a house themselves, but an occasional problem might render the nest unused. I have found dead birds, wasp nests, and so much nesting material that I needed access to clean.
When installing the floor, it is easiest to place the house on top of the floor and nail in from the sides. Remember to leave a gap for the action of the hinge, which consists of a nail driven in each side towards one end of the floor.
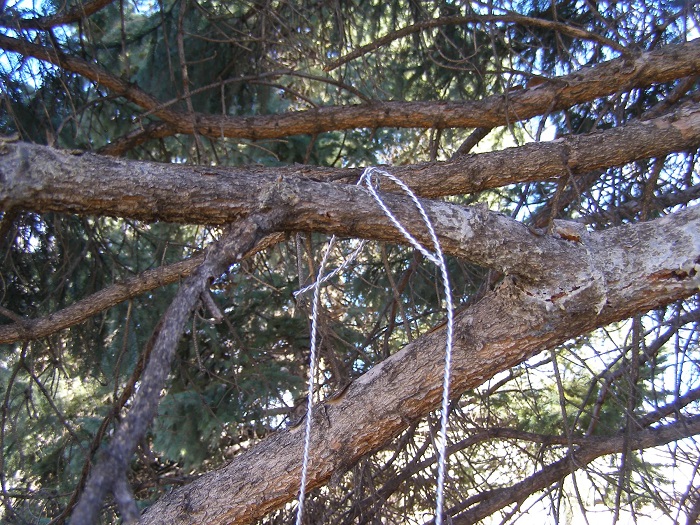
The house will need some type of hardware to hang it from. An old wire hanger, a scrap of wire, a small chain, etc... I have found that installing the hanger on alternate sides of the roof results in a stable house. (You'll understand when you see the pictures.)
Step 8: Final Thoughts
Locating a birdhouse; a few tips...
Try to locate the birdhouse in a shaded area that is free from hazards and not facing into direct sun or wind. A sheltered position and ensuring the birdhouse is securely attached to a tree by something that won't damage that tree will work best and last longer. The bird house needs to be at least 4-5metres from the ground to keep cats away. I hope you enjoyed this Instructable.
Australian Birds Nest Boxes
By Rewild Perth by BirdLife Australia
Artificial tree hollows, known as ‘nest-boxes’ or ‘habitat boxes’, aim to replicate the natural hollow cavities found in old trees. Such hollows are used by a small number of native birds for shelter, breeding or both, but the removal of large trees from the urban landscape is having a significant impact. You are unlikely to see immediate results when you provide a nest-box, but a ReWild garden will be more attractive to native birds over time as plants mature.
Lorikeet nesting box entrance holes should be 50mm to 70mm in diameter, with 60mm-65mm being ideal for Rainbow Lorikeets. Smaller species like Musk or Little Lorikeets prefer a tighter 50mm-55mm hole to reduce competition, while 70mm can accommodate larger parrots. Place the hole near the top of the box.
Nest Box Templates
Land cleared for housing and removal of mature trees from our parks and gardens has impacted nest opportunities for native birds.
We can help reverse this trend.
Nesting boxes need to be installed no less than five metres above the ground on a prominent branch or on the trunk of a tree.
Rosella-and-Regent nest box

Nightjar-and-Elegant Parrot
Kingfisher nesting box
Galah nesting box
Duck nesting box
Boobook nesting box
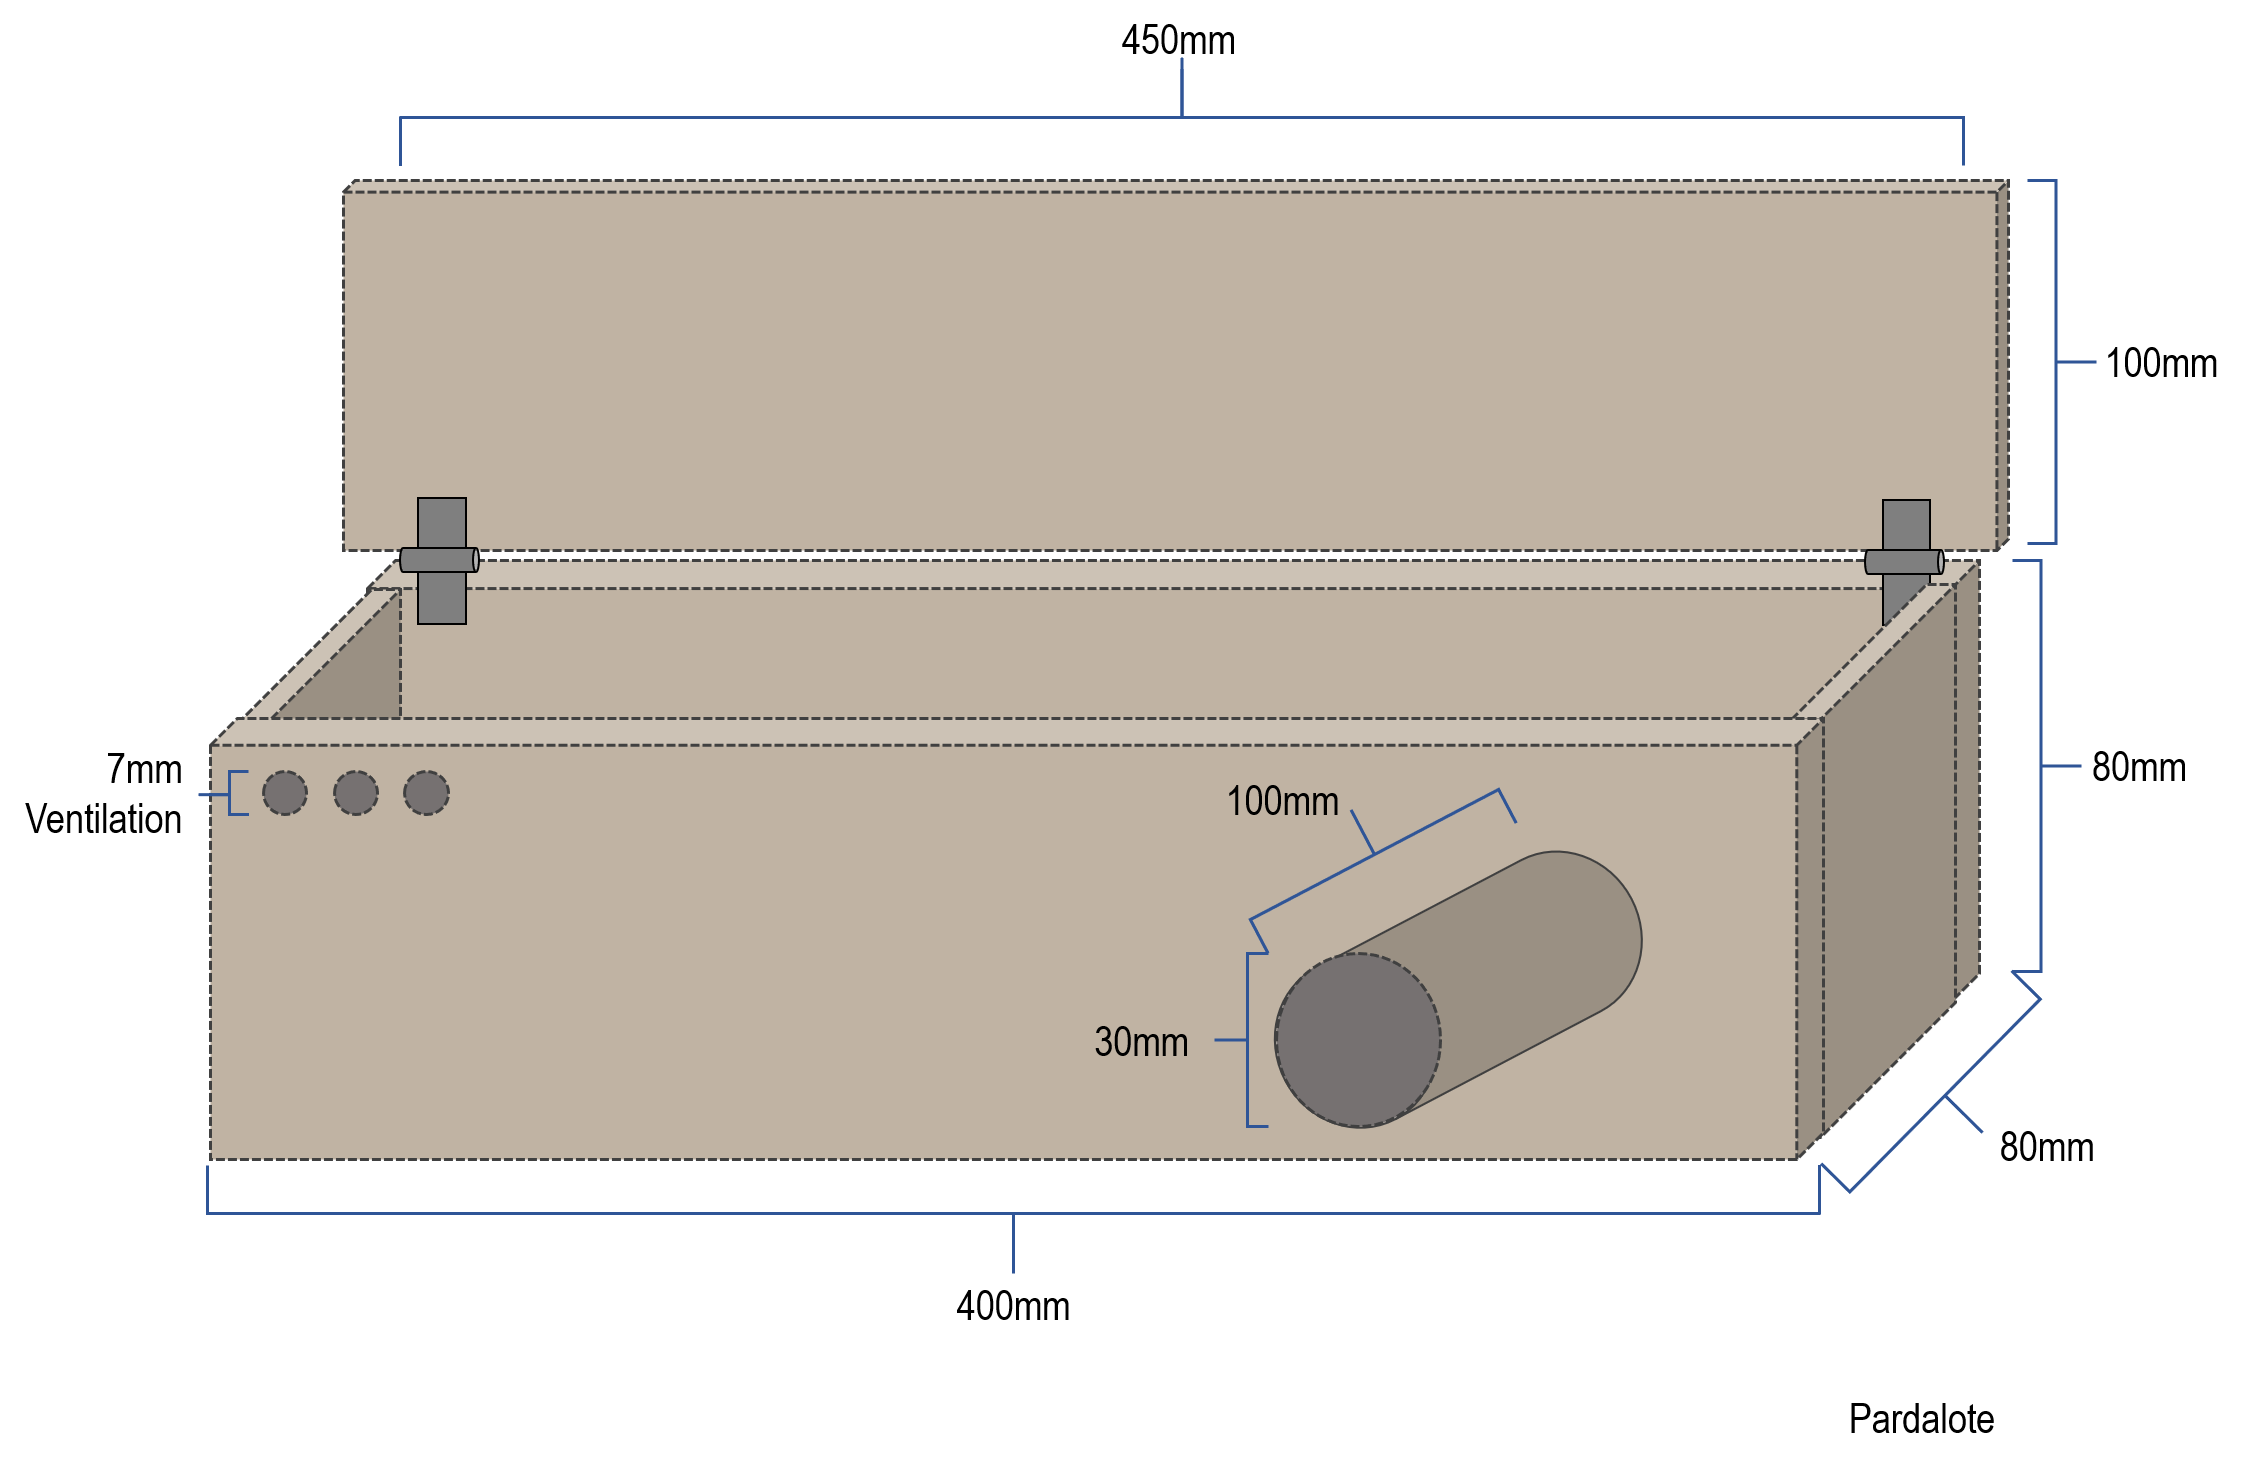
Pardalote nesting box

Lorikeet nesting box
For a list of some of the plant species to attract birds to your garden, please visit 2018 DIY page: Attracting Insectivore Birds to Your Garden: DIY Natural Tick Control
Early Autumn is a great time to put in some new plants and give them a feed - it's still warm enough for them to settle in and they will get a good dose of rain as the Season changes.
.jpg?timestamp=1774036361068)
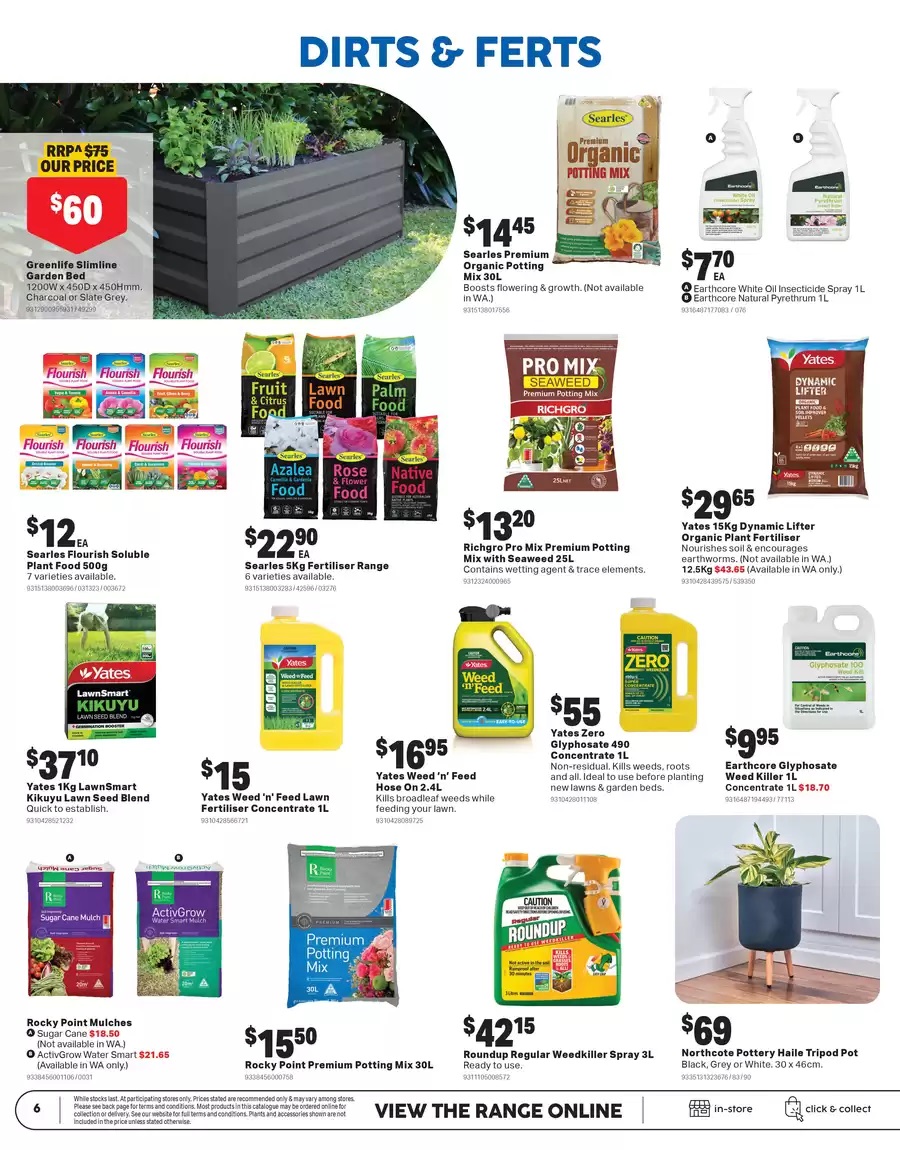
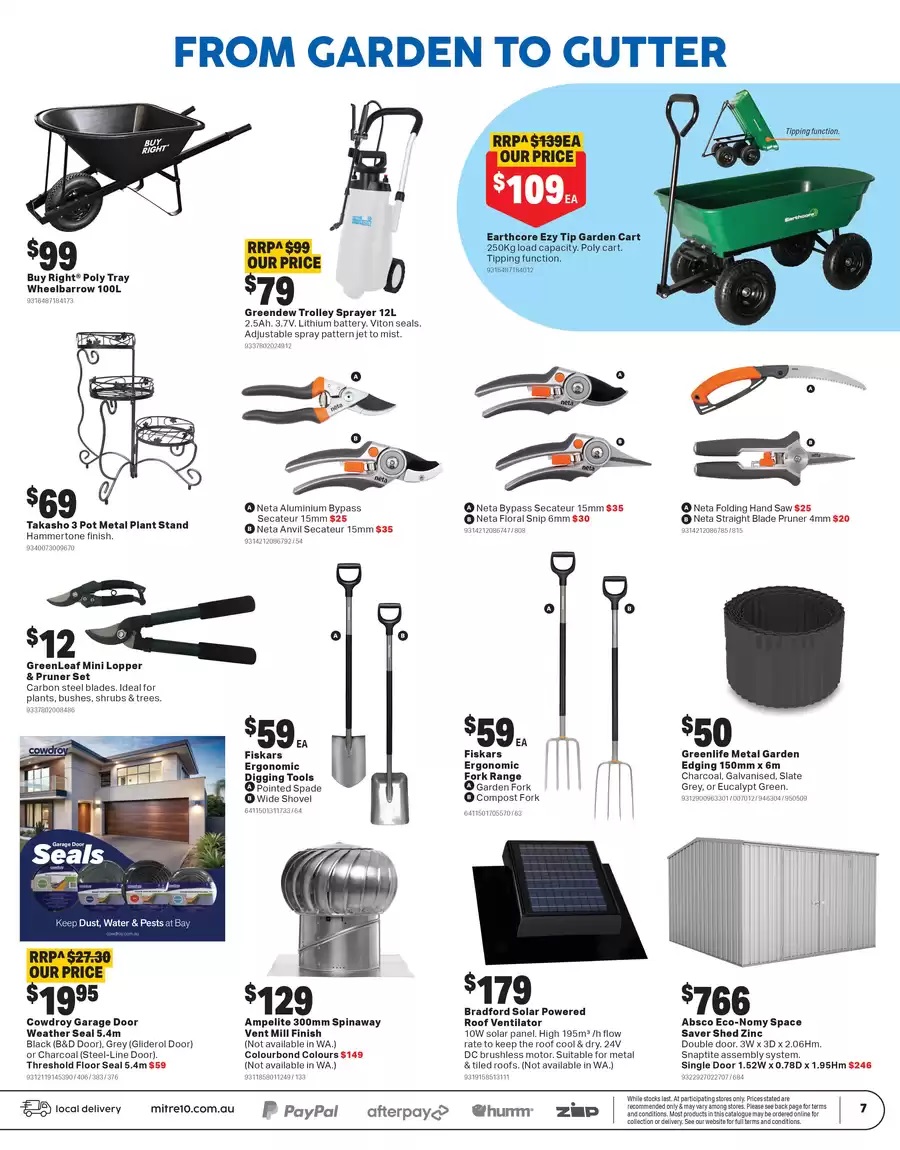
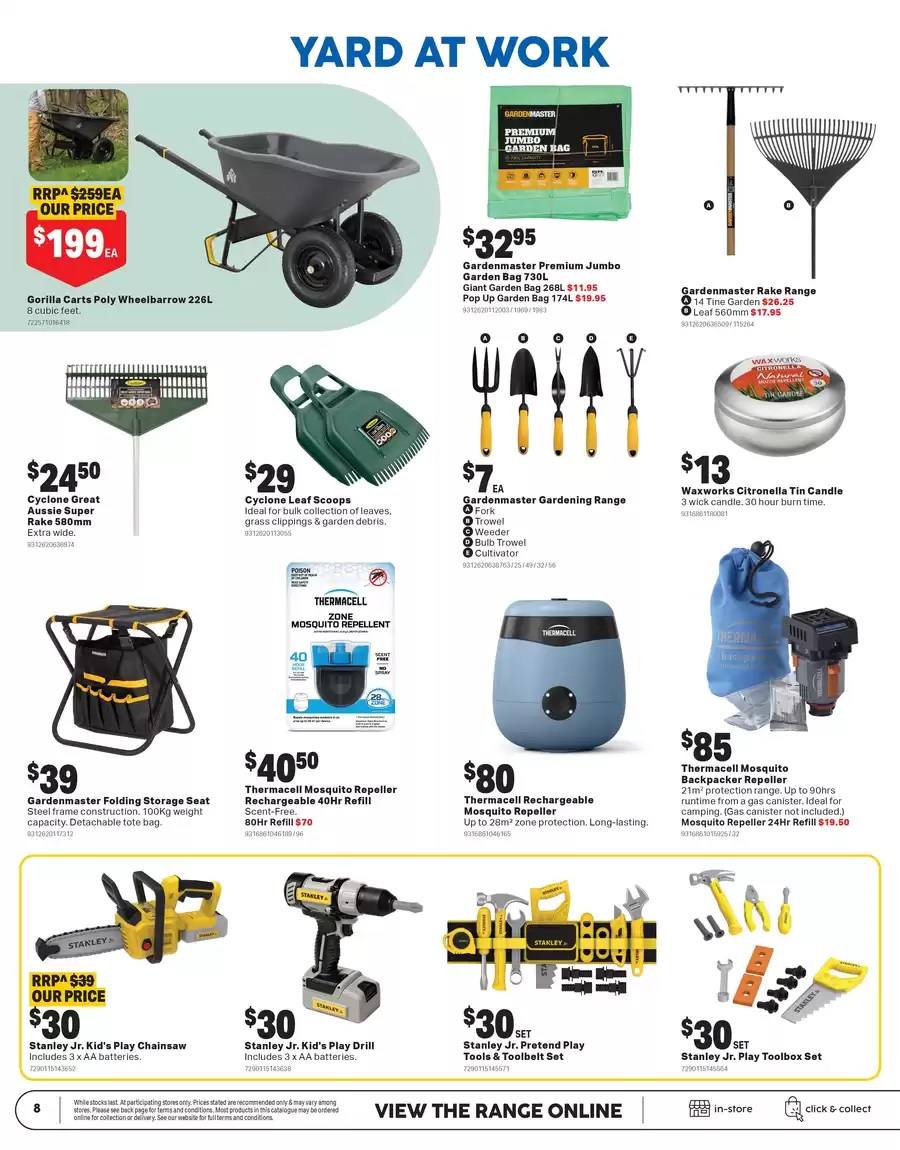
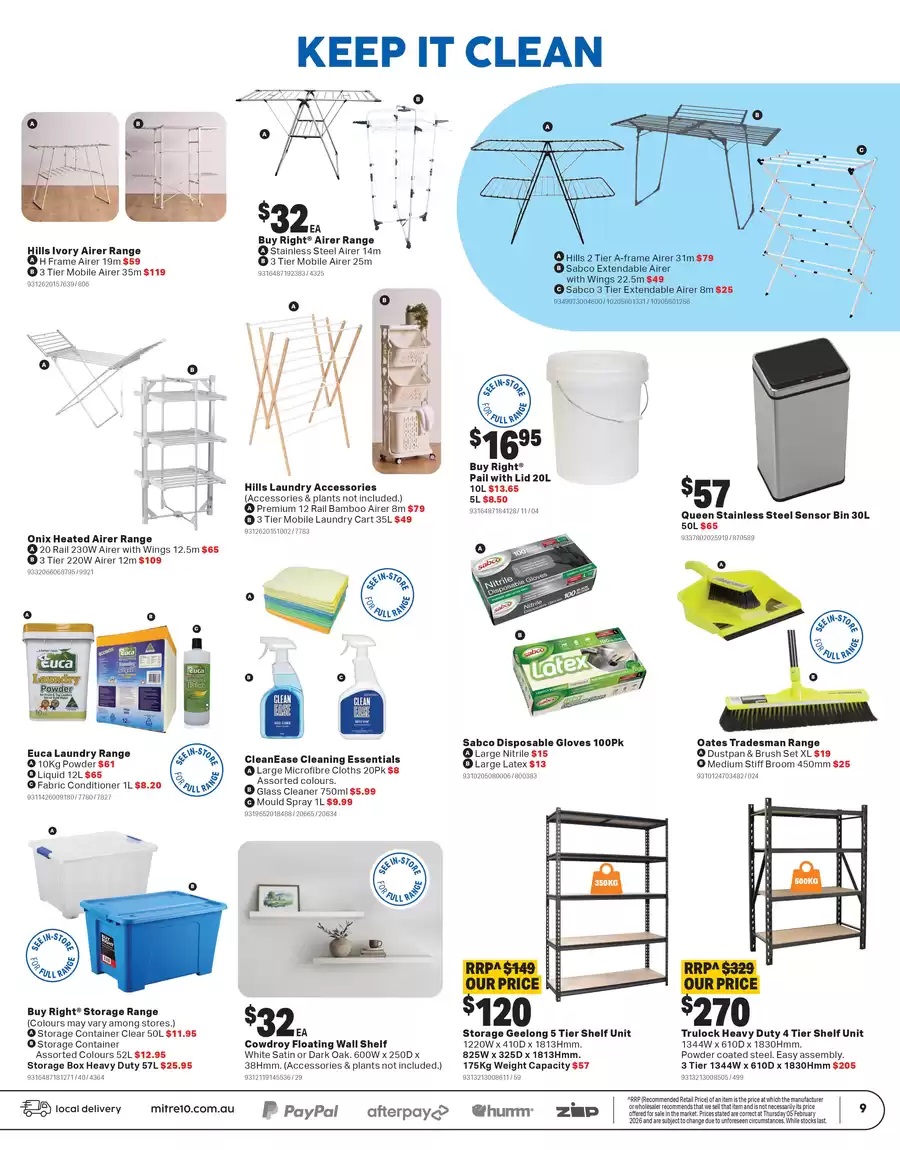
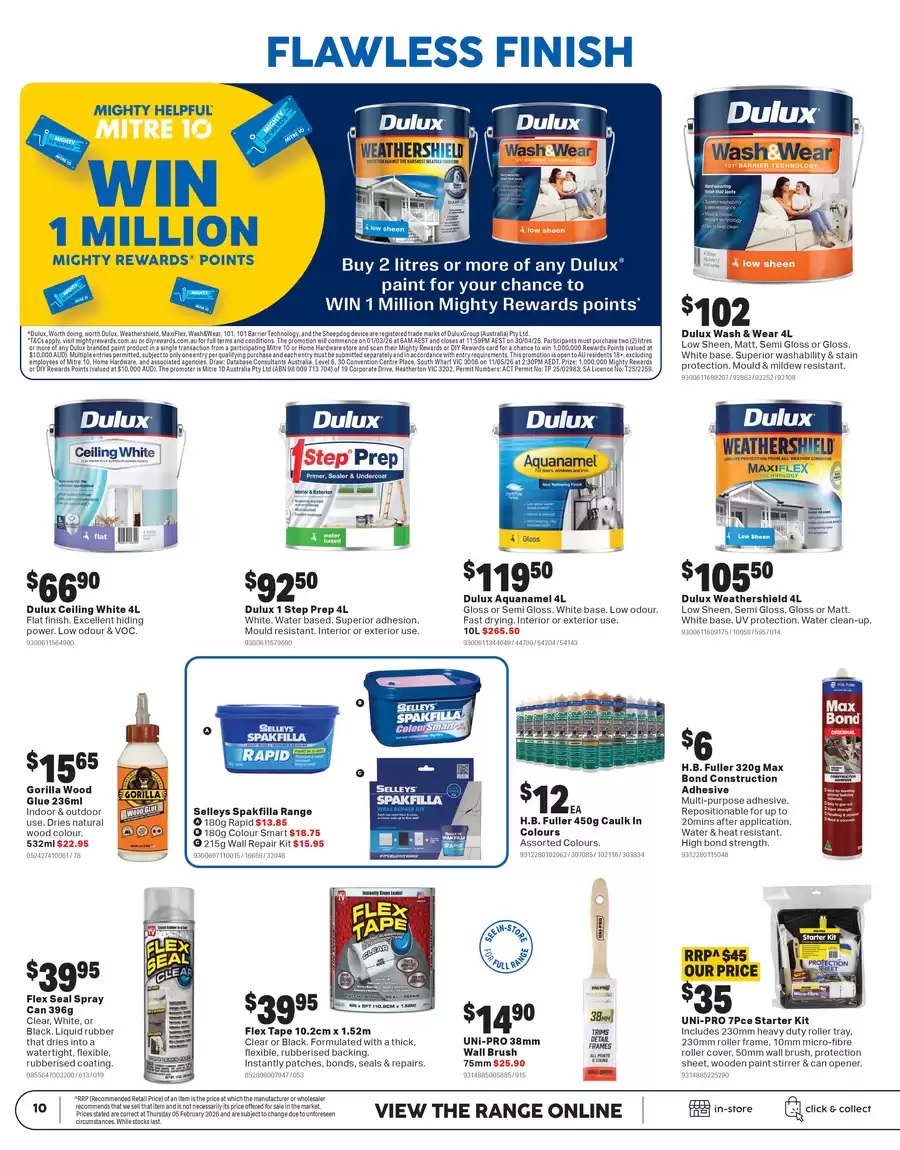
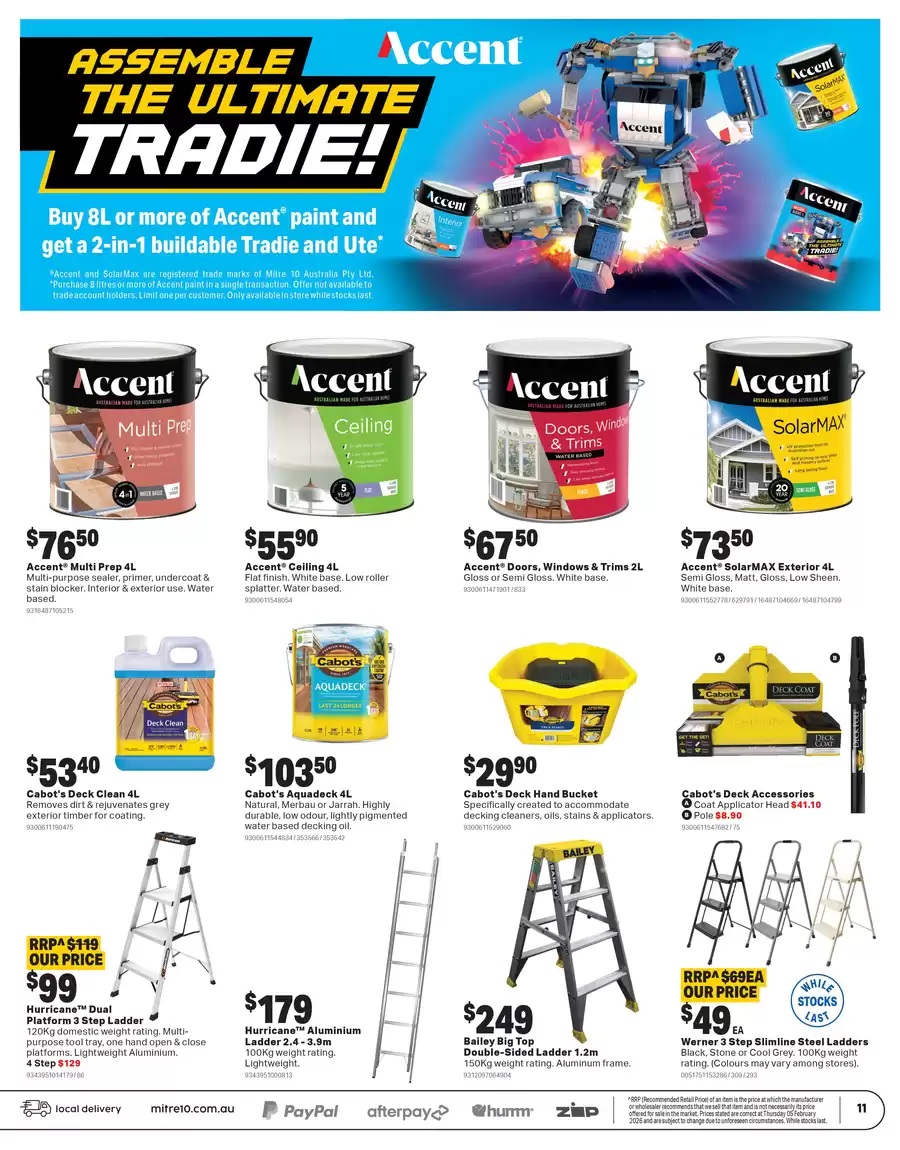
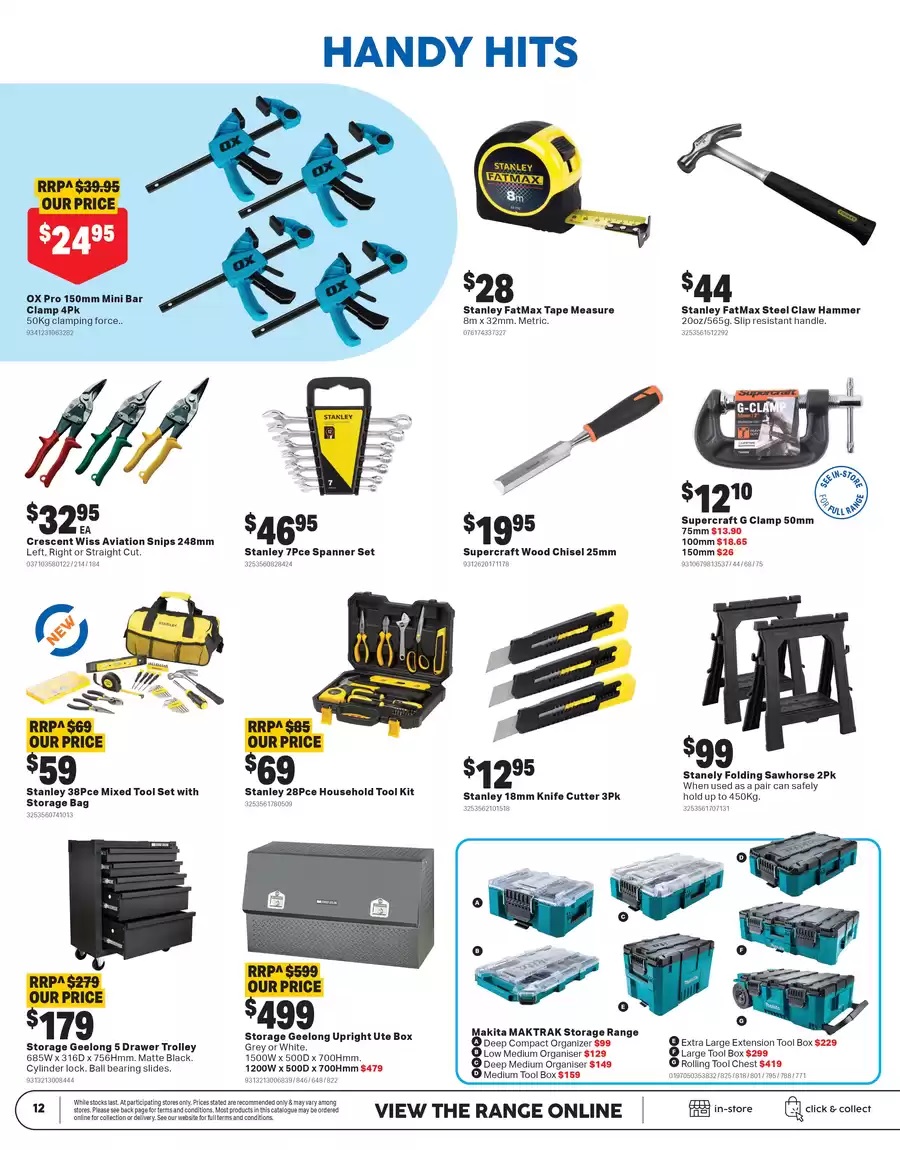
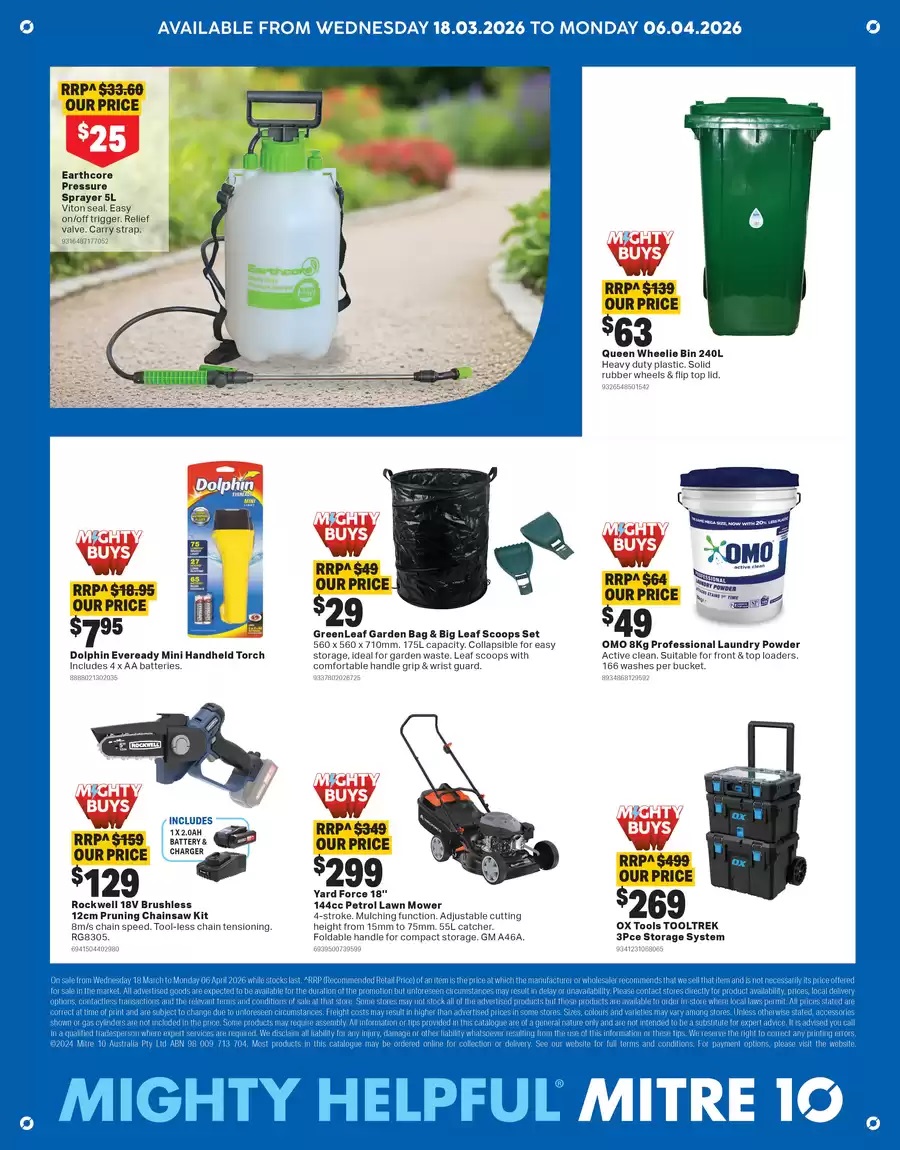
Possums In Your Roof?: Do The Right Thing
Products and Tools from Johnson Brothers Mitre to help you get it done On Sale until April 6 2026


.JPG?timestamp=1746874494405)
Johnson Brothers Mitre 10 Recycling Batteries: at Mona Vale + Avalon Beach
Over 18,600 tonnes of batteries are discarded to landfill in Australia each year, even though 95% of a battery can be recycled!
That’s why we are rolling out battery recycling units across our stores! Our battery recycling units accept household, button cell, laptop, and power tool batteries as well as mobile phones!
How To Dispose Of Your Batteries Safely:
- Collect Your Used Batteries: Gather all used batteries from your home. Our battery recycling units accept batteries from a wide range of products such as household, button cell, laptop, and power tool batteries.
- Tape Your Terminals: Tape the terminals of used batteries with clear sticky tape.
- Drop Them Off: Come and visit your nearest participating store to recycle your batteries for free (at Johnson Brothers Mitre 10 Mona Vale and Avalon Beach).
- Feel Good About Your Impact: By recycling your batteries, you're helping support a healthier planet by keeping hazardous material out of landfills and conserving resources.
Environmental Benefits
- Reduces hazardous waste in landfill
- Conserves natural resources by promoting the use of recycled materials
- Keep toxic materials out of waterways

Johnson Brothers Mitre 10: Serving Our Community Since 1955
The Independent Hardware Group has awarded Johnson Bros Mona Vale the best in state Store of the Year at the IHG state awards again in 2023.
Johnson Brothers say; ''Thank you to all of our amazing staff and customers for being awesome!''
IHG is Australia’s largest home improvement wholesaler supplying more than 1,500 stores nationwide. These stores cater to a broad range of Trade and DIY customers and range from large format warehouses to convenience operations and Trade centres, as well as frame and truss sites in two States.
Under the IHG network, there is a clear mandate to support the growth of Independents within the hardware sector in Australia by helping them to be ‘The Best Store in Town’.
The culture of IHG is built on being a low cost and transparent business partner to members, with an unwavering commitment to protect and grow a sustainable independent hardware sector for the long term.

Click on logo to visit Johnson Brothers Mitre 10 website
Johnson Bros Mitre 10 - Avalon (02) 9918 3315
Johnson Bros Mitre 10 - Mona Vale (02) 9999 3340
JBH Timber & Building Supplies (02) 9999 0333
JBH Fencing & Landscape Supplies (02) 9970 6333
www.johnsonbros.com.au Online store: jbhmv.com.au
